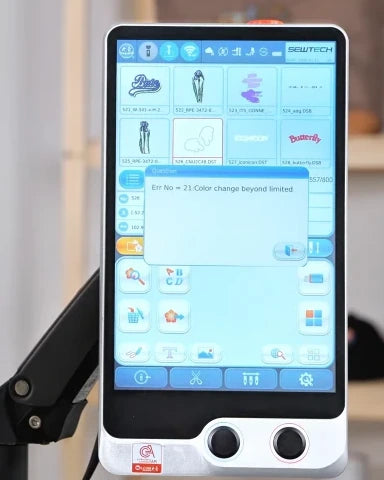
Fix Error 21: Color Change Beyond Limit

Overview
Error 21 (“Color change beyond limited”) means the controller has called for a needle outside its configured range. The ST-1501 shown has 15 needles and reports 49 in the design’s color-order strip. Check the configured needle count, correct the design’s assignments, then test a manual needle change. The guide also applies to SC-1501.
Step-by-step guide
1. Identify the Error 21 message
Watch at 00:24Look for Error No. 21 with “Color change beyond limited” on the touchscreen. This example calls for needle 49, which exceeds the 15 needles on the machine. Leave the machine idle while you check the setup.
2. Stop embroidery and check the 100° position
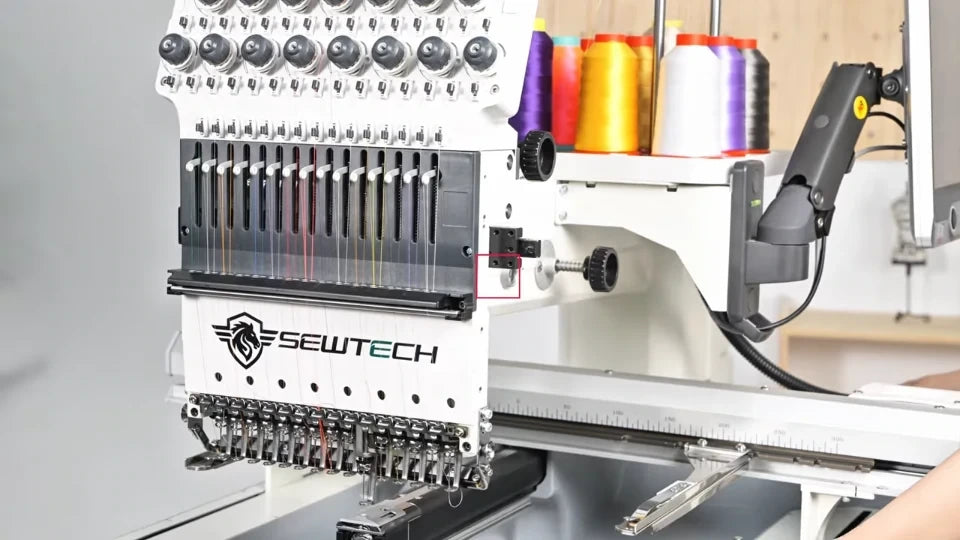
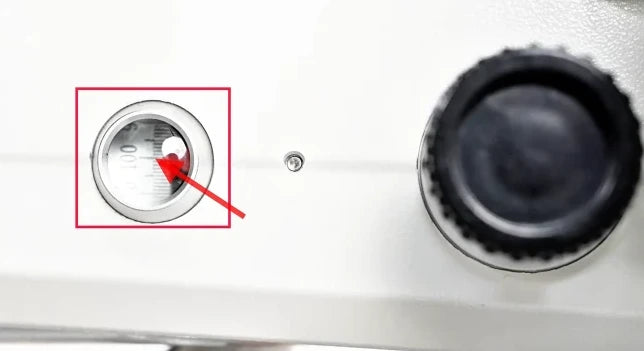
Watch at 00:33With embroidery stopped, look at the round position window next to the black knob behind the needle head. The main shaft should be at 100°. Keep hands away from the needle case and color-change mechanism. Remove any hoop or garment from the work area before testing, and leave the physical Start button alone while the needle count or an assignment is wrong.
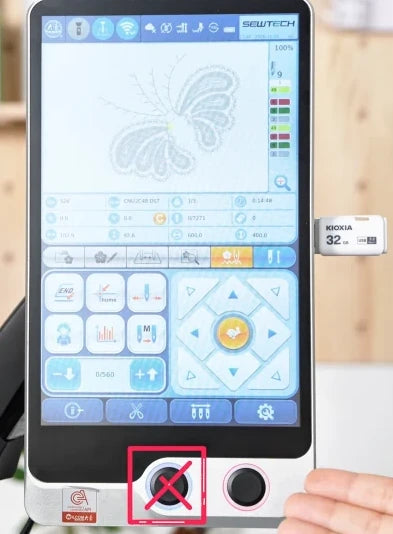
3. Exit embroidery mode before opening settings
Watch at 00:58If the embroidery-mode button at the right end of the strip above the direction pad is blue, tap it. When “Cancel EMB?” appears, tap the checkmark. In the video the button changes from blue to red after the exit.


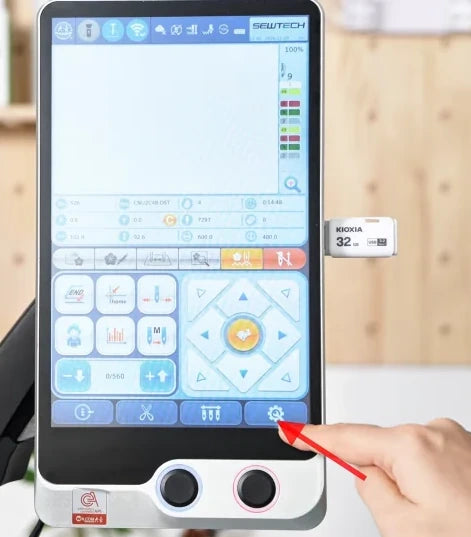
4. Open Settings and Expert Parameters
Watch at 01:07Tap the gear at the far right of the bottom toolbar. In the Settings grid, tap the middle tile in the second row, shown with a person and a small gear. If the controller asks for a password, use the one for your controller and tap the keypad checkmark. The video shows this prompt at 01:13.
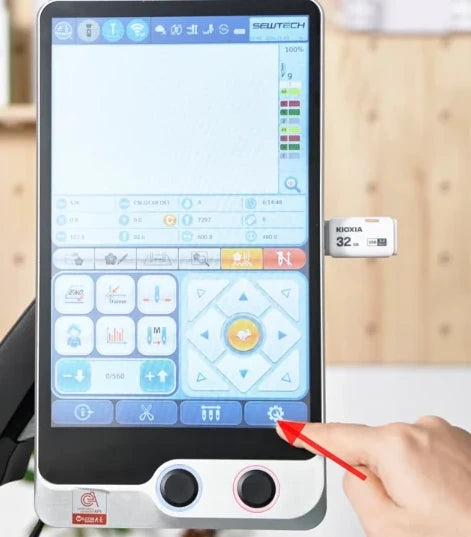

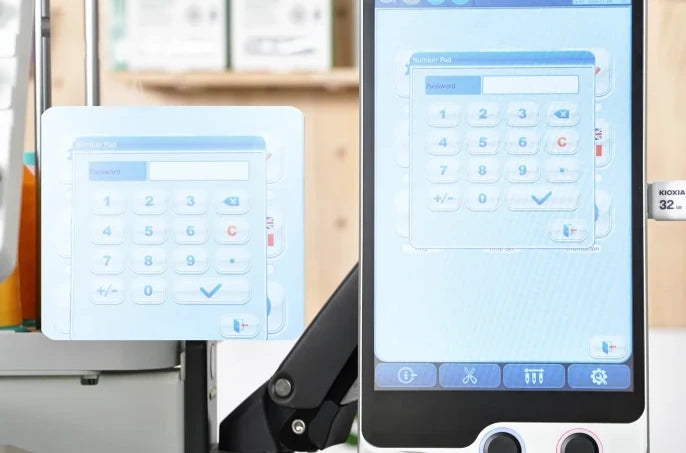
5. Open Machine Configuration from the parameter list
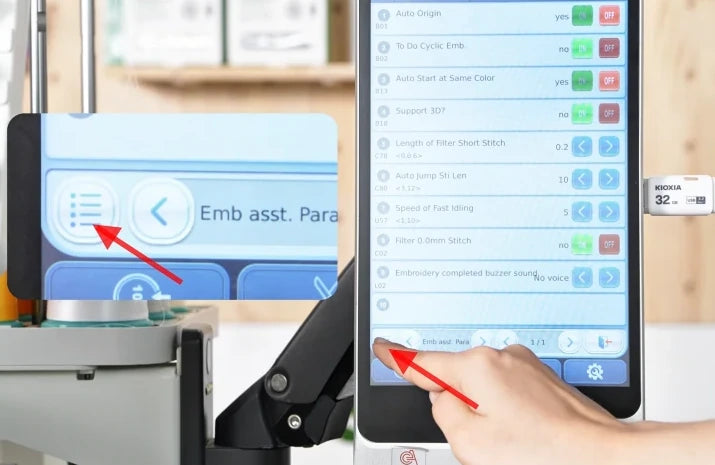
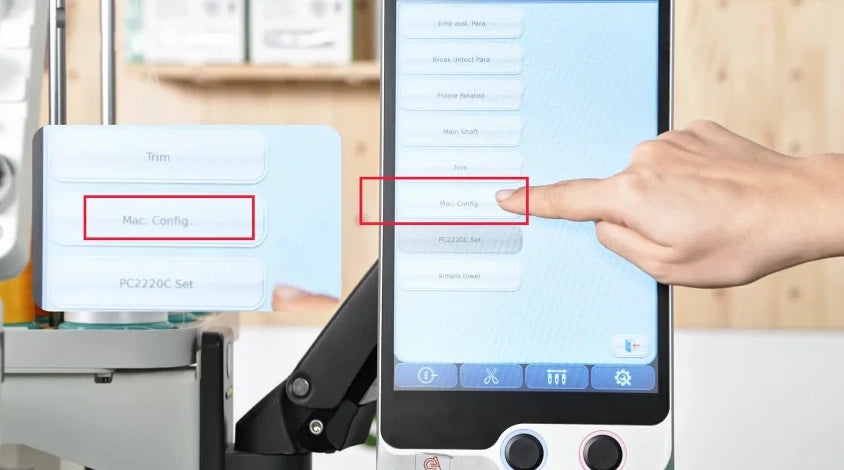
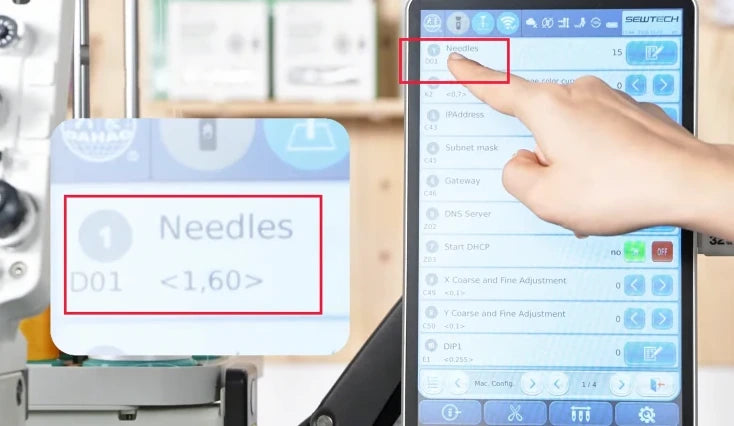
Watch at 01:19On the parameter screen, tap the list icon at the bottom left of the parameter panel, just above the blue toolbar. In the category list, choose “Mac. Config.” (Machine Configuration). The next screen should show Needles at the top.
6. Compare D01 Needles with the machine’s physical count
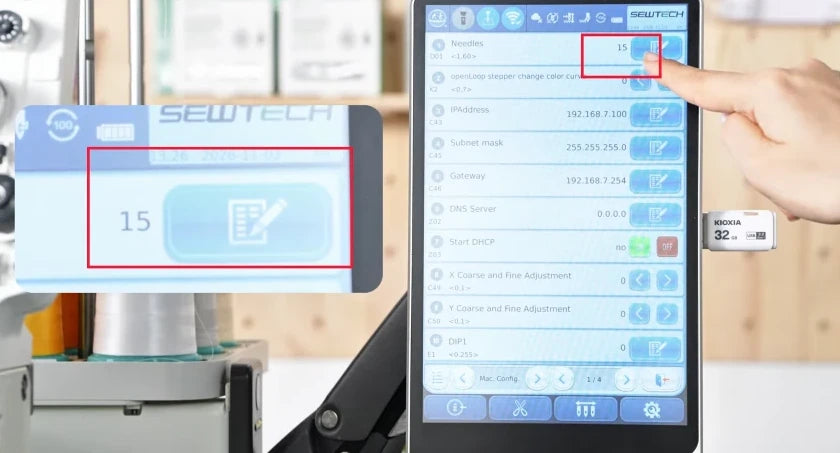
Watch at 01:30Read the value on the right of the first row, “D01 Needles.” It is the maximum needle count the controller recognizes. The video shows 15 for a 15-needle ST-1501, so the presenter leaves it as is and taps the exit icon at the bottom right of the parameter panel. If your value differs from the actual needle count, correct only D01 to match the machine before testing. The video shows the edit control beside the value, but skips the edit and save sequence because the setting already matches.

7. Find the out-of-range number in the color-order strip
Watch at 02:07On the working screen, look at the narrow column of color swatches to the right of the design preview. The arrow in the video points to 49 on the first swatch. On this 15-needle machine every color stop must be assigned to a needle from 1 through 15.
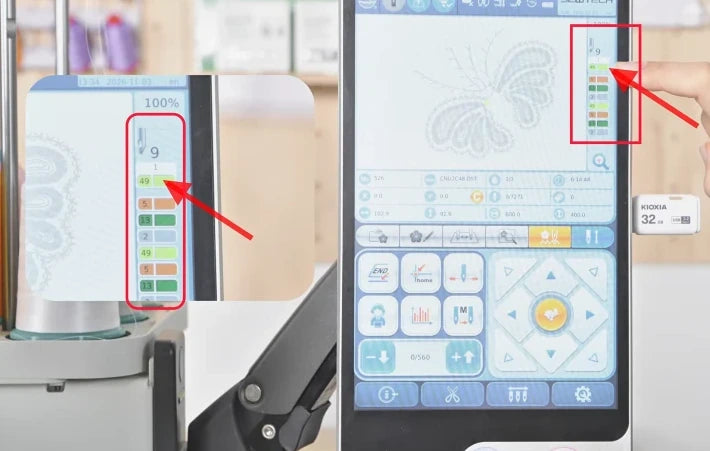
8. Reassign the design’s color stops to valid needles
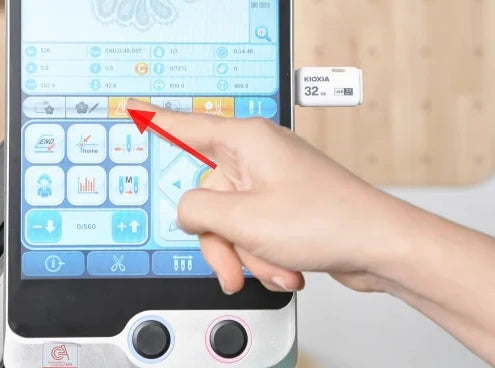
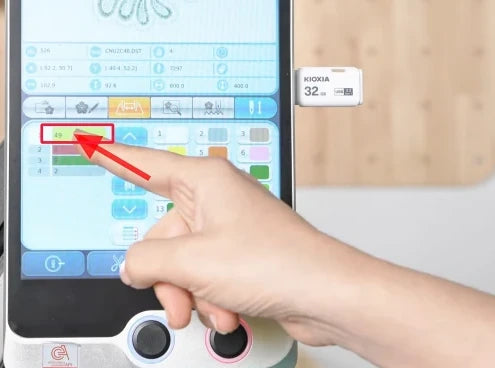
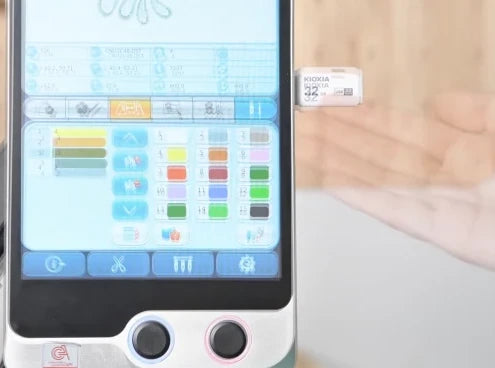
Watch at 02:20Tap the Color Change Order tab in the strip directly below the design details. Select a color stop on the left, then tap the numbered swatch on the right for the needle threaded with the intended color. Watch the row on the left update and repeat for each stop that needs correction. Before testing, check that every assigned number is in range for your machine.

9. Select a different needle in Manual Needle Change
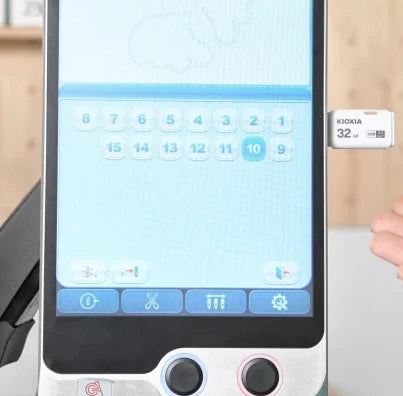
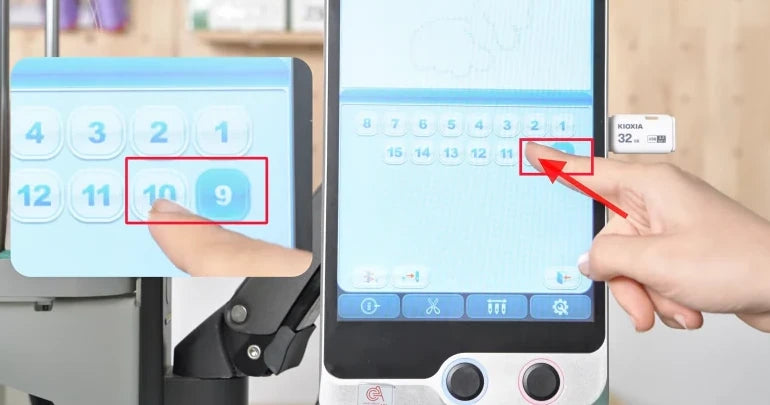
Watch at 02:36Tap the needle icon in the blue bottom toolbar, immediately to the left of the gear. In the numbered grid, tap a different valid needle. The video shows 9 highlighted at first, then the presenter selects 10. Keep hands clear of the needle case as it moves.

10. Confirm the needle case reaches the selected position
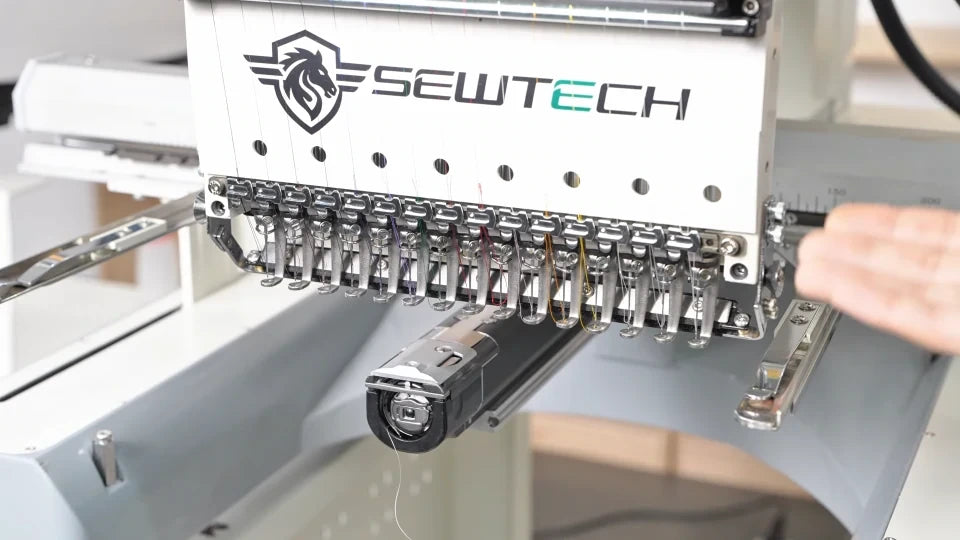
Watch at 02:48Wait for the case to settle. Confirm the selected number is highlighted and Error 21 stays cleared. In the video, 10 is highlighted on the Manual Needle Change screen and no error appears. If the warning returns or the case cannot reach the chosen needle, stop and contact SEWTECH support with the displayed number and D01 value. The video finishes after the manual test.