Thread the SEWTECH ST-1501

Overview
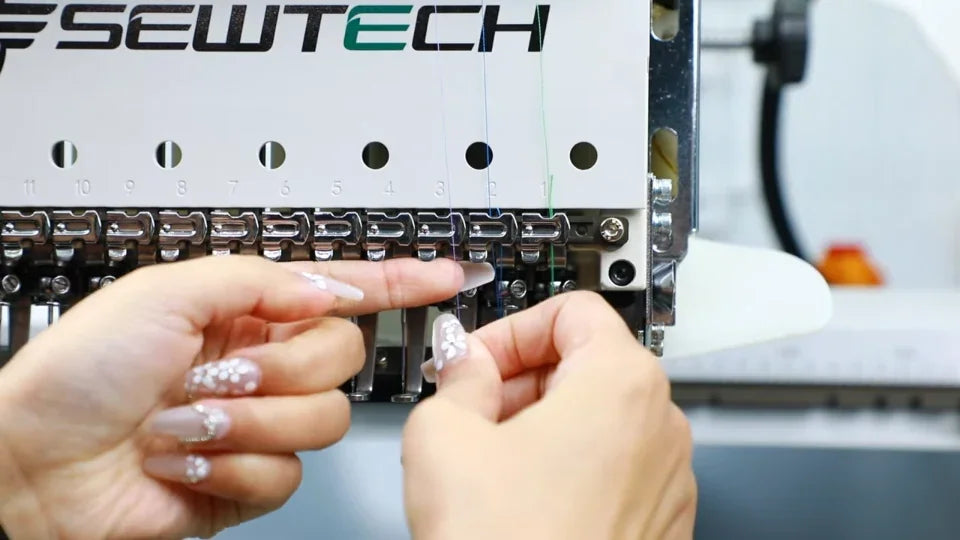
Thread the ST-1501 with the machine stopped. Have your embroidery thread, the hooked thread picker from the toolbox and small scissors ready. The video shows the complete route in green on needle 1, then repeats it in blue and purple on needles 2 and 3. Match the number at the spool, guide plate, tube and needle before moving on.
Step-by-step guide
1. Match spool, guide and needle numbers
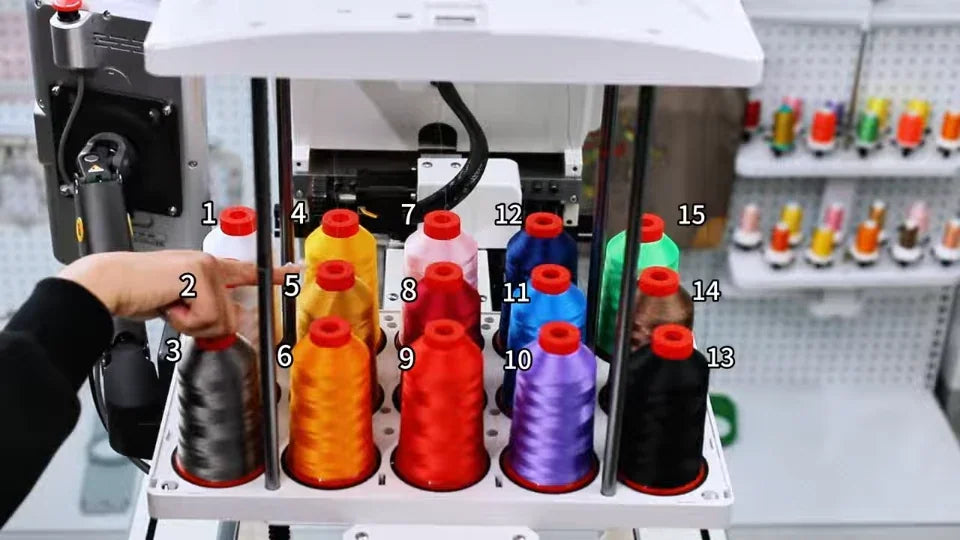
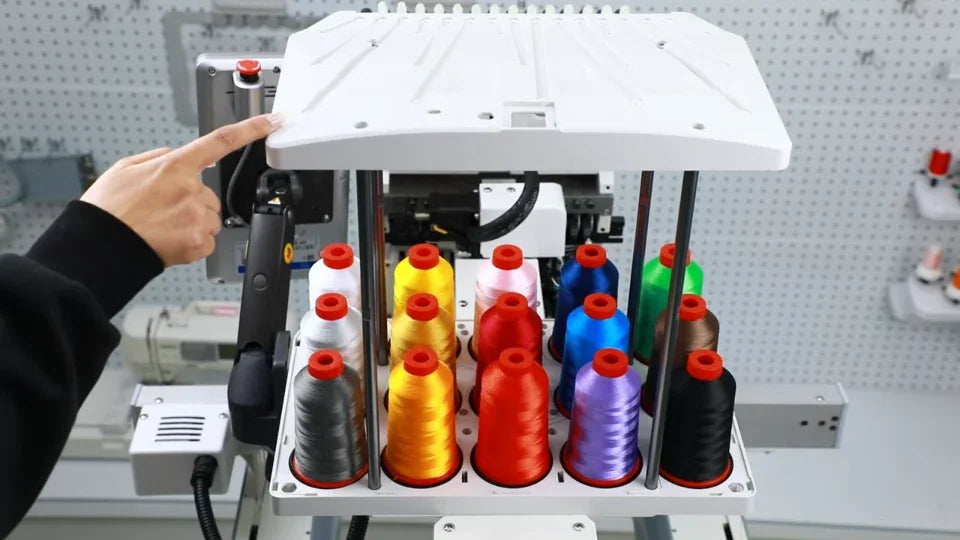
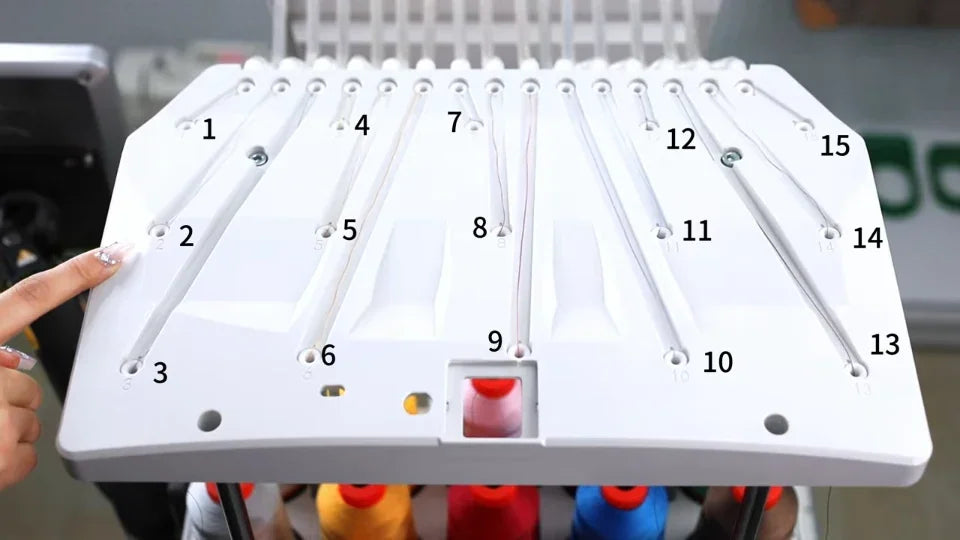
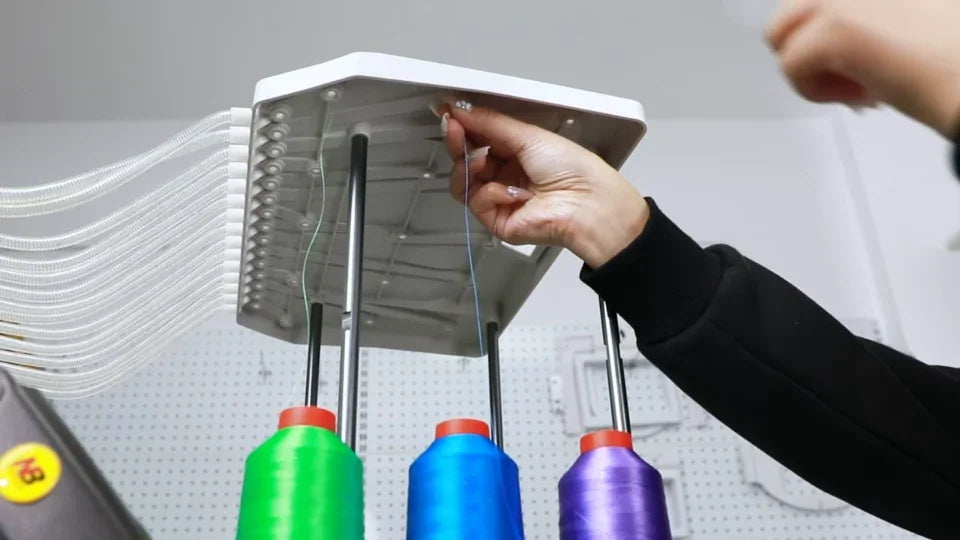
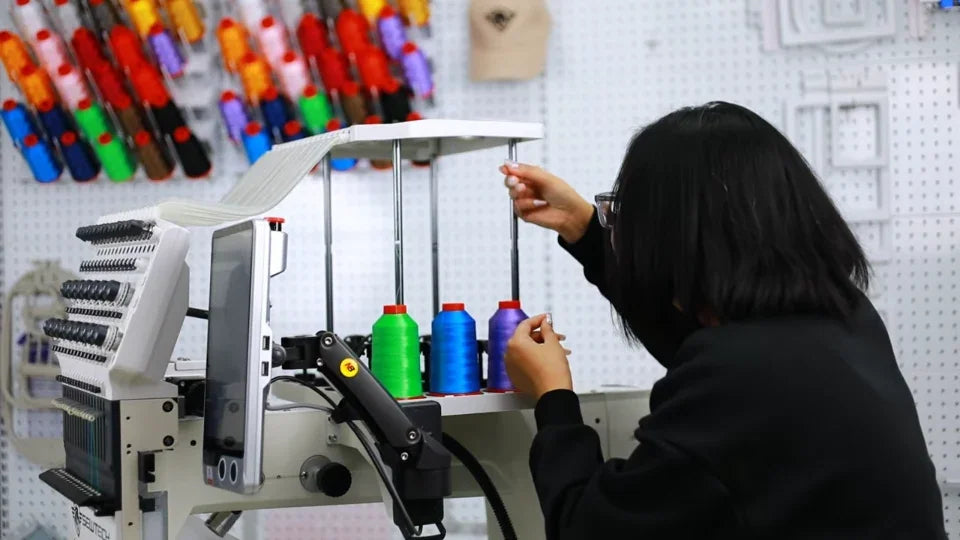
Watch at 00:09At the back of the machine, identify spool positions 1 through 15. Each spool feeds up through the hole directly above it in the white guide plate. Match that position to the marked route on top of the plate and to the same needle number at the front. The camera angle changes between views, so use the numbers to keep each line in its own route.
2. Feed spool 1 through the two plate holes
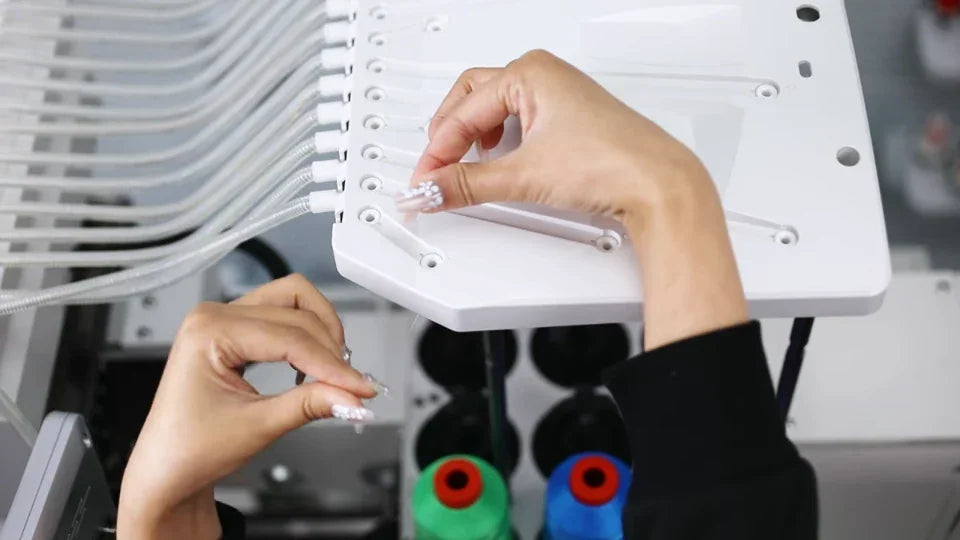
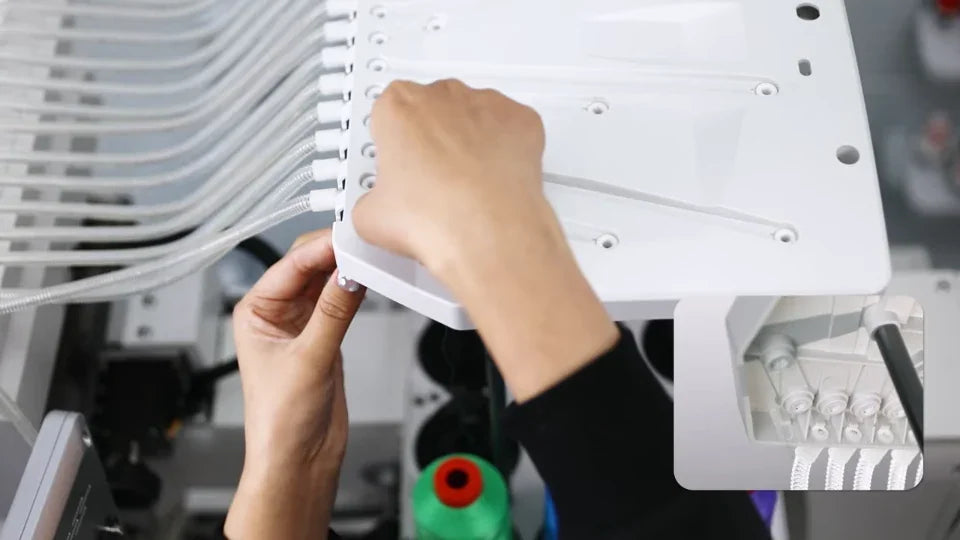
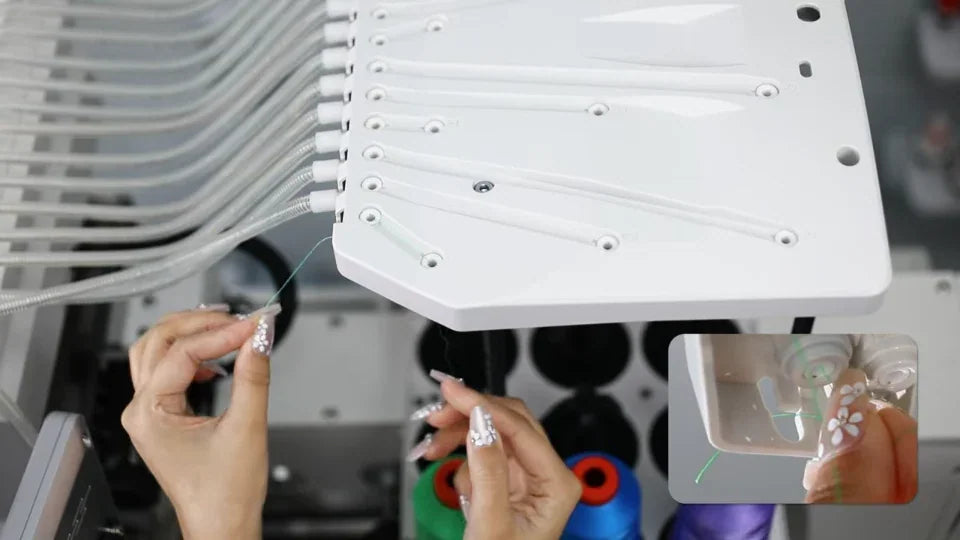
Watch at 02:11Start with the green thread on spool 1 in the demonstration. Push its end up through the hole directly above the spool and take hold of it on top of the plate. Follow the same groove toward the tube bank. Feed the end back down through the second hole at the tube end of that groove.
3. Free the matching tube and expose the thread end
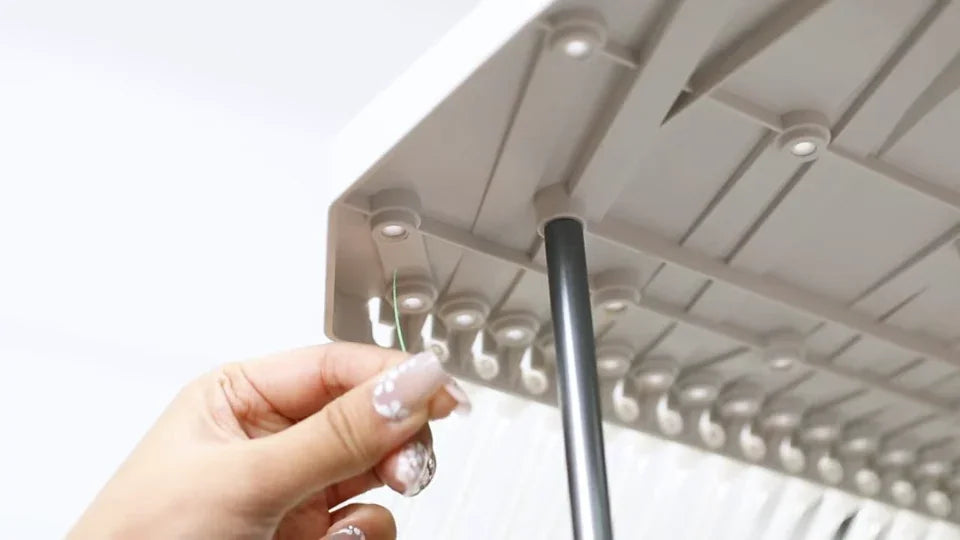
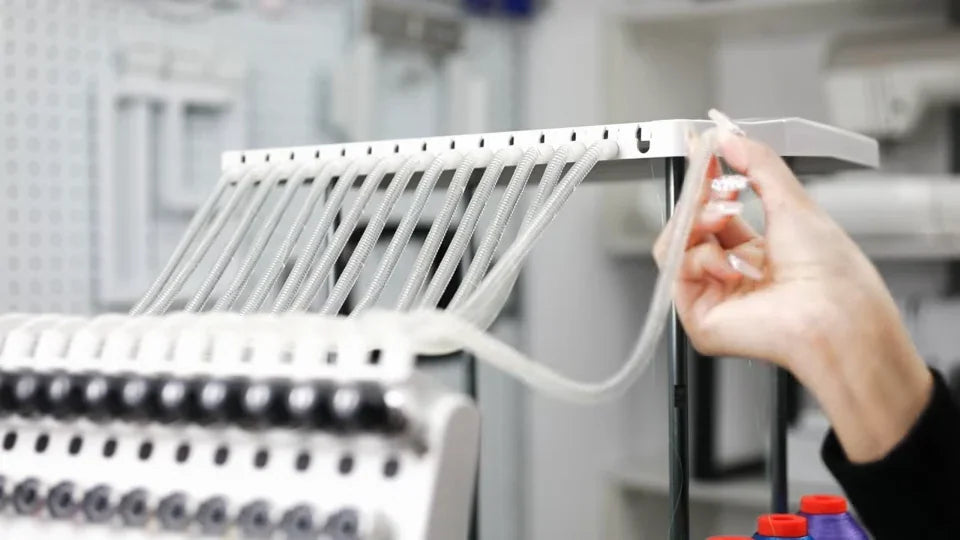
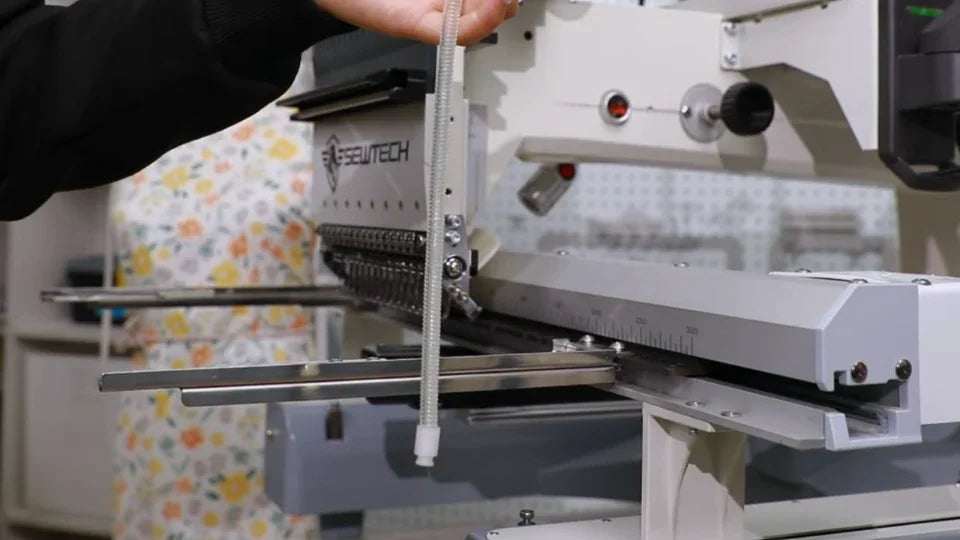
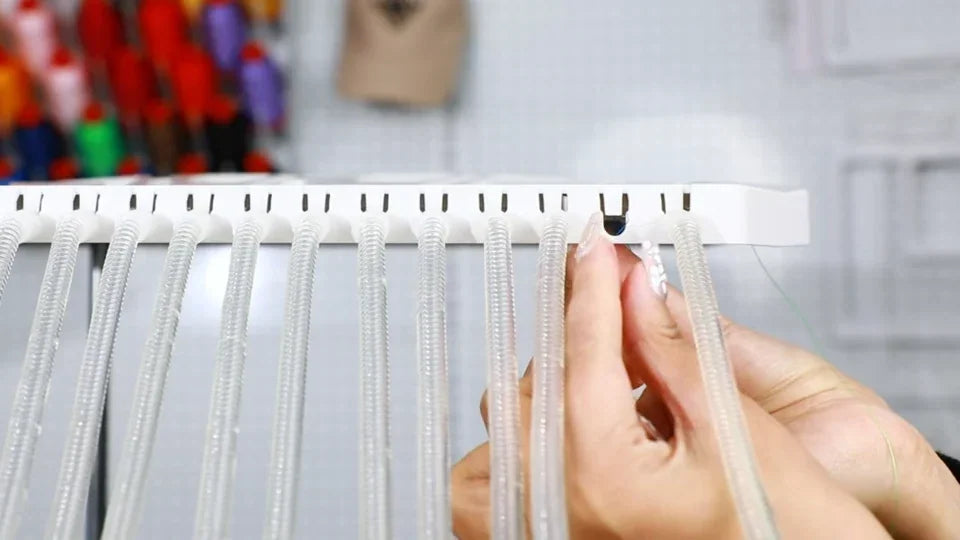
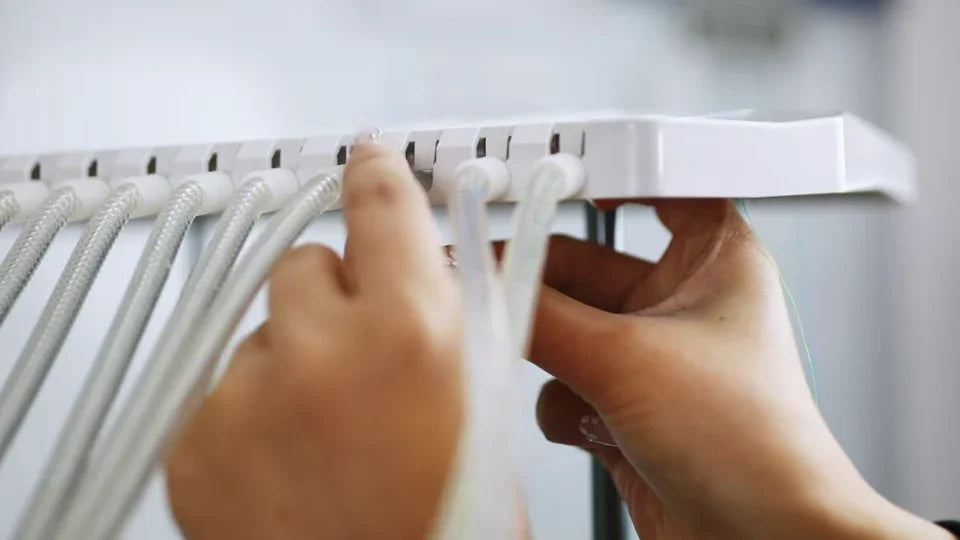
Watch at 02:32Unplug the clear tube for spool 1 so you can work with it in your hands. Check below the guide plate and guide the thread through the small opening at that tube position. Leave the end accessible for the hook.
4. Draw the thread through the tube with the picker
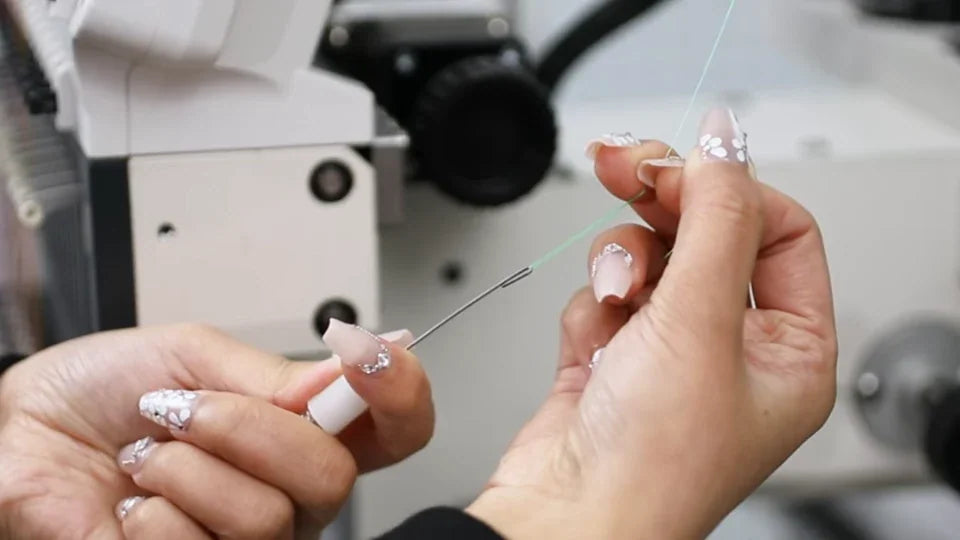
Watch at 02:40Use the wire picker from the toolbox with its hook facing up. Feed the wire into the detached tube until the hook reaches the far end. Draw it back slightly to catch the green thread, then withdraw the picker with the line caught in the hook. Check that the free end emerges from the other end of the tube.
5. Refit the tube and seat the thread between the pre-tension discs
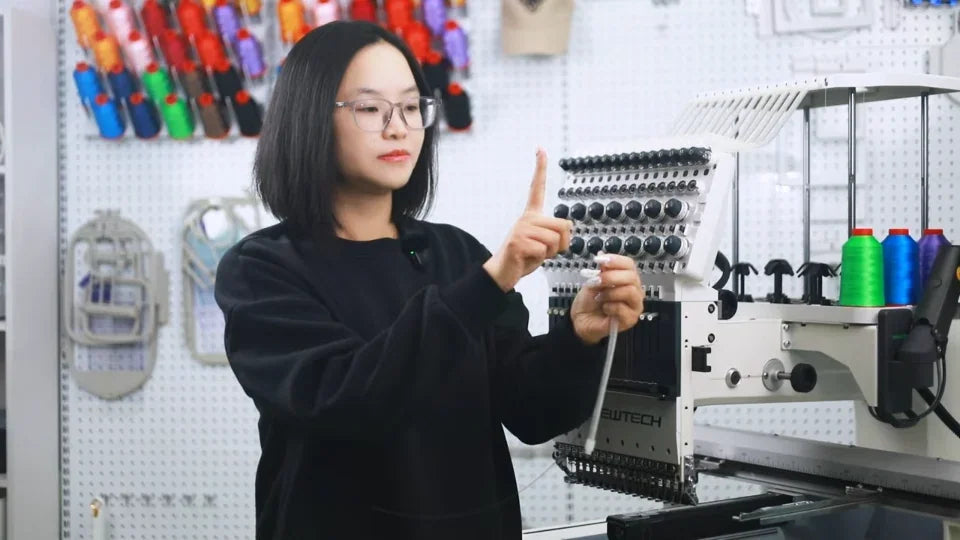
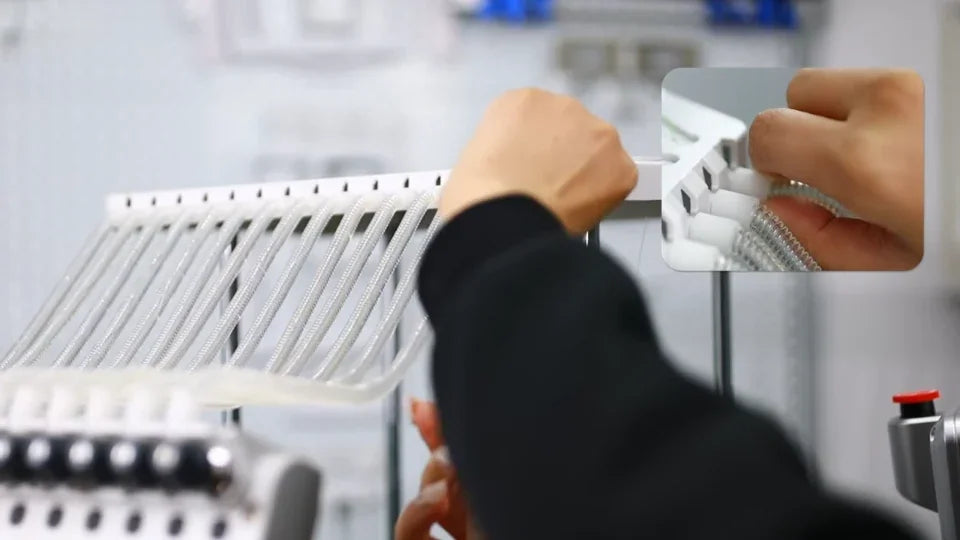
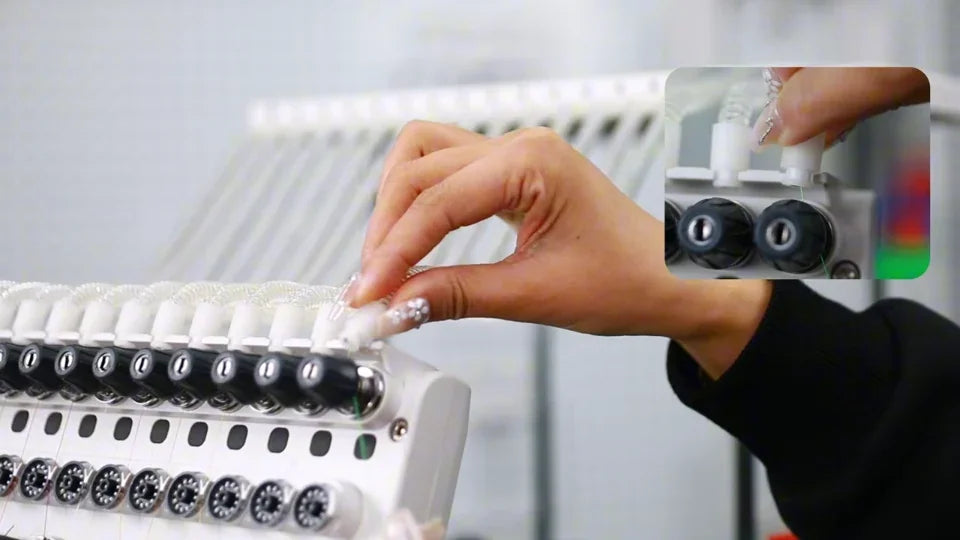
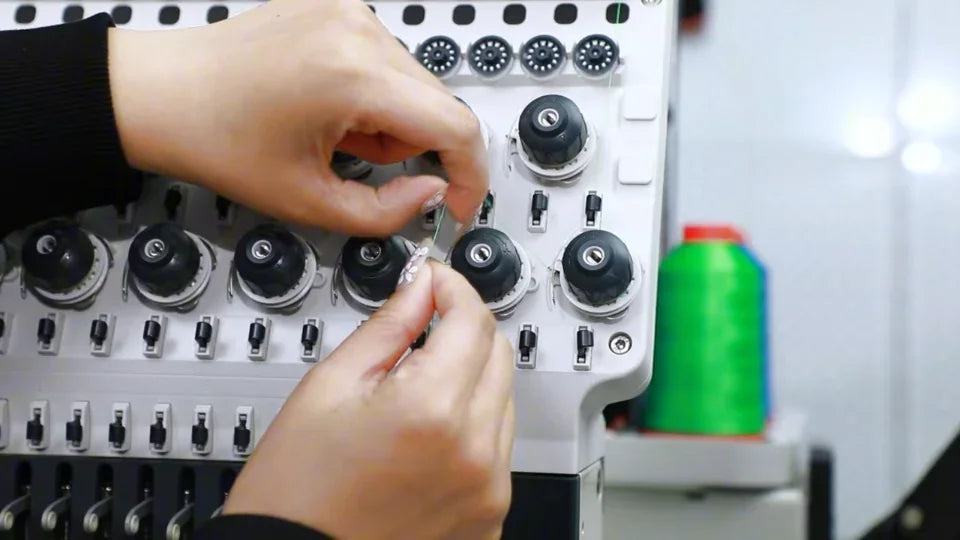
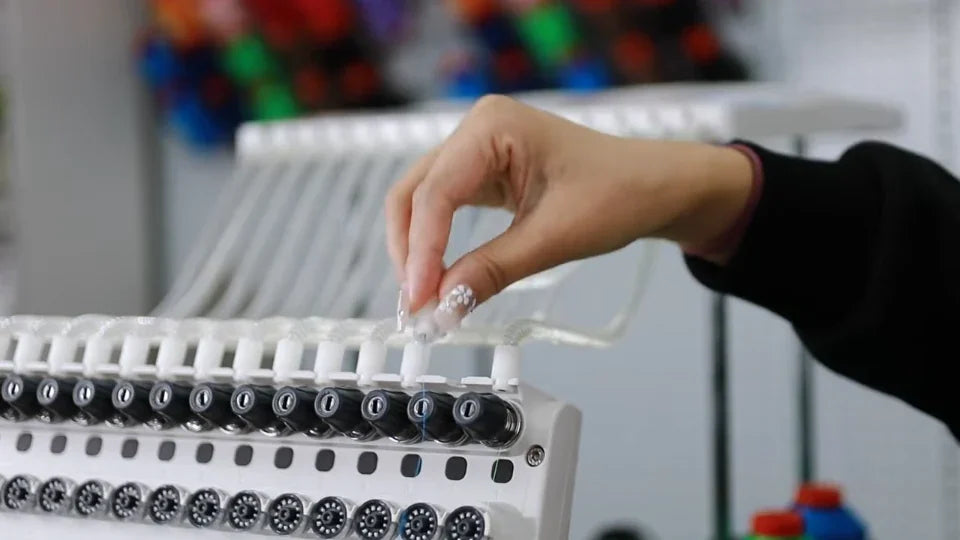
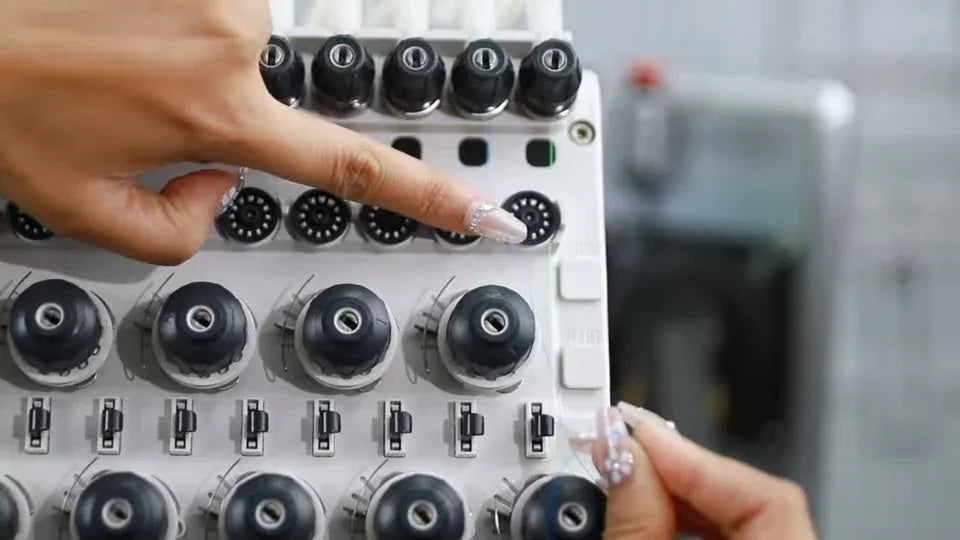
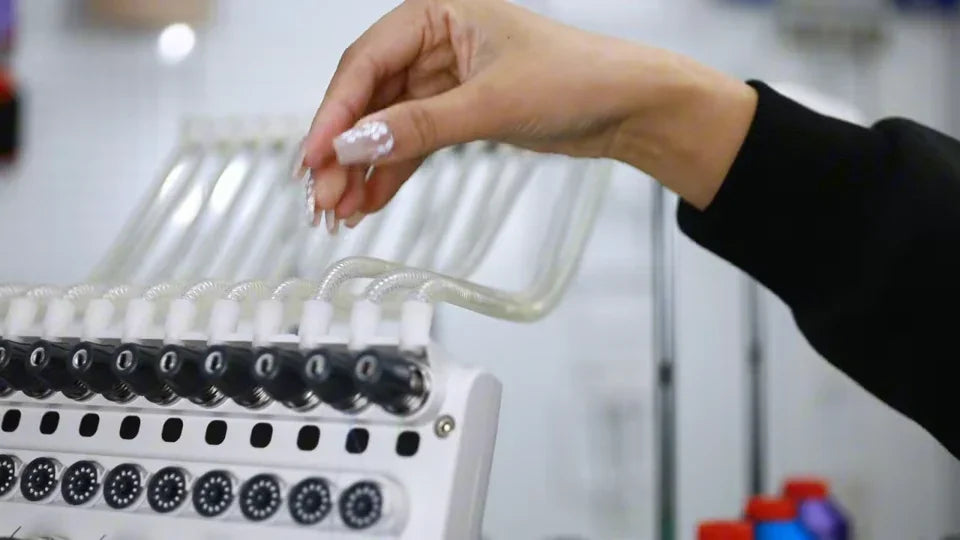
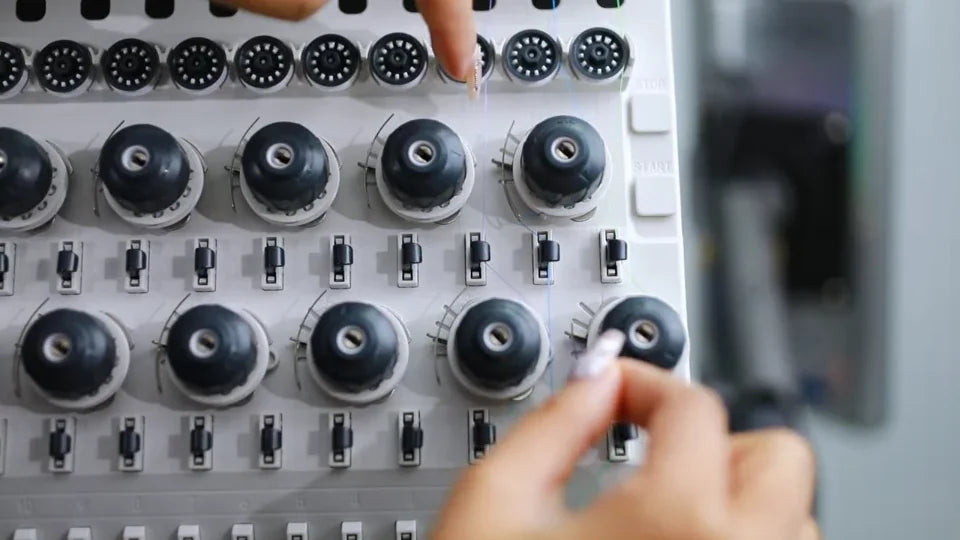
Watch at 03:25Press the two tube ends back into their matching sockets at the guide plate and the top of the head. At the small top-row pre-tension knob for needle 1, lift the disc gently and slip the thread into the notch between the two discs. Let the disc settle back with the thread in the gap.
6. Wrap the small dotted wheel once
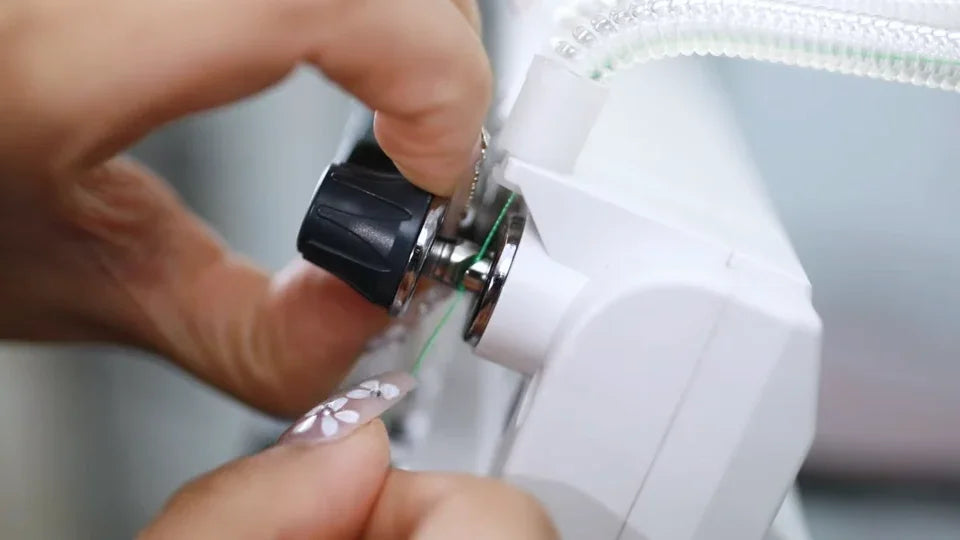
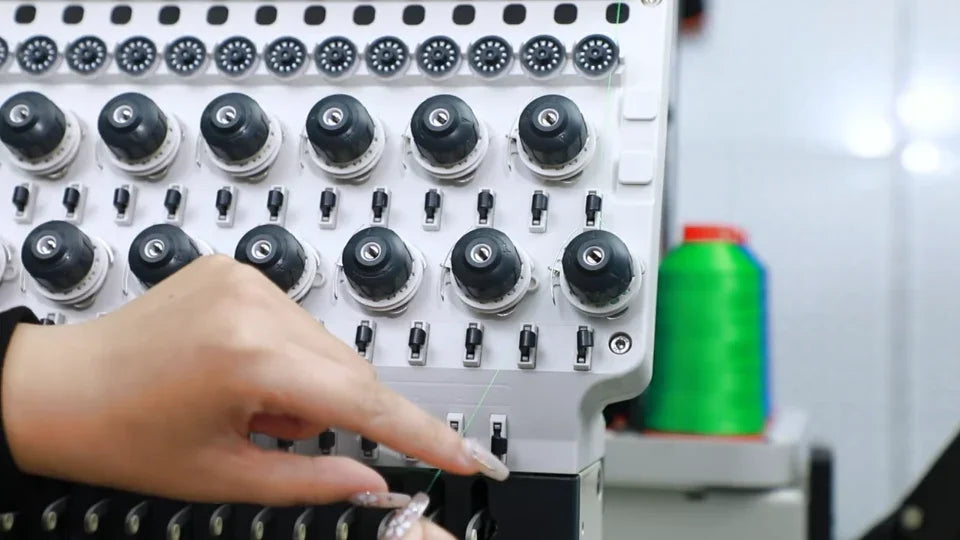
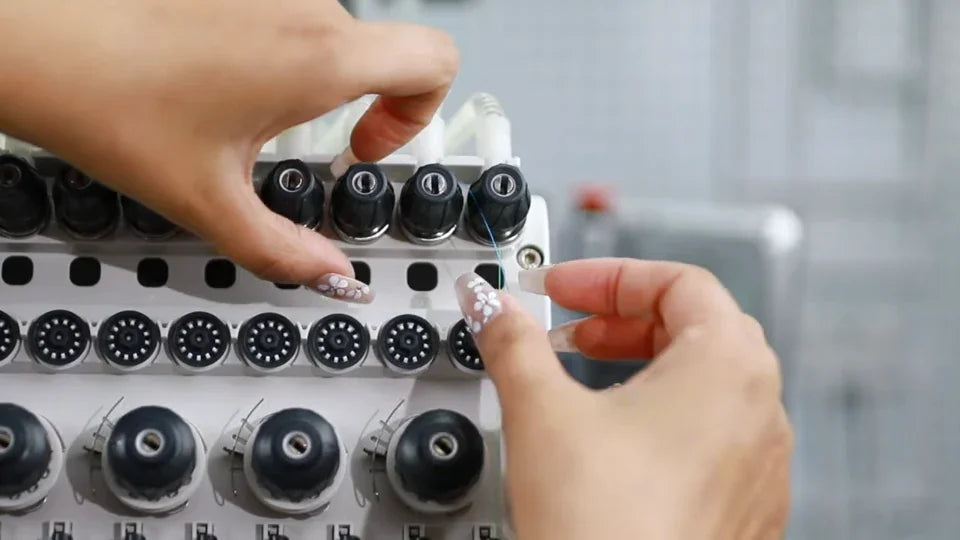
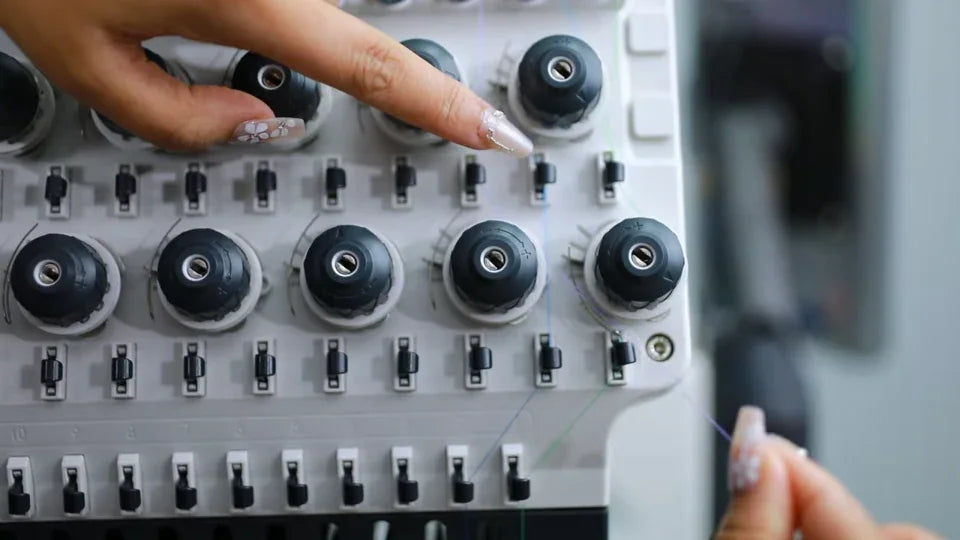
Watch at 03:41Facing the machine head, wrap the thread clockwise once around the small black wheel with white dots, directly beneath the top pre-tension row. Take the end to the matching hook below, following the needle 1 path.
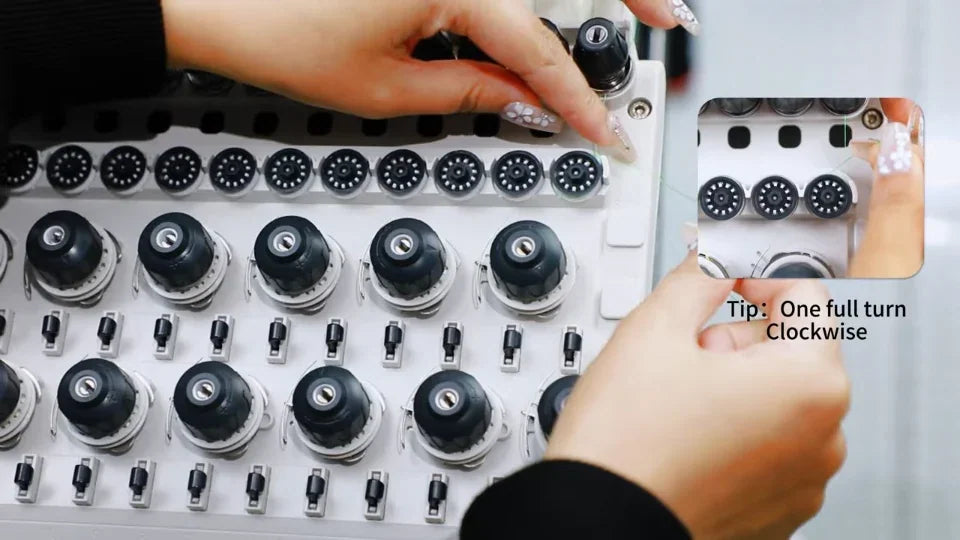
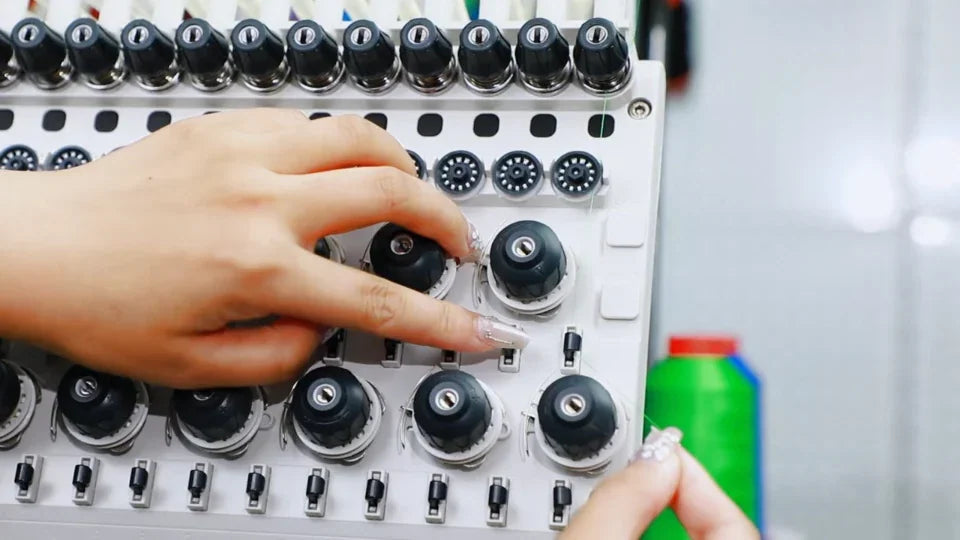
7. Wrap the larger tension wheel one and a half turns
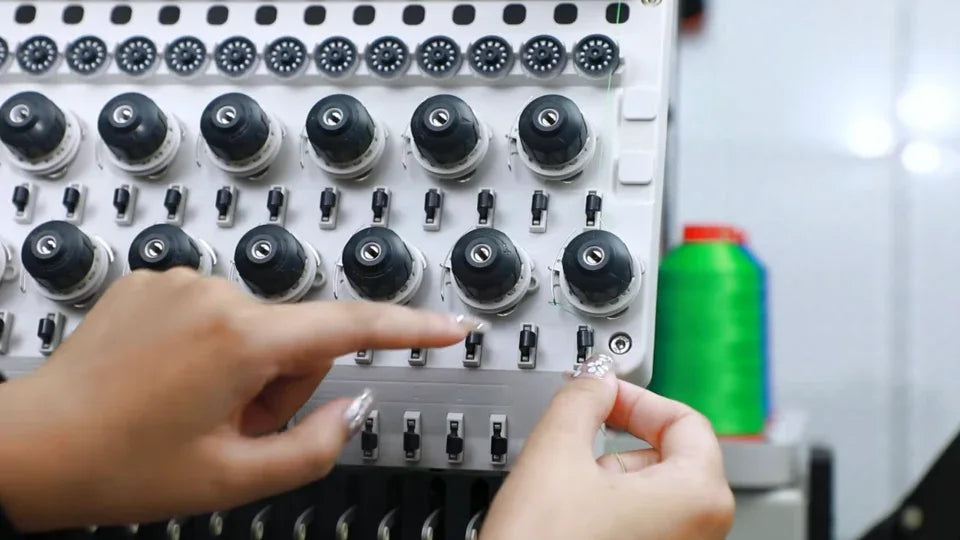
Watch at 03:52Continue to the larger tension wheel on the same needle route. Viewed from the front, wrap clockwise for one full turn plus another half turn. Lead the end through the hook shown after the wrap. Compare the seated wrap with the close-up before guiding the line farther down.
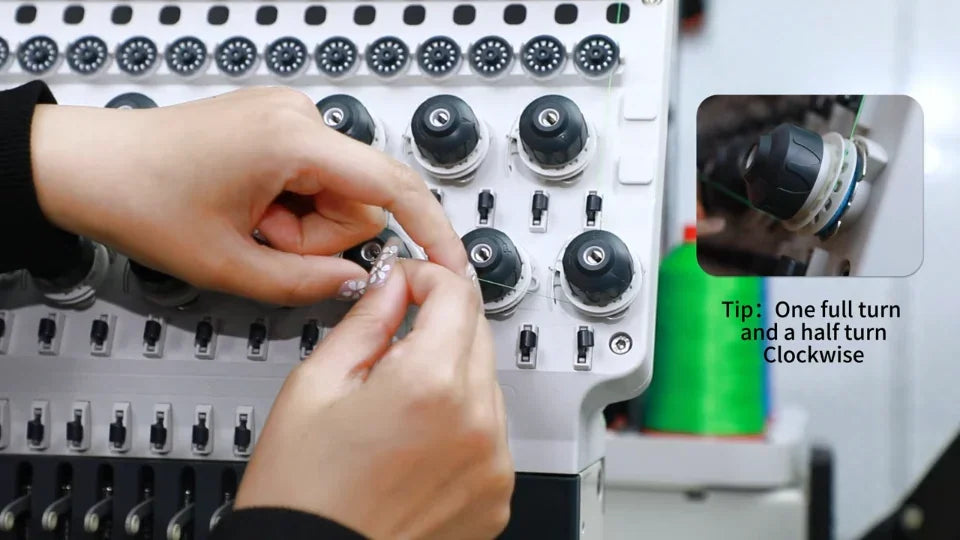
8. Continue through the remaining hooks
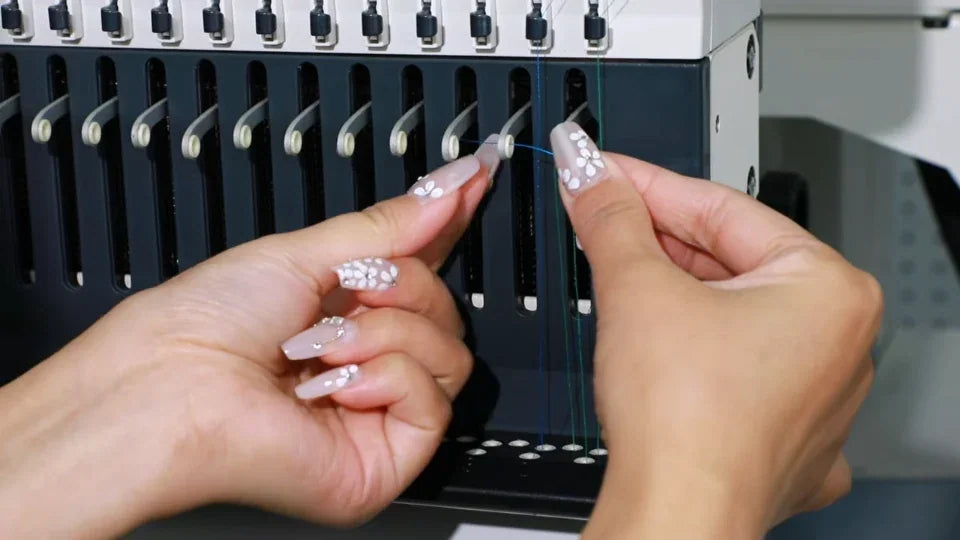
Watch at 04:08Pass the thread through the next small hook and then the following hook just above the black slotted panel. Compare the line with the close-up as you pull it down. The thread should stay in each hook and lead into the same needle route below.
9. Go through the lower guide and past the steel bar
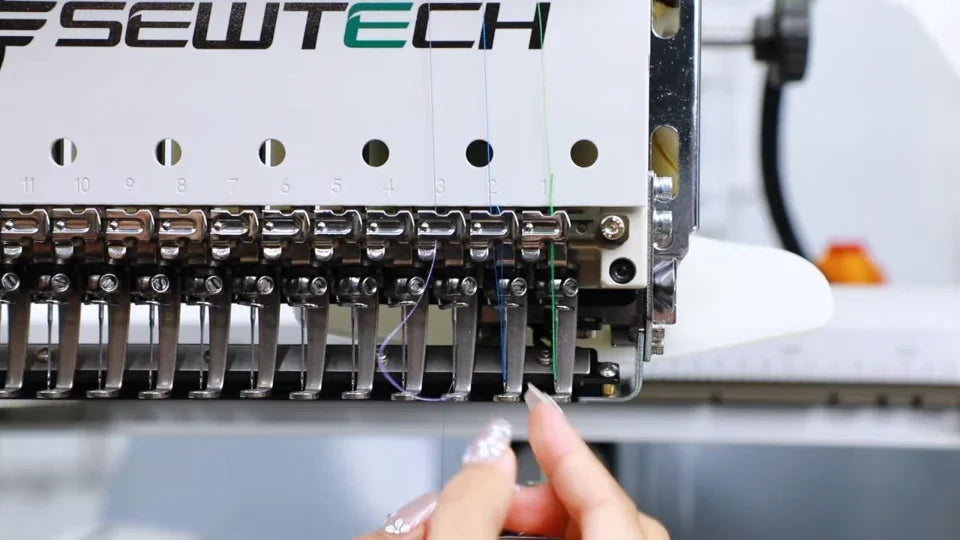
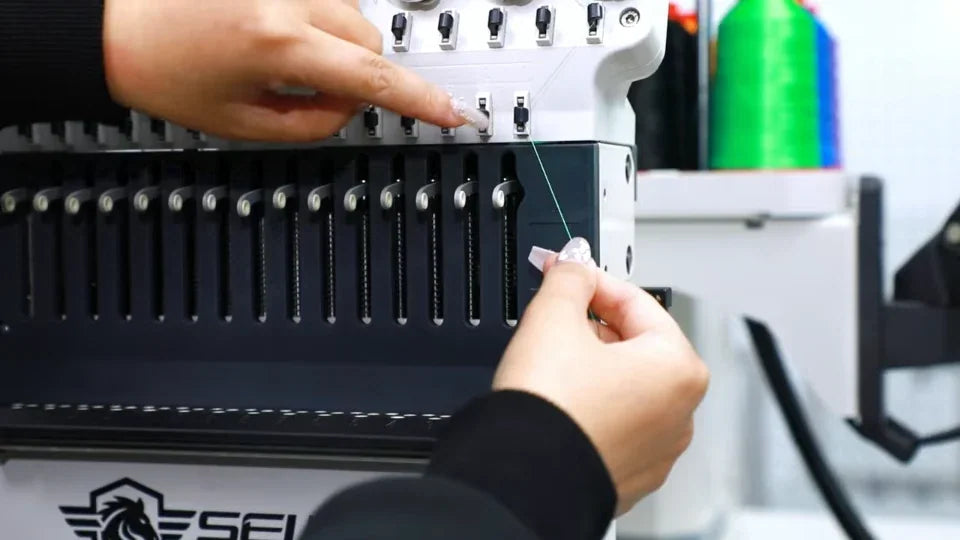
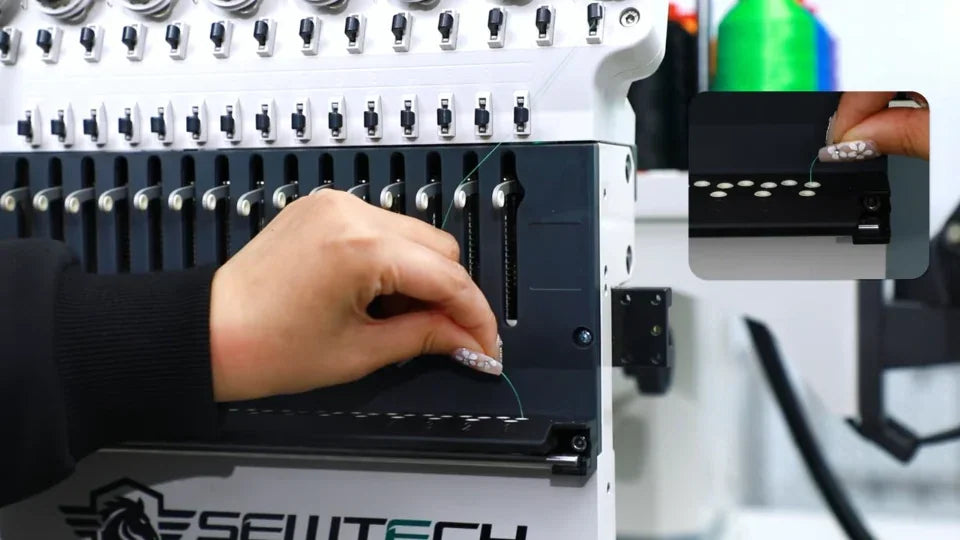
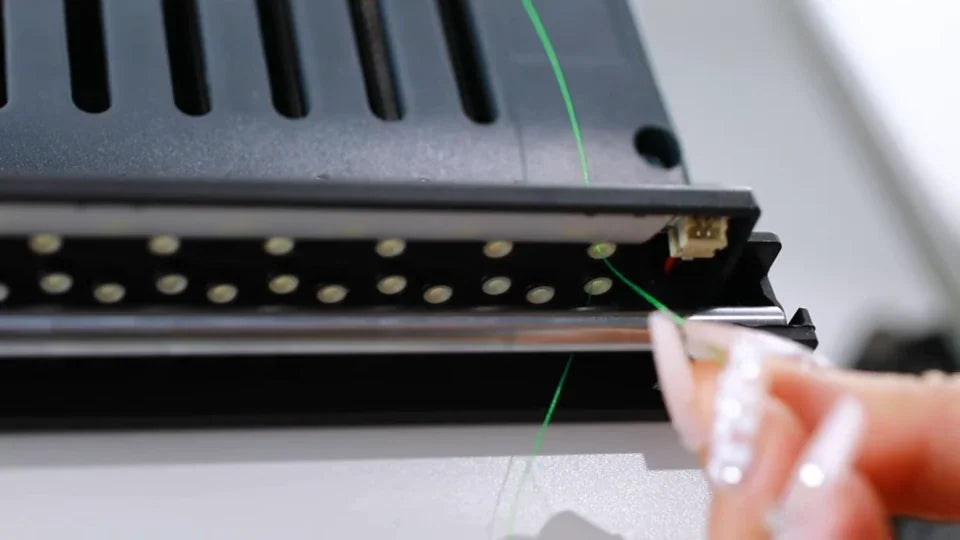
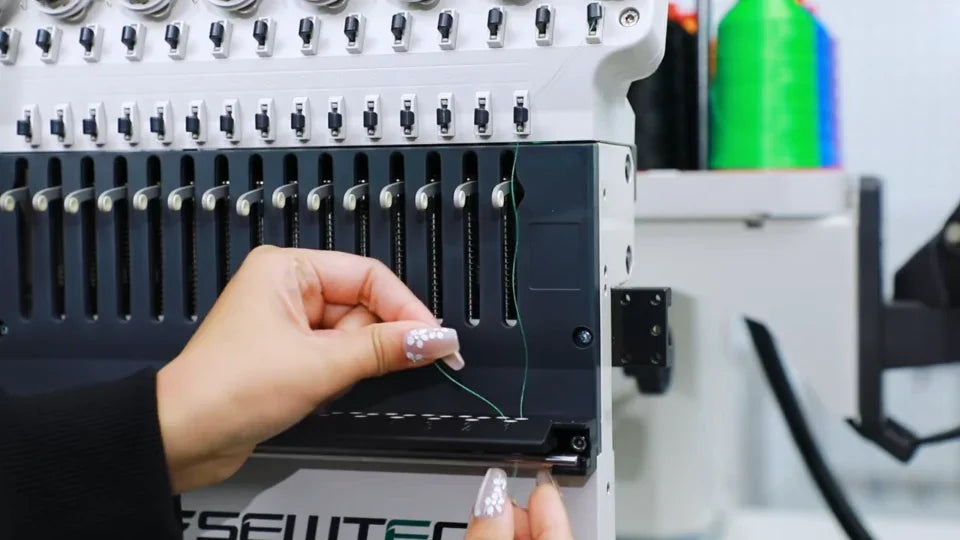
Watch at 04:18Feed down through the first guide hole on the black ledge below the slotted panel. Bring the end past the horizontal steel bar and up through the next hole for this route. Keep the thread free of the steel bar so it can feed back up to the take-up lever.
10. Thread the take-up lever and come back down
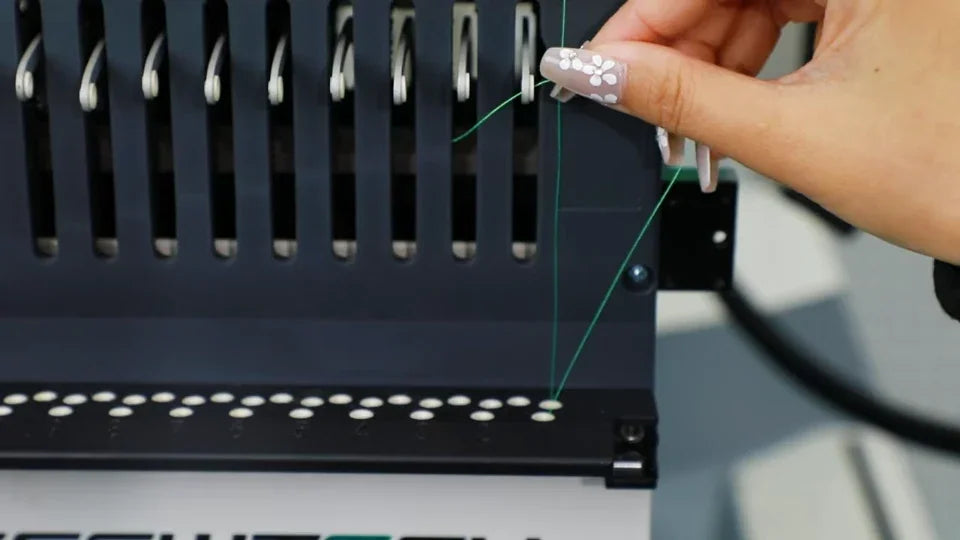
Watch at 04:31Bring the thread up to the silver take-up lever in the slot for needle 1. Pass it through the lever eye. Then bring it back down through the next hole in the black ledge. Check the upward and return runs against the close-up before taking the end down to the needle.
11. Slip the thread under the bar above needle 1
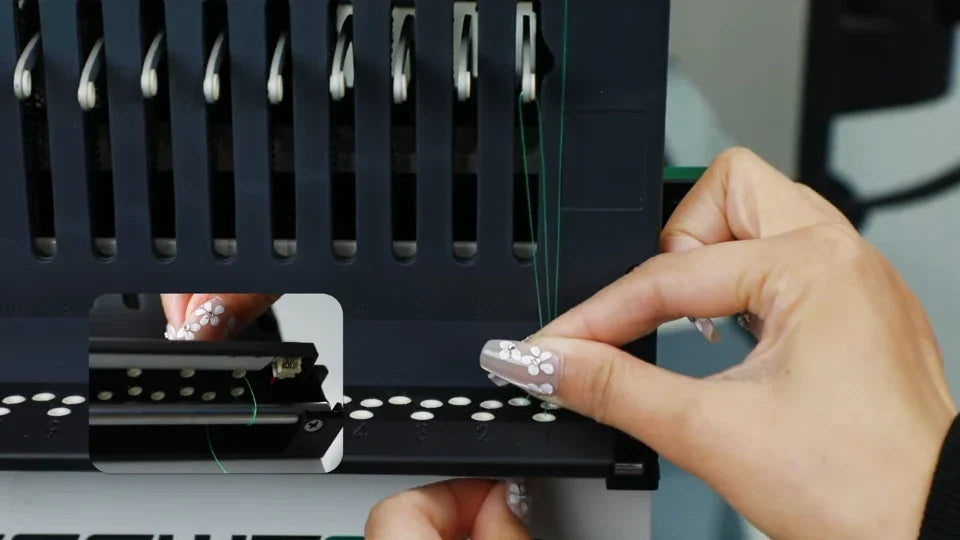
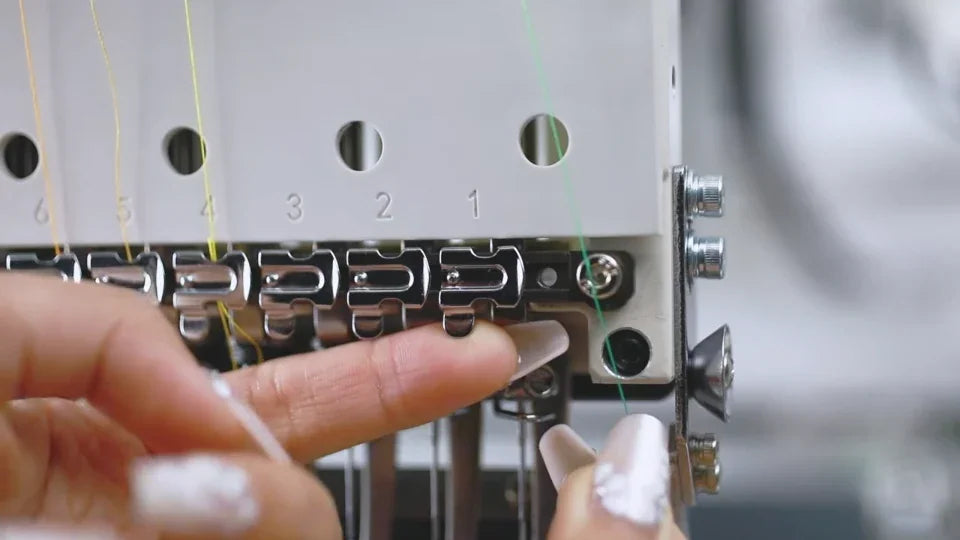
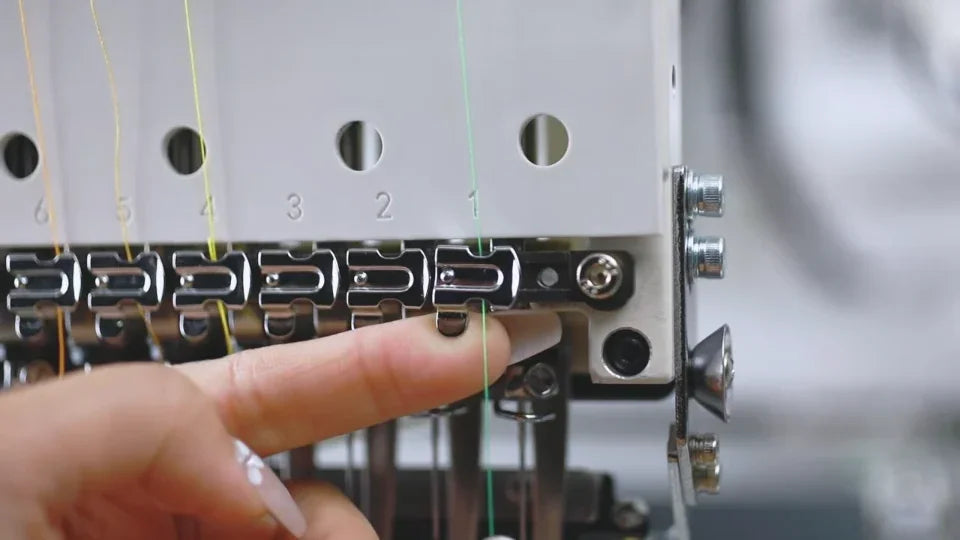
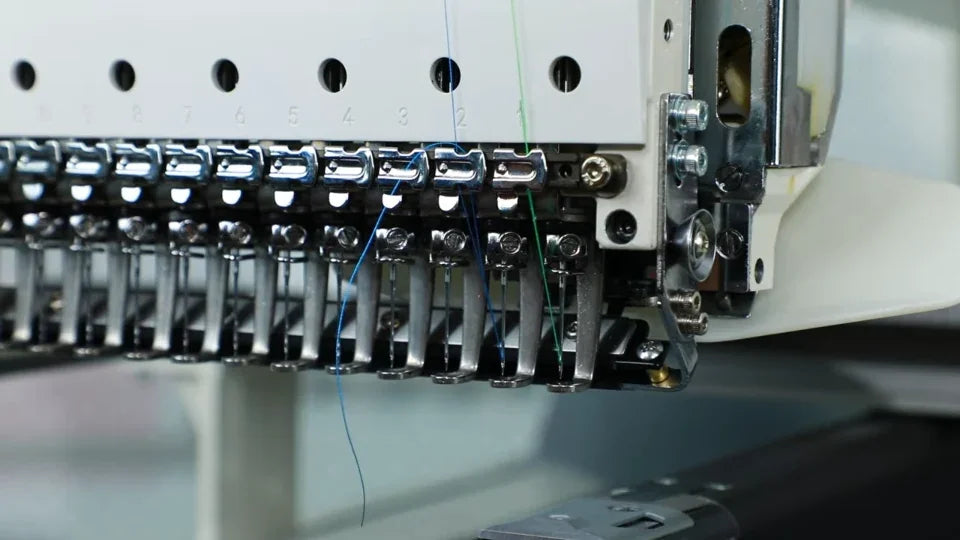
Watch at 04:44Find the 1 mark above the rightmost needle position in the front close-up. With the machine stopped, use a finger to lift the small bar below the mark slightly. Slip the thread underneath it and lower the end toward the needle eye.
12. Thread the eye from front to back
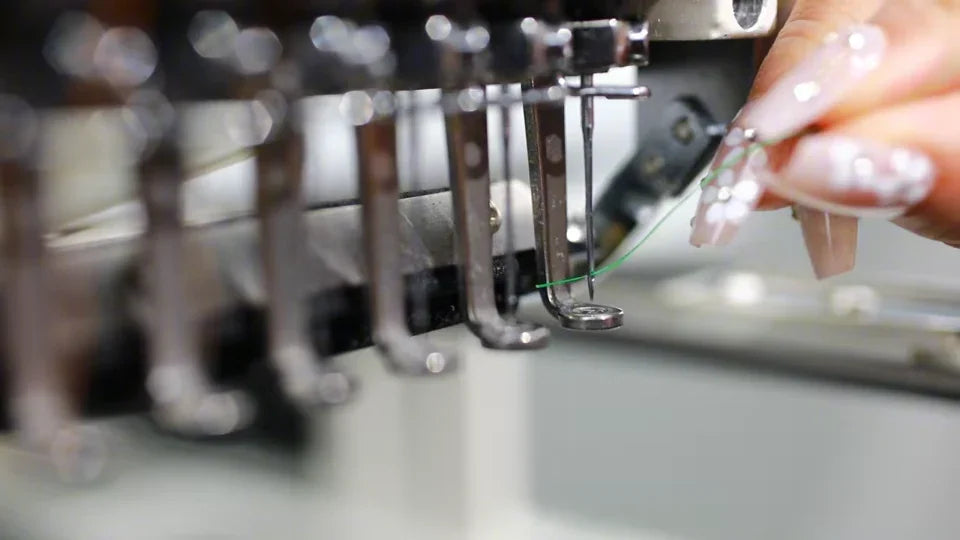
Watch at 04:57Push the green end through needle 1 from front to back. Draw the end through and route it under the presser-foot area as shown. Check that the line goes through the needle eye and that the tail can still be held for the finishing step.
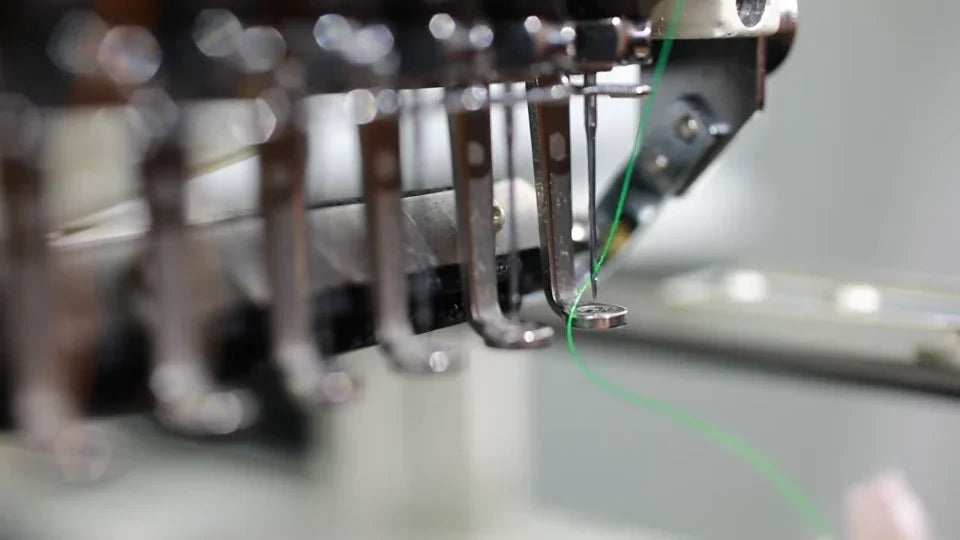
13. Secure the tail and trim the excess
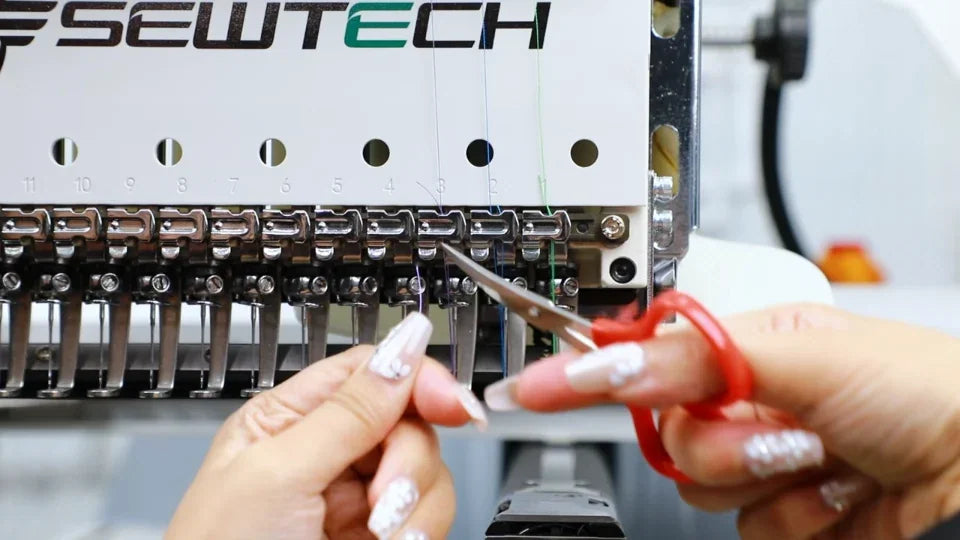
Watch at 05:04Lift the small bar again and slide the tail back under it, as shown. Make sure the tail is held and the thread stays through the eye. Use small scissors to trim the loose excess. The video shows the result at the needle without specifying a tail length.
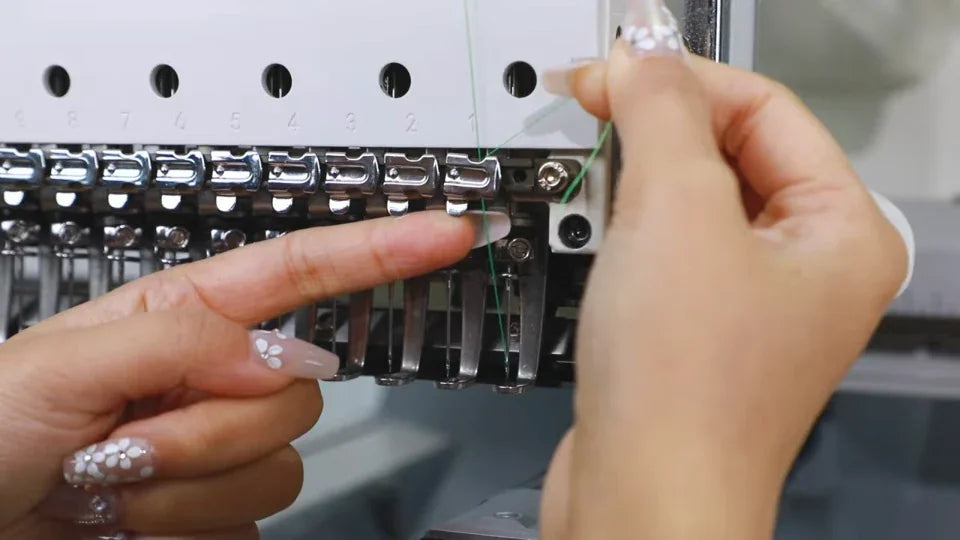
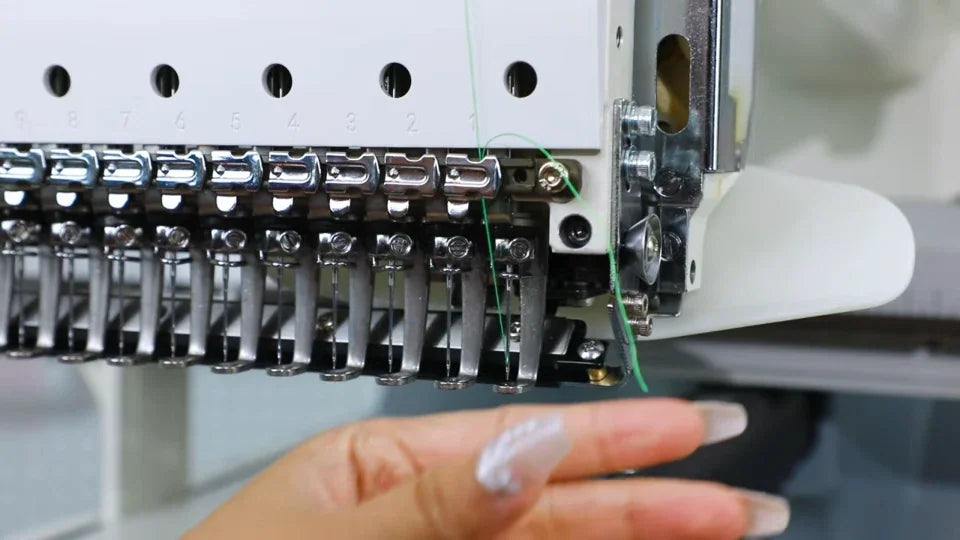
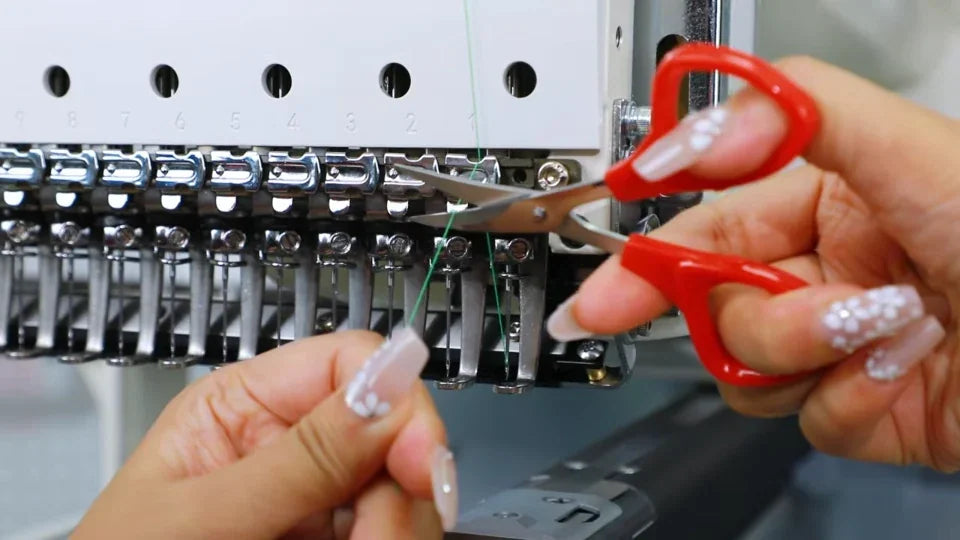
14. Start spool 2 in its own guide and tube
Watch at 05:15Start the blue thread at the hole directly above spool 2. Follow the marked route across the plate, down into the matching opening and through the detached tube using the picker. Reconnect both ends. Before wrapping, check that the blue thread emerges at needle 2’s pre-tension position, beside the green thread already installed for needle 1.
15. Repeat the wheel, guide and needle route for spool 2
Watch at 06:12Seat the blue thread in its own pre-tension discs. Repeat the one-turn wrap on the small dotted wheel and the one-and-a-half-turn wrap on the larger tension wheel, both clockwise. Pass each hook, the lower guides and the take-up lever. At needle 2, thread front to back, guide the tail under the foot and secure it. Look for the blue and green ends at their separate needle positions.
16. Start spool 3 at the corresponding hole and tube
Watch at 07:06Repeat from the purple spool in position 3. Feed up through the hole directly above it and across the matching guide-plate route. Remove the corresponding clear tube, pass the thread through it with the picker and reinstall both ends. Trace the purple line to the next pre-tension position.
17. Follow the third front path independently
Watch at 08:02Seat the purple line in the third pre-tension assembly. Follow the same two clockwise wraps and each intervening hook. Guide the line down through its own lower holes, up through the take-up lever and back down. Compare the three neighboring runs at the black panel to check for crossed lines.
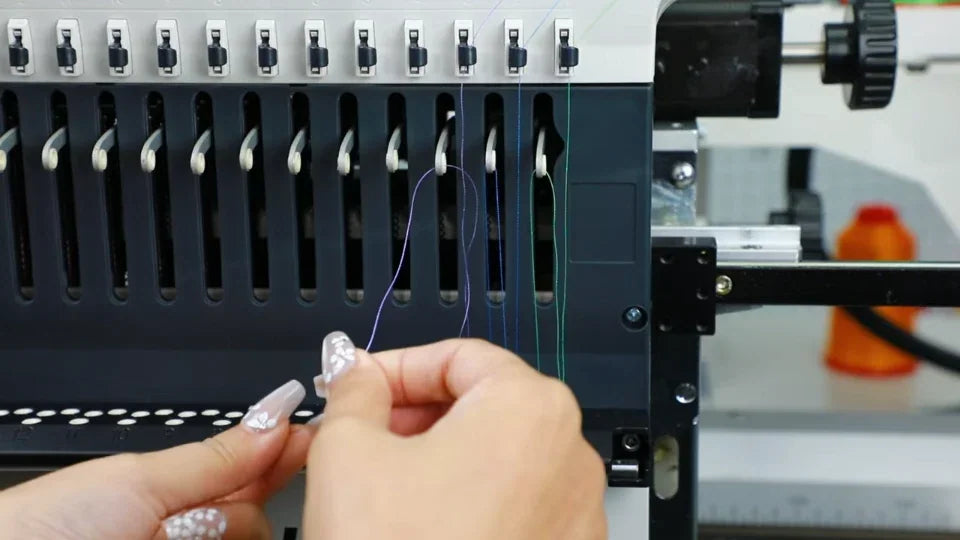
18. Finish needle 3 and check all threaded positions
Watch at 08:36Slip the purple line under the small bar, thread needle 3 from front to back and guide the tail under the foot. Tuck the tail back under the bar and trim the excess. Use the same route for the remaining spool positions. Before sewing, trace each threaded line end to end: matching spool and needle, seated tube, wraps in their grooves, every guide engaged and each tail held. The demonstration ends at the needle area.