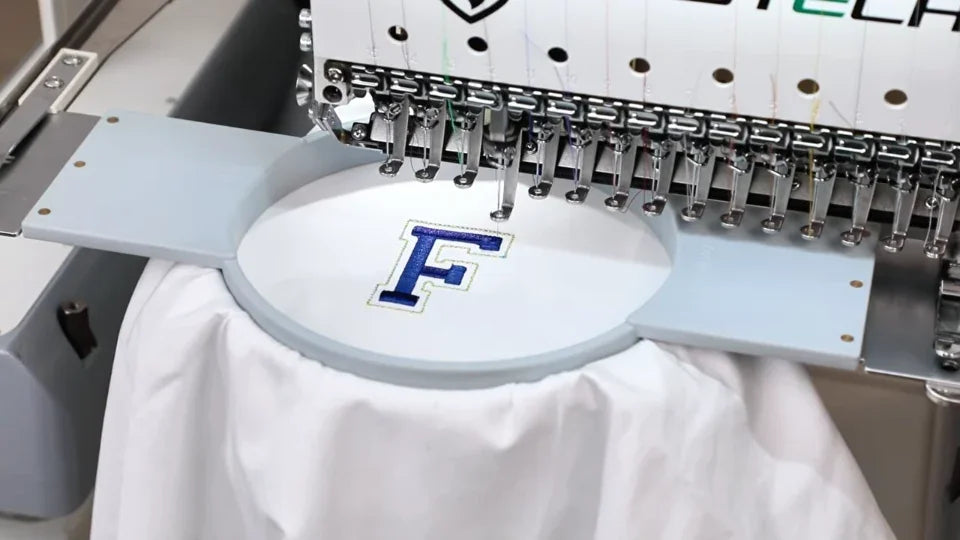
Fix Long Thread Tails After Trimming on the ST-1501 and SC-1501

Overview
This guide applies to the ST-1501 and SC-1501. The video shows the ST-1501. A long upper-thread tail left after trimming can be caught in the first stitches of the next color. Check the thread clamp, the upper tension knob and the controller’s trim length in that order. Stop embroidery before working at the needle head and have a 2 mm hex key ready.
Step-by-step guide
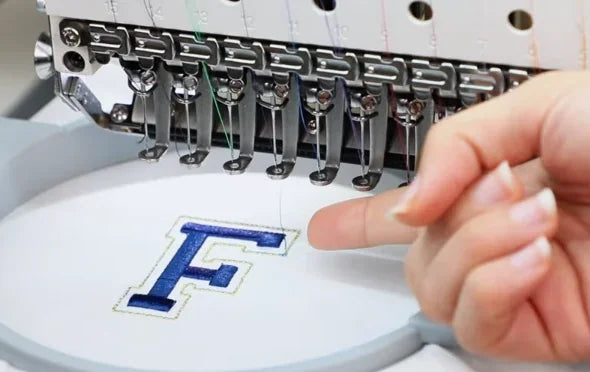
1. Identify the long upper-thread tail
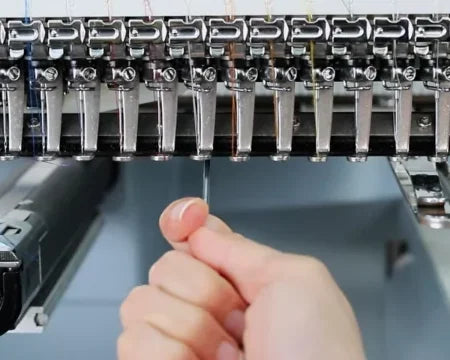
Watch at 00:12Pause after the trim and look between the needles and the hooped fabric. In the demonstration, a loose strand hangs down toward the blue F where the next color is meant to stitch. Follow the strand back to the needle area to identify the affected upper thread.
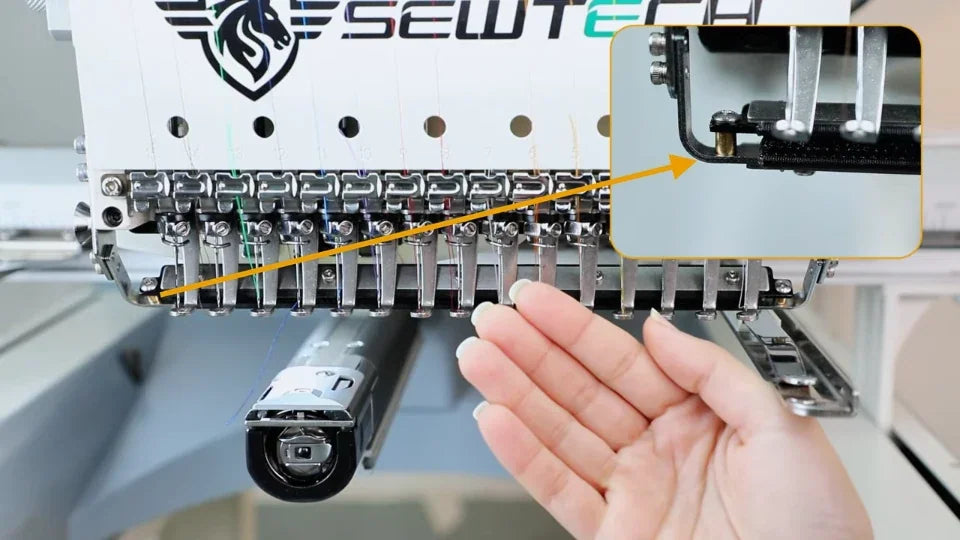
2. Locate the upper thread clamp
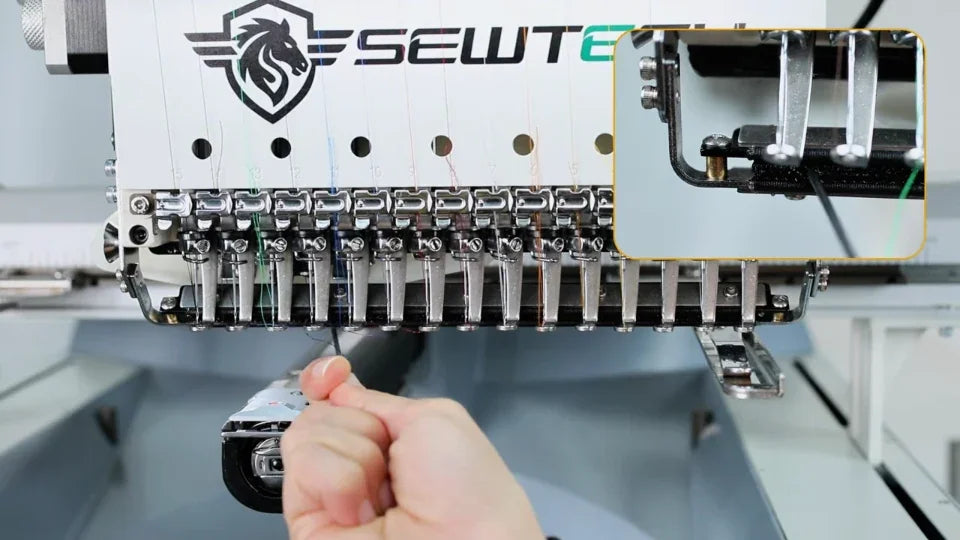
Watch at 00:24At the front of the stopped machine, look just below the row of silver needle-area fingers for the long black clamp strip. The left-end inset shows the gap in this strip. A clamp that grips the upper thread too tightly is the first possible cause in the video.
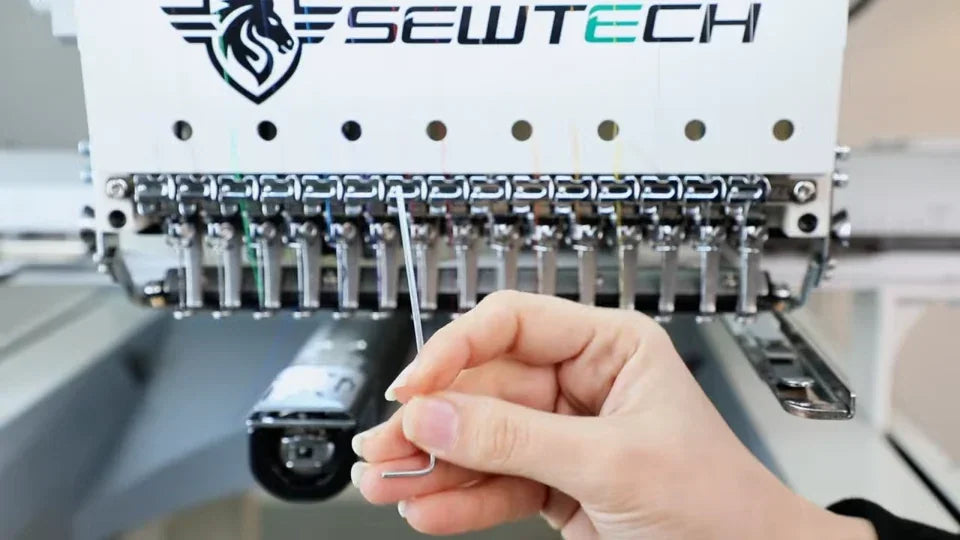
3. Ease a tight clamp with a 2 mm hex key
Watch at 00:31If the clamp is too tight, place the tip of the 2 mm hex key between its mating surfaces, as shown in the inset. Gently slide the key side to side in the gap and take it out before any test run. The video gives the tool size. Use a trim and color-change test to judge the result.
4. Tighten a loose upper thread
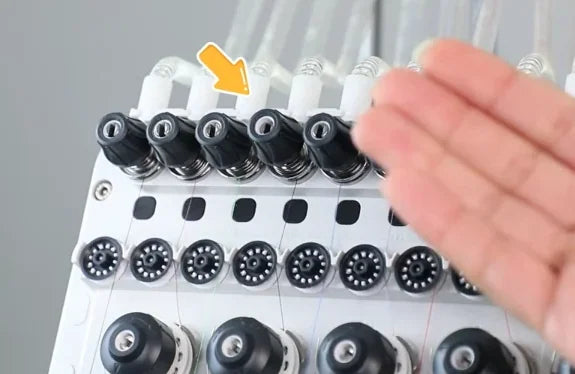
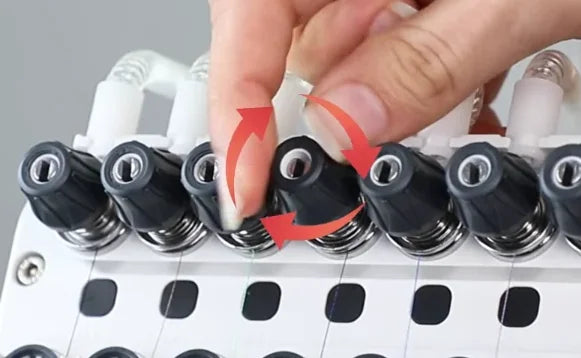
Watch at 00:44Find the small spring-backed black knob for the affected thread in the top row, directly below the white thread tubes. The row of small dotted wheels sits beneath it. If the upper thread is loose, turn its top-row knob slightly clockwise as viewed from the front and test again. The video shows the direction of rotation.
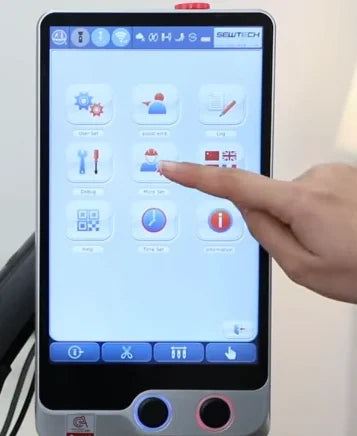
5. Open More Set from the embroidery screen
Watch at 01:07With embroidery stopped, tap the hand icon at the far right of the blue bottom bar. In the grid that appears, tap More Set, the middle tile of the second row. The controller opens a parameter list.

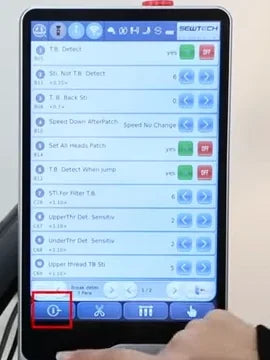
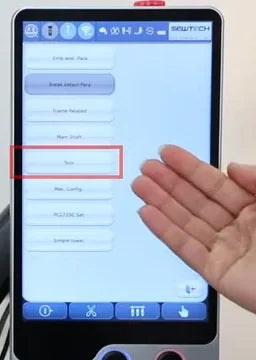
6. Open the Trim category
Watch at 01:12From the first parameter list, tap the far-left button in the blue bottom bar, the one boxed in red in the video. On the category screen that opens, tap Trim in the left column just below Main Shaft. The trim parameters replace the category list.
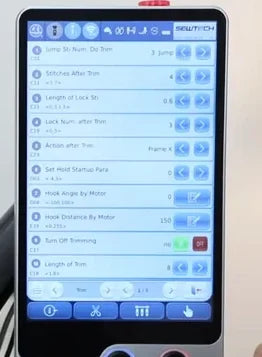
7. Find Length of Trim on page 1/3
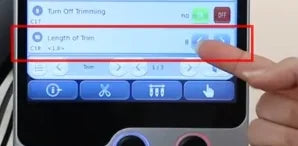
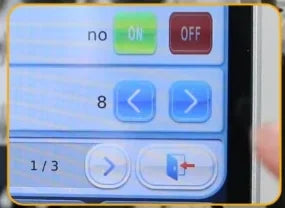
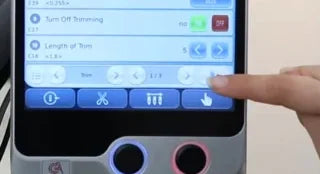
Watch at 01:19On the demonstrated controller, Length of Trim is the bottom row on Trim page 1/3, immediately below Turn Off Trimming. Read the current value on the right. In the video it starts at 8.
8. Decrease the trim length and check the display
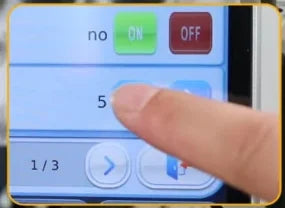
Watch at 01:24If the current length is too high, tap the left arrow on the Length of Trim row and watch the number decrease. The video shows 8 changing to 5 as an example. Treat these as controller values and use your trim test to decide whether the new setting works for your job.
9. Exit the Trim parameters
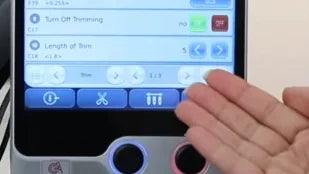
Watch at 01:29Check the new number on the Length of Trim row. The presenter then presses the exit icon at the right end of the light-blue row above the blue toolbar. The footage cuts to the hoop after this tap.
10. Verify a trim and the next color
Watch at 01:31Remove the tool and keep your hands clear before restarting. Test a trim and the first stitches of the next color. Check that the remaining upper-thread tail stays clear of those stitches and the next color starts cleanly. Once both checks pass, continue the design. The video shows the machine back at the hooped F after the adjustment.