SEWTECHSupport Center 简体中文

Align and Focus the ST-1501 Positioning Laser

Applies to ST-1501

Watch on YouTube ↗

Overview

Use this procedure with the SEWTECH ST-1501 stopped and the needle plate exposed. Check the red dot at the needle hole first, then load the design and mount your hooped fabric for the trace. If the dot is missing, go straight to the controller settings. If it is visible but stretched or blurry, start with the focus adjustment.

Step-by-step guide

1. Find the dot and the needle hole

Watch at 00:10

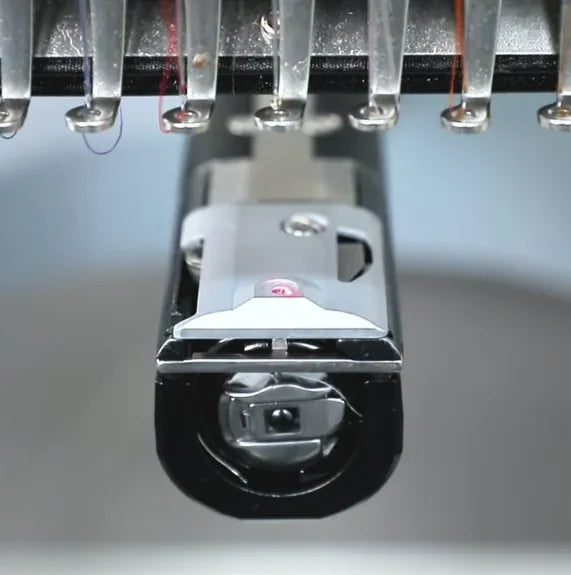
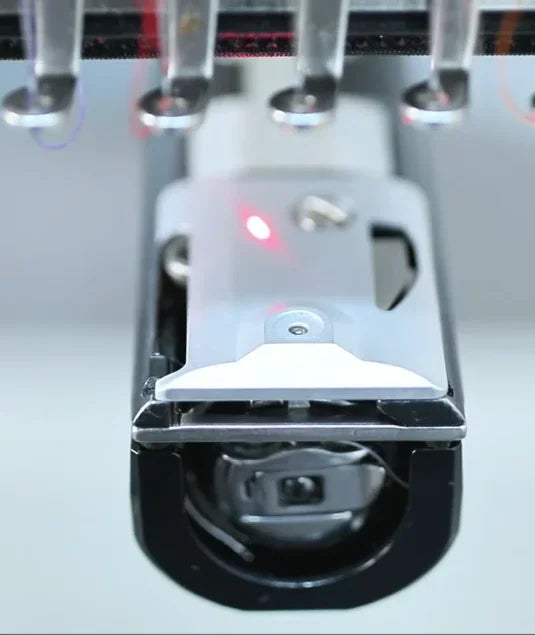
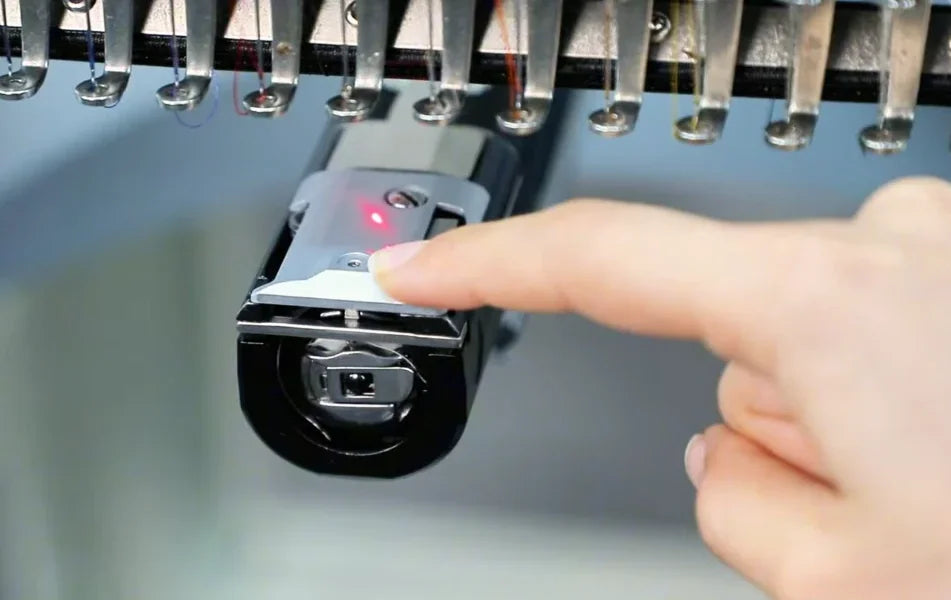
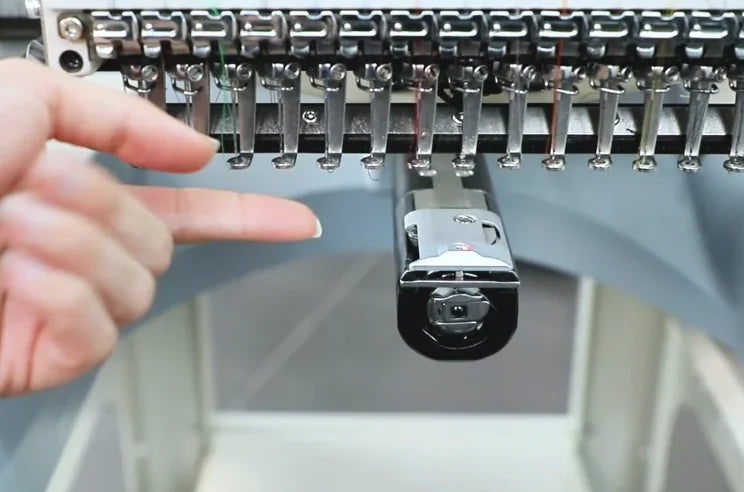
Look at the metal needle plate directly below the needle head. Use the small round needle hole near the front edge as the reference. The reflected red dot should sit in the center of that hole. If it falls on the metal beside the hole, adjust the laser unit.
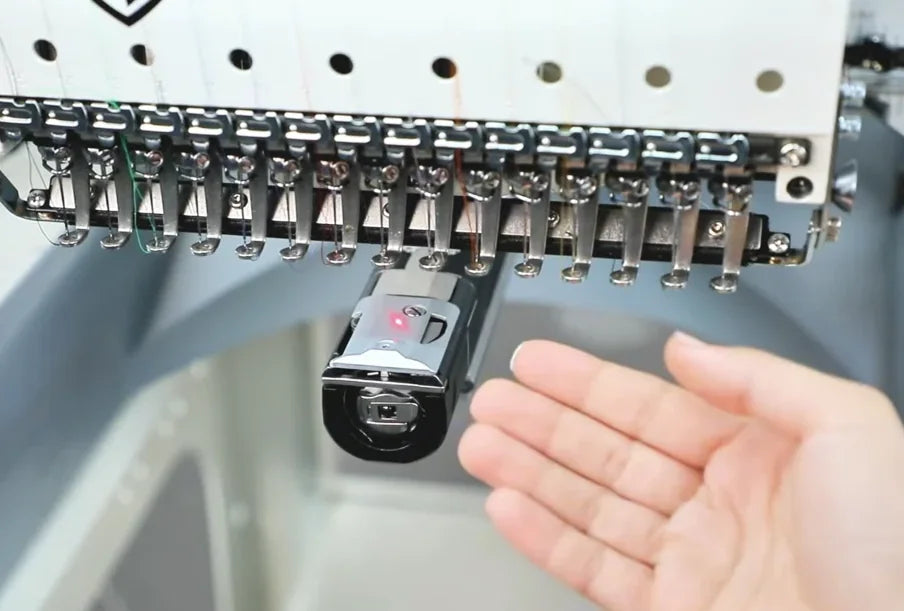
The needle plate is exposed beneath the row of needles.
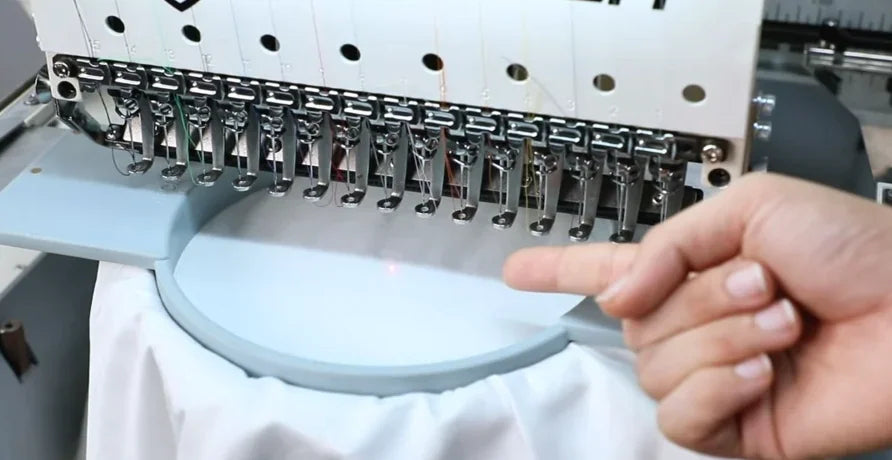
The finger points to the needle hole. The red dot is visibly offset on the plate.

2. Move the laser unit by hand

Watch at 00:24

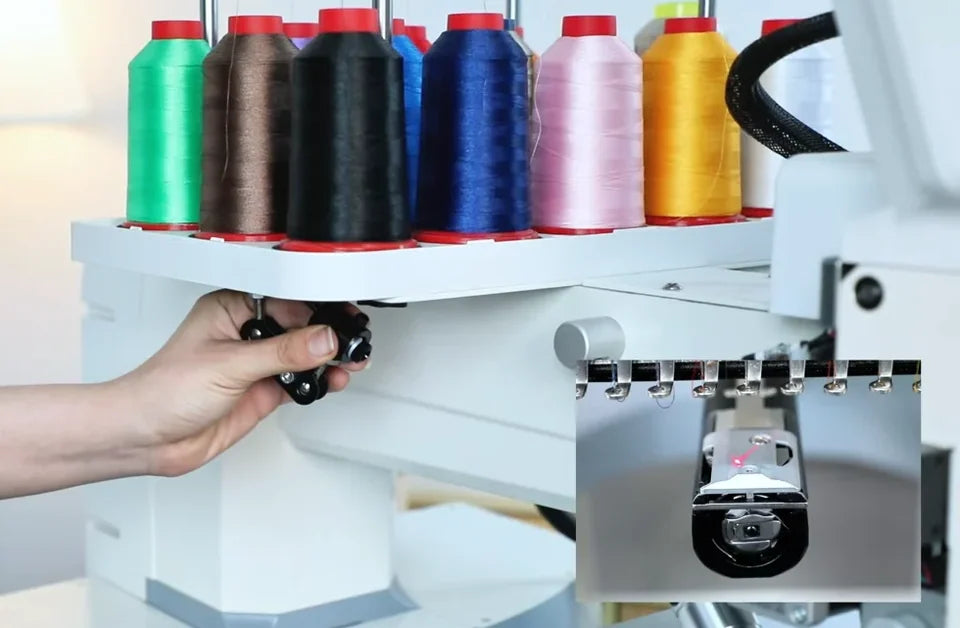
Find the black laser unit and its hinged bracket under the thread spool shelf. Gently move the whole unit by hand in small increments while watching the dot on the plate. Stop moving it when the dot sits in the center of the needle hole.
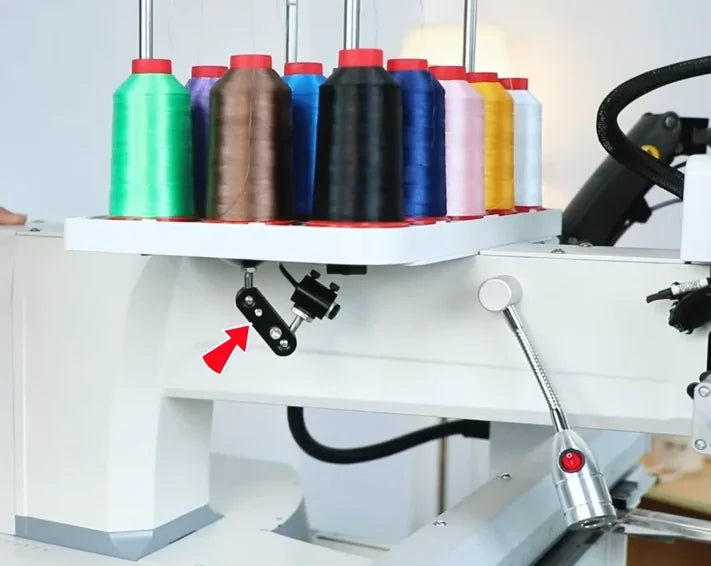
The red arrow identifies the laser assembly below the spool shelf.
Move the assembly gently. The inset shows where the red dot falls.
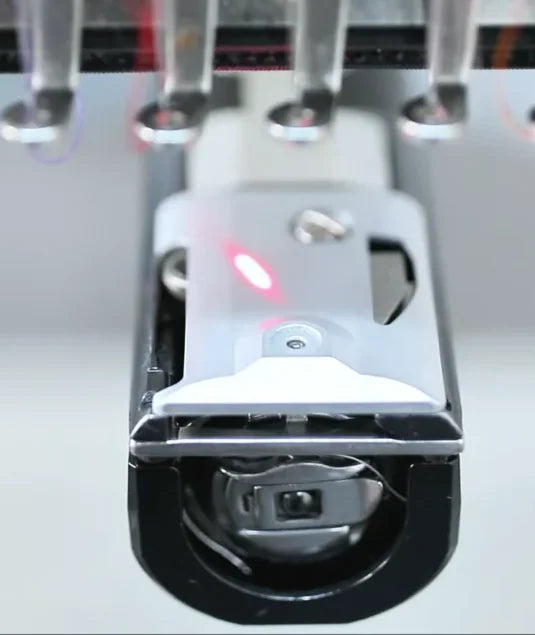
The close-up shows the red light at the needle hole after alignment.

3. Release the unit and recheck

Watch at 00:47

Let go of the bracket and check the plate again. The dot should stay centered when your hand is off the assembly. If it shifts when released, make another small adjustment and recheck before running the trace.
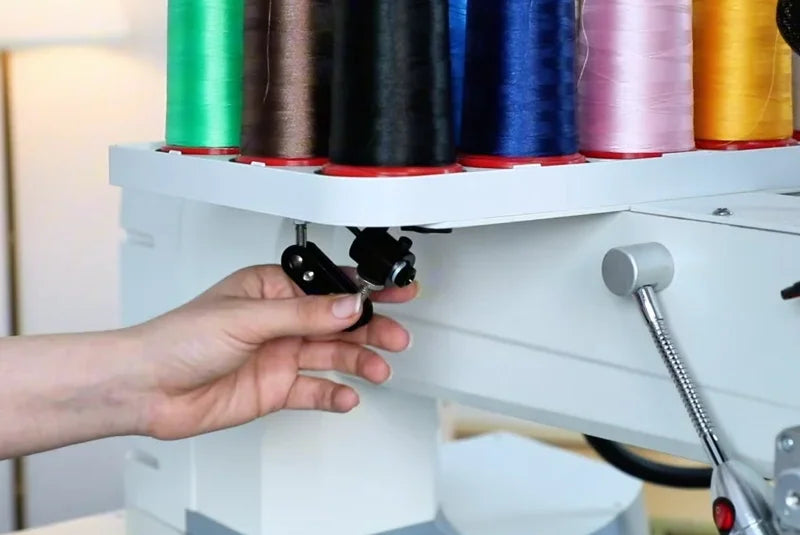
The operator finishes the adjustment at the bracket under the thread spools.
With the bracket released, check that the red light still falls in the needle hole.

4. Trace the design on hooped fabric

Watch at 00:59

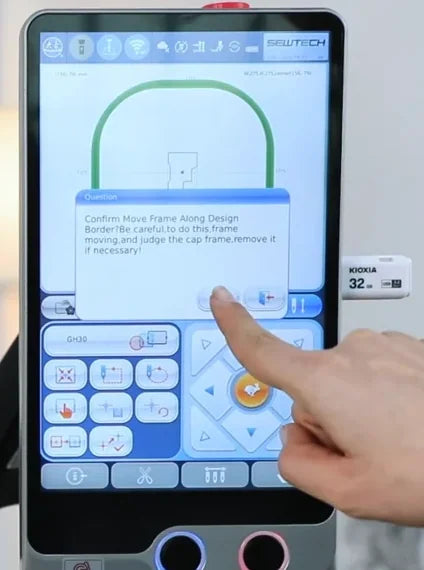
With the design loaded and the fabric held flat in its mounted hoop, open the frame controls. Tap the dotted-rectangle Trace button in the left control block, directly under the hoop selector and just left of the dashed oval. Clear the frame path and tap the check mark in the move-frame prompt. As the hoop moves, watch the laser dot mark the design boundary on the fabric. Check that the path is within the hoop and that the design is centered where you intend to stitch. GH30 is the hoop selection in this example.
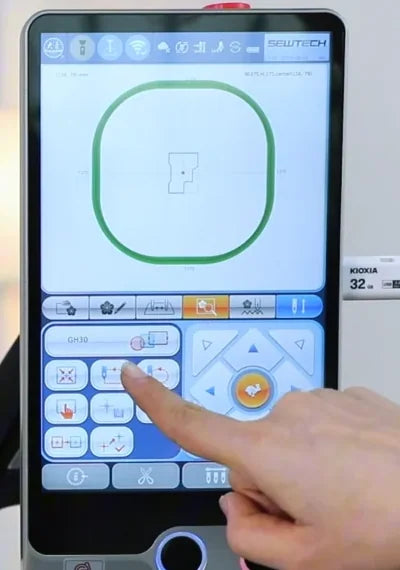
The operator taps the dotted rectangle under the GH30 hoop selection.
The prompt asks to move the frame along the design border. Tap the check mark to proceed.
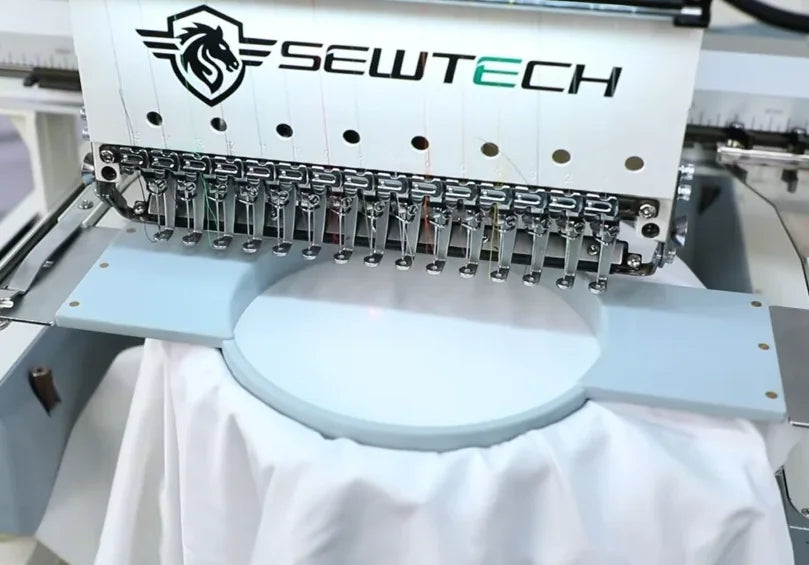
The hoop moves beneath the head. The faint red dot is visible on the white fabric.
Compare the red dot’s path on the fabric with the intended placement before stitching.

5. Focus a stretched or blurry dot

Watch at 01:23

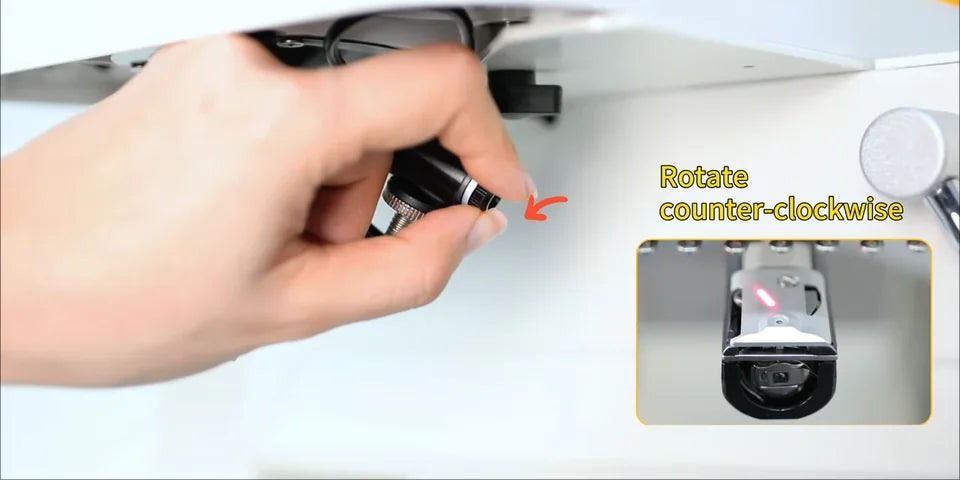
If the red light looks broad or stretched, find the same black unit under the spool shelf. Gently turn only the lens tip counterclockwise a little at a time, as shown. Watch the spot shrink to a small, sharp dot and stop there. Avoid turning the lens tip to the end of its travel. Recheck centering at the needle hole after focusing.
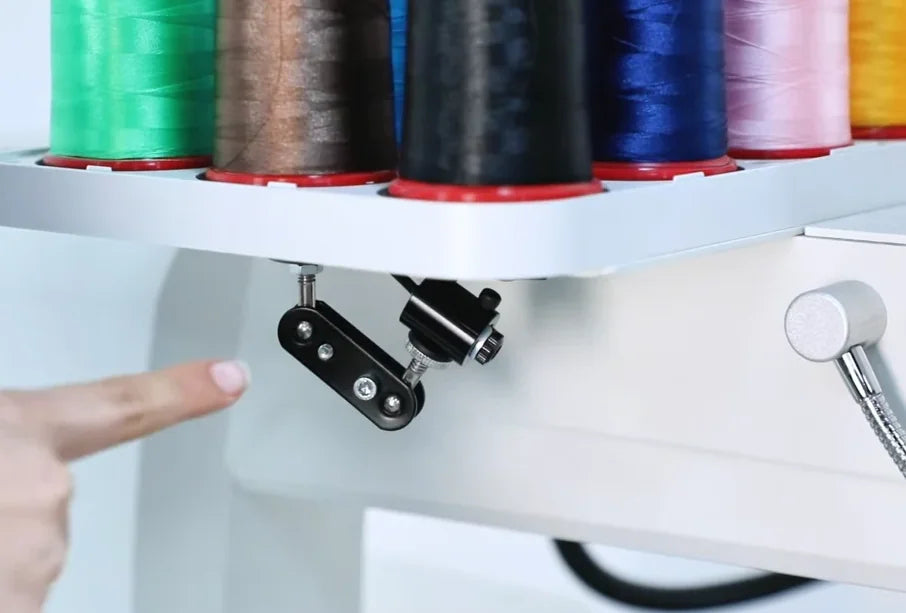
The finger identifies the black laser unit below the thread spools.
Turn the lens tip counterclockwise in small movements, following the arrow.
Before focusing, the spot is elongated on the silver plate.
The smaller spot illustrates the focus change. Recheck its position at the needle hole.

6. Open More Set if the dot is missing

Watch at 01:51

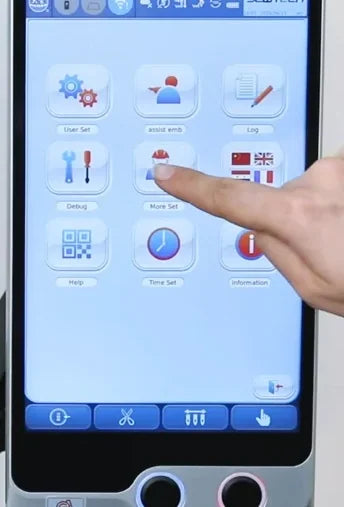
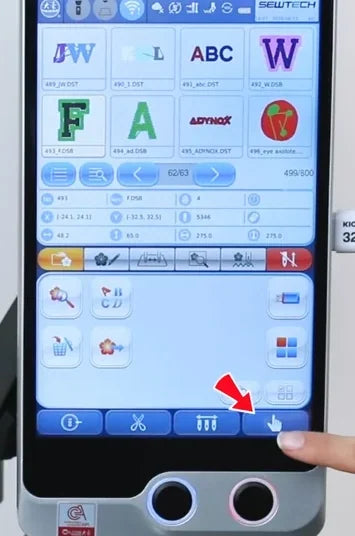
If there is no red dot on the exposed plate, check whether the positioning laser is enabled. Tap the hand icon at the far right of the blue bottom bar to open the manual page. Tap More Set in the center of the icon grid.
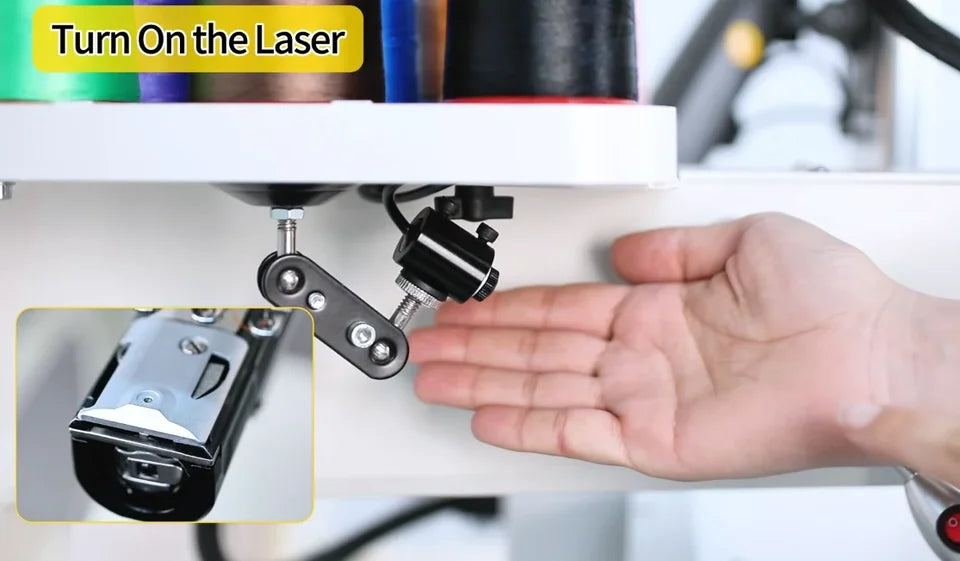
The inset shows the exposed needle plate with no red light.
The hand icon at the far right of the bottom bar opens the manual page.
The middle tile in the manual menu is labeled More Set.

7. Confirm the settings code if prompted

Watch at 02:05

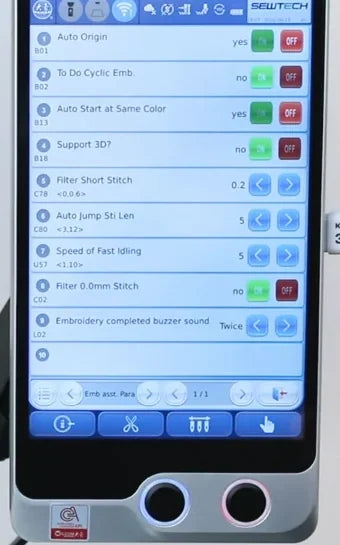
If the Number Pad opens, use the settings code for your controller and tap the check mark. The video shows 823456 on the demonstrated ST-1501. Successful entry opens the parameter list.
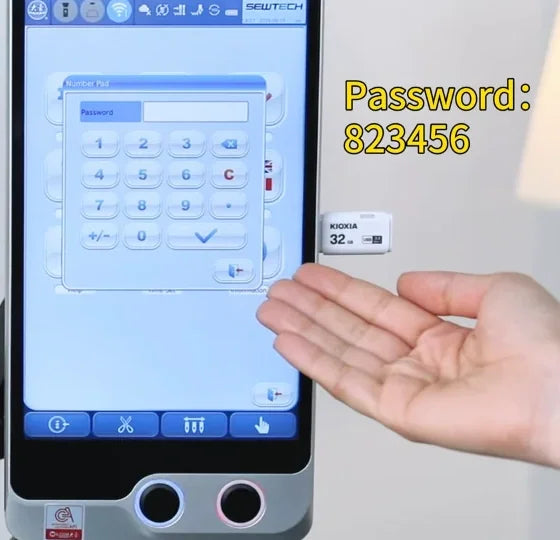
The demonstration shows 823456 next to the password keypad. The check mark submits the entry.
The parameter list appears after the code is accepted.

8. Open Mac. Config. and go to page 2/4

Watch at 02:13

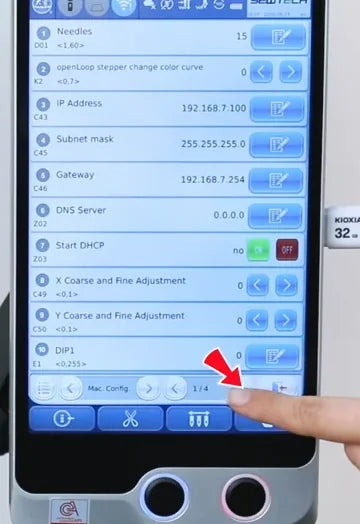
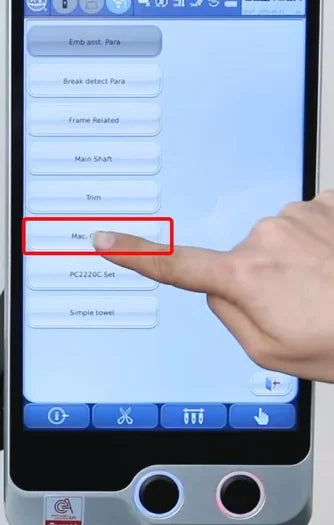
Tap the list icon at the far left of the light-colored row above the blue bottom bar. Select Mac. Config. in the category list, immediately below Trim. On Mac. Config. page 1/4, tap the right arrow beside the page counter to reach page 2/4.
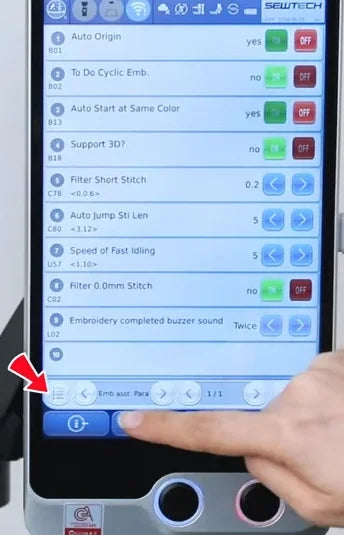
The arrow points to the category list icon at the lower left of the parameter page.
Select Mac. Config. directly under Trim.
Tap the right arrow beside 1/4 to open the second page.

9. Enable item 5, Start needle light?

Watch at 02:23

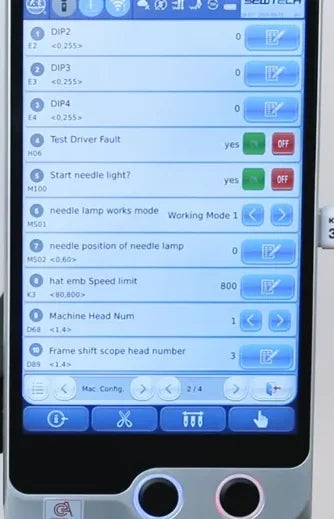
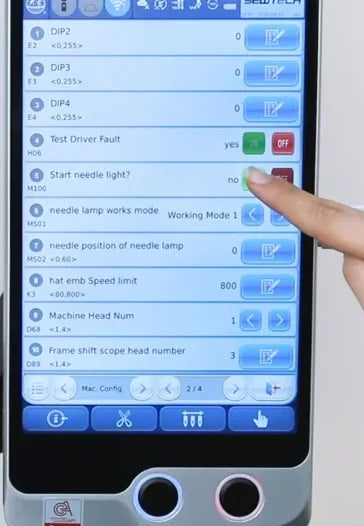
On page 2/4, find row 5, code M100. The touchscreen labels it Start needle light? and the narration calls it Start Needle LED. If the current value is no, tap the green ON button on that same row. Confirm that the value changes to yes.
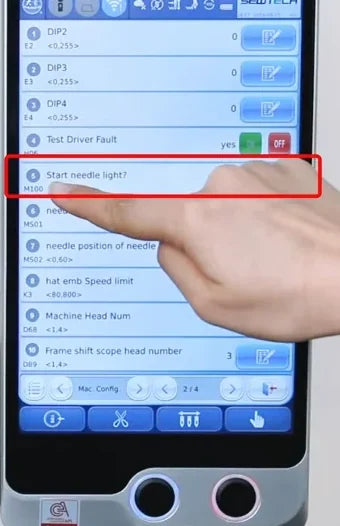
The red outline identifies row 5, M100, on page 2/4.
With the value at no, tap the green ON button in the same row.
The value beside Start needle light? now reads yes.

10. Confirm that the red dot returns

Watch at 02:33

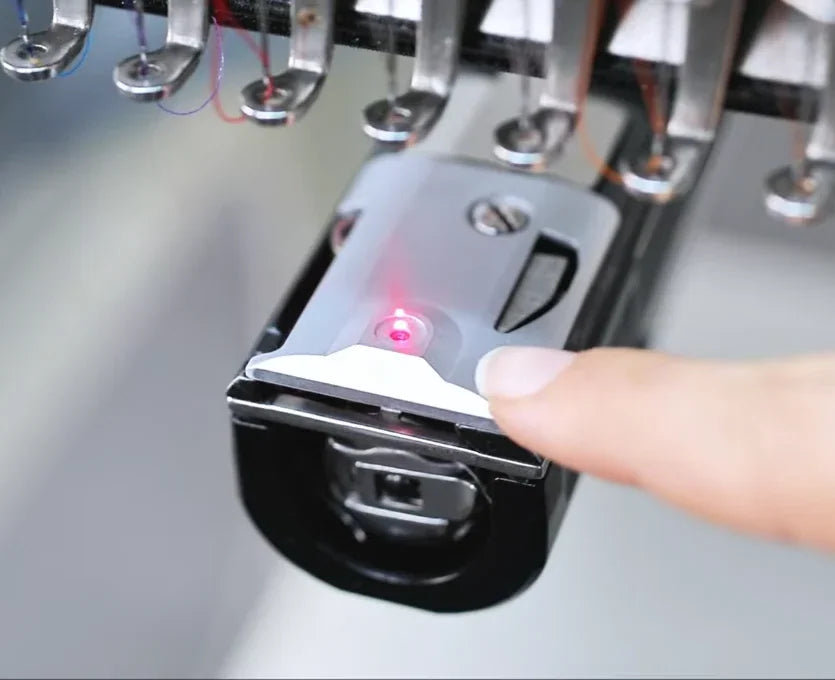
Return your attention to the exposed needle plate. The video shows the dot come on after the setting is enabled. Once it is visible, use the needle hole to verify centering and run the trace on your fabric before you stitch.
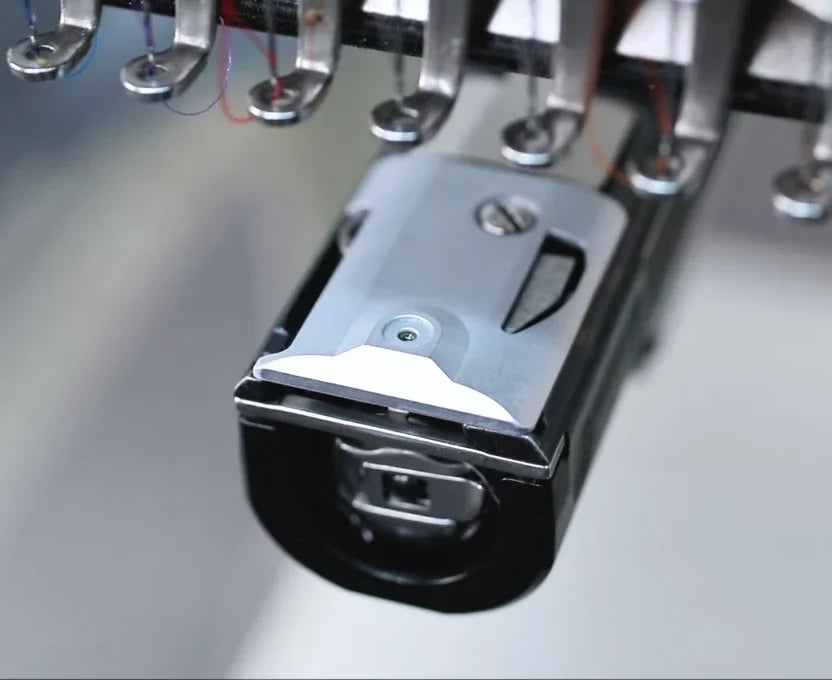
At the start of the close-up, the reference hole is visible without the red dot.
The red dot is now visible on the needle plate at the hole.