Fix Unwanted Jump Threads on the ST-1501 and SC-1501

Overview
This ST-1501 demonstration also applies to the SC-1501. For a long thread crossing the gaps between separate letters, check whether automatic trimming is enabled, then test the jump count in one-step changes. If the same transition still leaves a strand, check the digitized file.
Step-by-step guide
1. Identify the thread bridging two letters
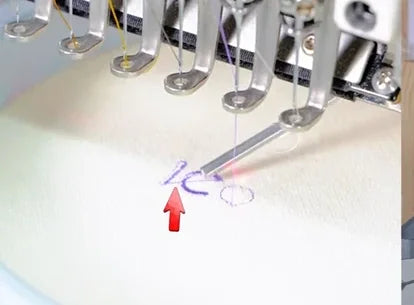
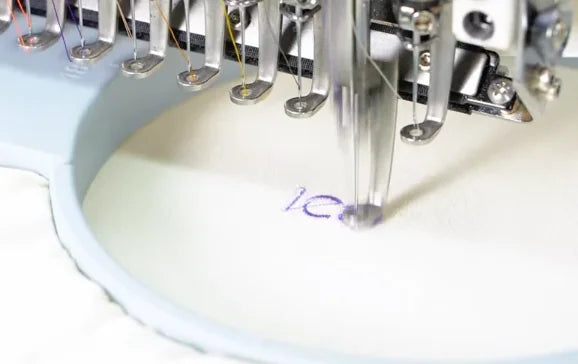
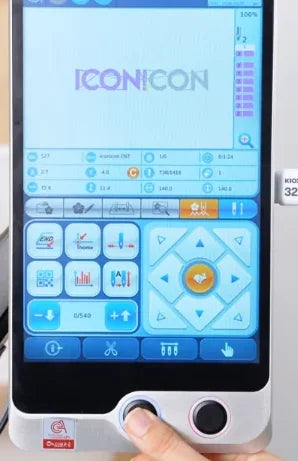
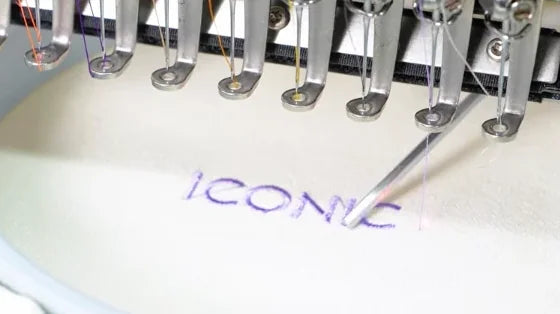
Watch at 00:12Prepare the affected design and a hooped test piece. In the demonstration, purple lettering is already loaded and white fabric is mounted in a round hoop. With the needle stopped, look for a loose thread spanning the gap between separate letters. Use the same design transition for each test so you can compare the results.
2. Open More Set from the embroidery screen
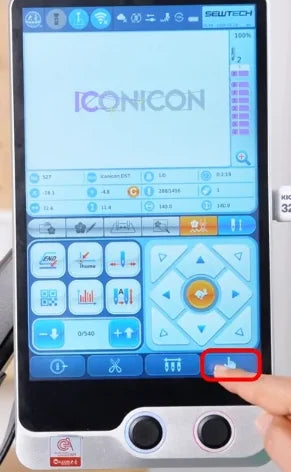
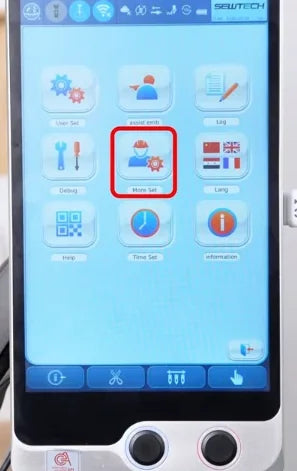
Watch at 00:30With the machine stopped, tap the hand icon at the far right of the blue bottom toolbar. In the grid that opens, tap More Set, the tile in the center showing a person with a gear. The controller opens the parameter list.
3. Choose Trim in the parameter categories
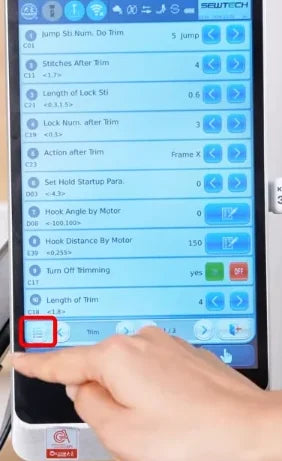
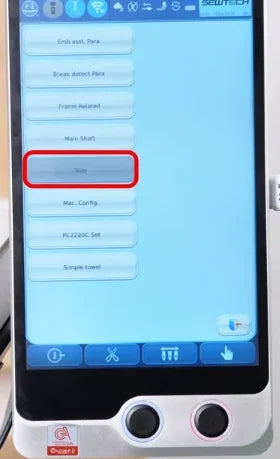
Watch at 00:34Tap the list icon at the lower left of the parameter panel, just above the dark blue toolbar. In the category list, choose Trim. The bottom of the settings panel in this video reads Trim and 1/3.
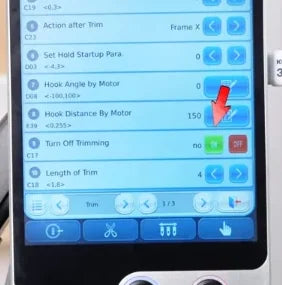
4. Enable automatic trimming in C17
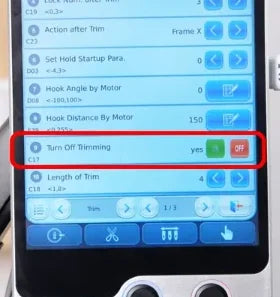
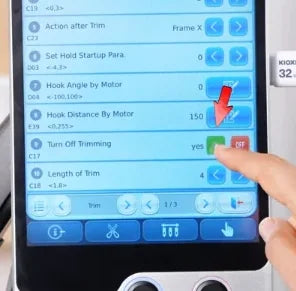
Watch at 00:38On Trim page 1/3, find C17 Turn Off Trimming, the second row from the bottom, just above Length of Trim. The current state describes whether trimming is disabled. If it reads “yes,” tap the green ON button shown in the video and verify that C17 changes to “no.” If it already reads “no,” leave it there.
5. Run the first test and inspect the gap
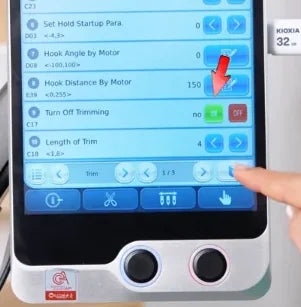
Watch at 00:42Use the pale blue exit icon at the lower right of the parameter panel to return to the design preview. Press the left of the two round physical buttons below the touchscreen to start the test. Watch the needle stitch across the affected transition. Once the machine stops, inspect the fabric. In this test, a long connecting strand remains, so the tutorial proceeds to C01. If the gap is clean, you can stop here.

6. Lower the C01 jump count one step
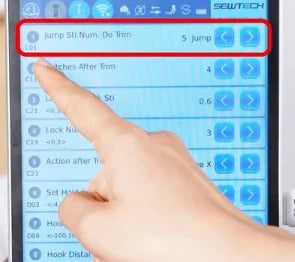
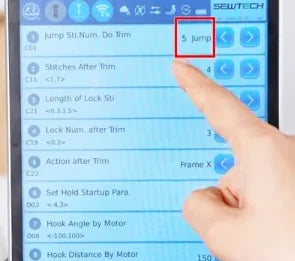
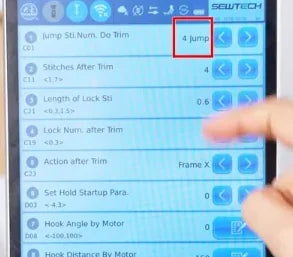
Watch at 01:04Return through the hand icon and More Set to Trim page 1/3. Use the category list to select Trim if needed. The first row, C01 Jump Sti.Num. Do Trim, is the setting the presenter calls Jump Stitch. Tap its left arrow once and check the number on the same row. The example drops from 5 Jump to 4 Jump. Test after each change, using the result to decide whether to adjust again.
7. Return to the preview and retest at 4
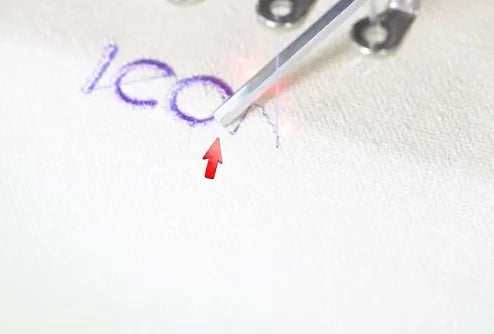
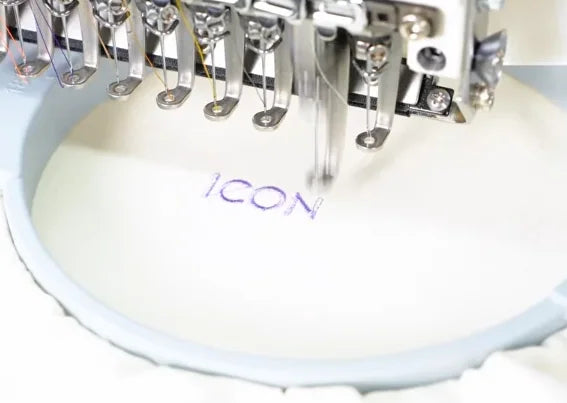
Watch at 01:16In this sequence the first exit takes you from Trim back to the settings grid. Tap the exit icon at the lower right of the grid to reach the design preview. Use the left round physical button to run the same test again. The pointer at 1:26 shows another thread still spanning a gap at the right end of the stitched letters, so the sample needs one more adjustment.

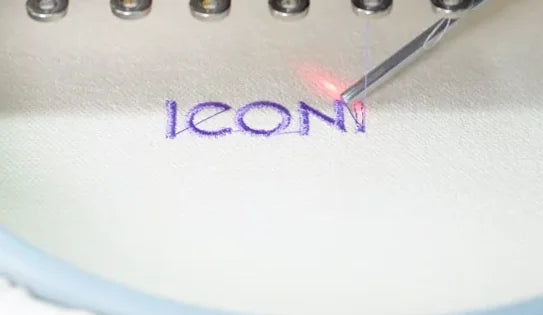
8. Lower C01 again only if a strand remains
Watch at 01:28If the second test still leaves a strand, reopen More Set and return to the C01 row on the Trim screen. The example still shows 4 Jump. Tap the left arrow on that row once and verify the new reading, 3 Jump in this demonstration. Use the exit keys to return to the design preview.
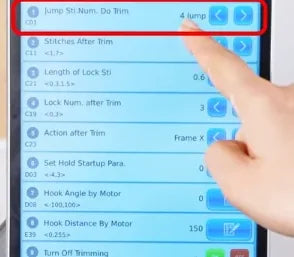
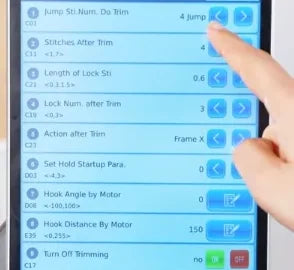
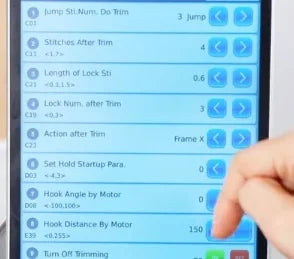
9. Verify that the machine cuts between letters
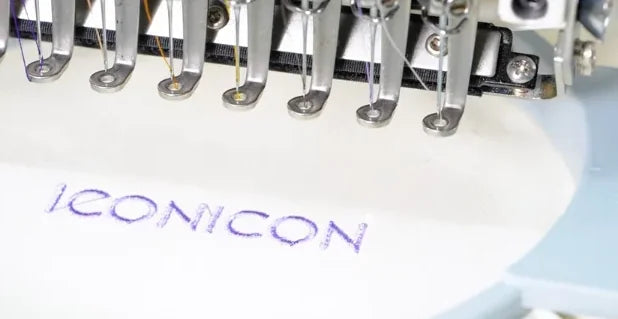
Watch at 01:35Start embroidery again with the left physical button. Watch the machine finish one letter and travel to the next. In the demonstration, it cuts the thread automatically during these transitions. When the machine stops, check that the finished letters have clean gaps without a long strand bridging them. Use the value that passes on your sample. The 5, 4 and 3 readings are specific to this test.
10. Check the digitized file if the thread persists
Watch at 02:02If the same gap keeps bridging with trimming enabled and after incremental C01 tests, open the embroidery design in your digitizing software. Inspect the travel and trim instructions between the affected elements, correct the design as needed, then test the revised file on the machine. The video explains this branch verbally and ends without a software walkthrough.