SEWTECHSupport Center 简体中文

Move Forward or Back by Stitches on the ST-1201 and SC-1501

Applies to ST-1201 / SC-1501 Demonstrated on ST-1201

Watch on YouTube ↗

Overview

If the thread breaks and the machine travels a few stitches before stopping, rethread the active needle and move the stitch position back to the end of the last intact stitches. This demonstration on the ST-1201 shows fixed-count and continuous movement, single-stitch adjustments, and how to resume. A letter M, 10 stitches back, and 5 stitches forward are examples from the video.

Step-by-step guide

1. Stop and rethread the active needle

Watch at 00:11

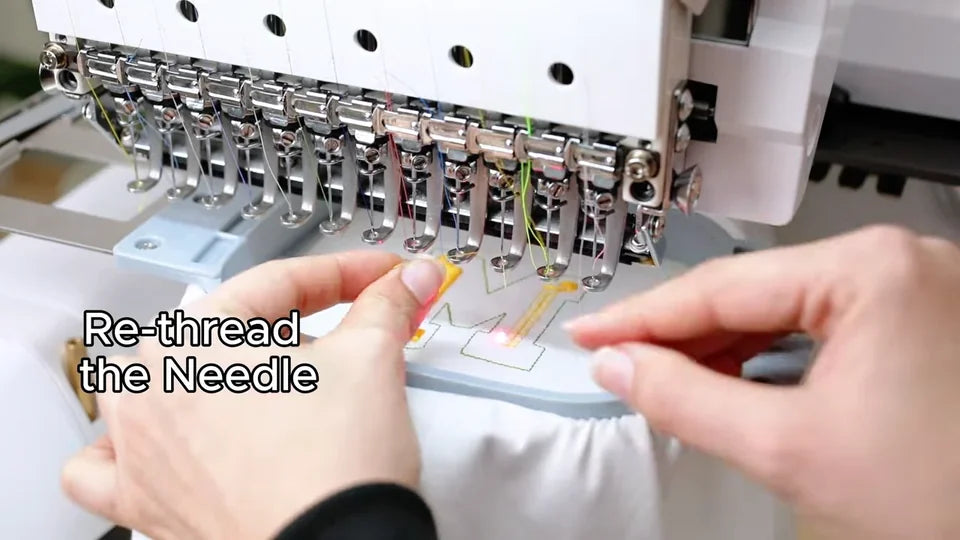
Wait until the machine stops. Leave the material hooped and keep the current design open. Find where the thread stopped forming stitches and rethread the active needle before moving the hoop.
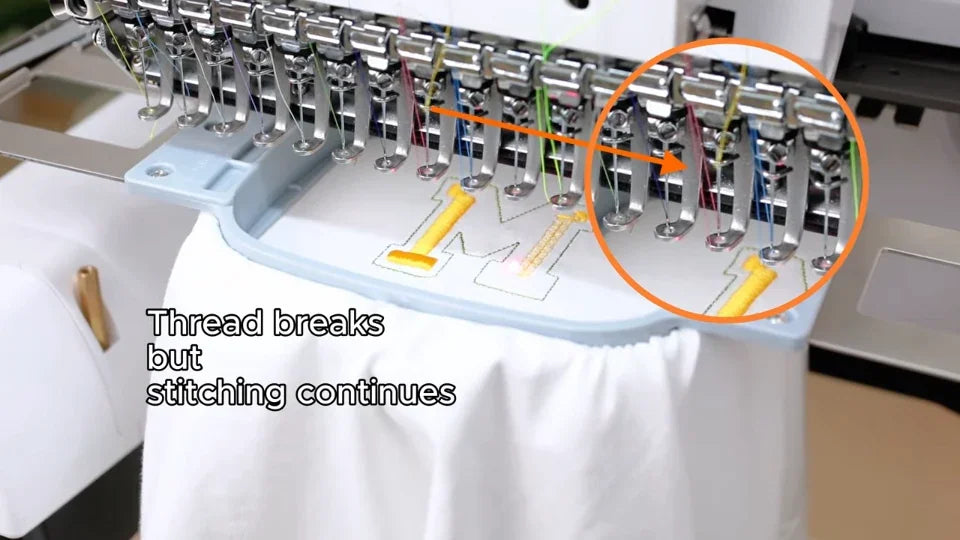
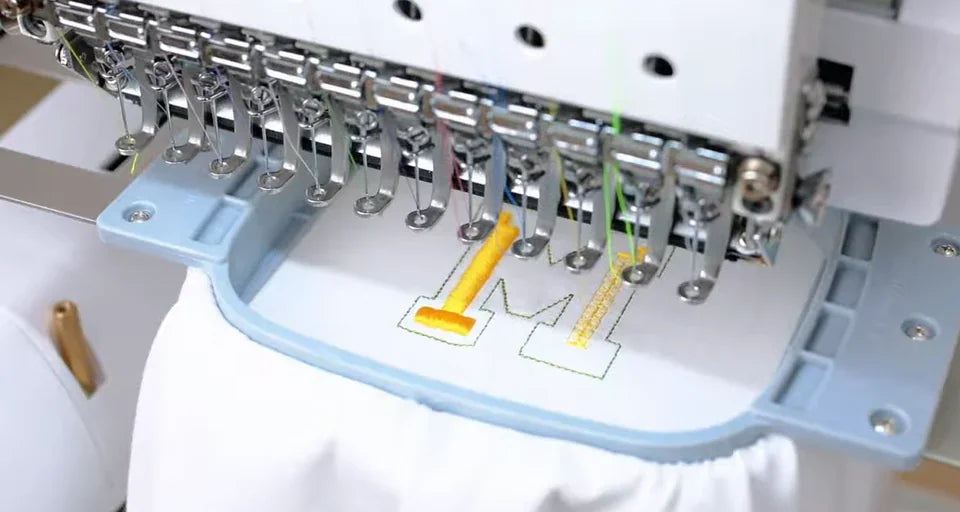
The circled needle position shows where the head continued along the M after the thread broke.
Rethread the active needle while the machine is stationary and the fabric is still hooped.

2. Open the stitch-movement controls

Watch at 00:34

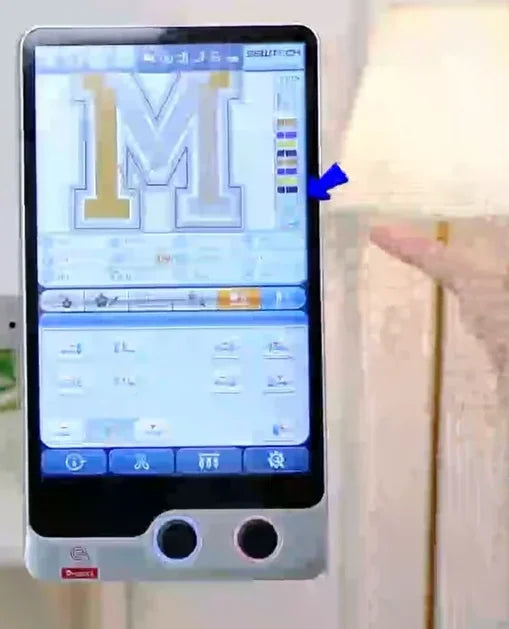
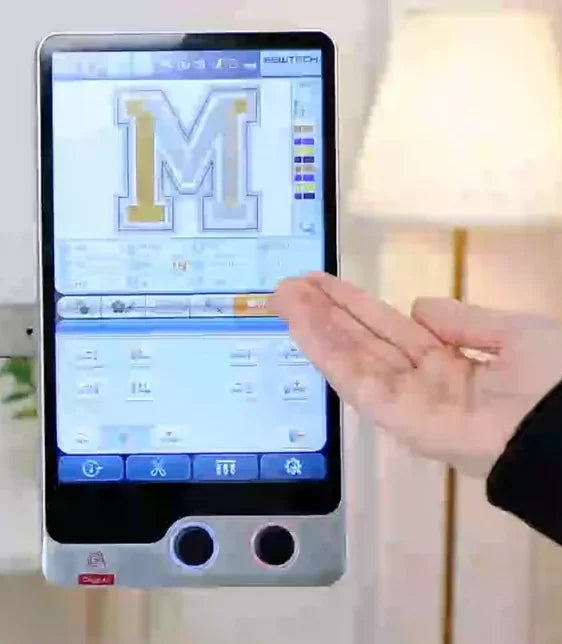
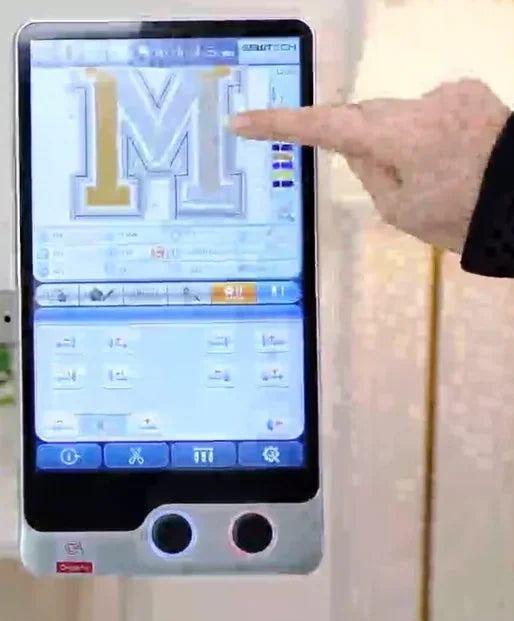
On the main embroidery screen, tap the third tile in the top row of the lower-left controls. The lower part of the screen changes from the hoop-direction pad to the stitch-movement panel. Find the fixed-count field in the bottom row of this panel.
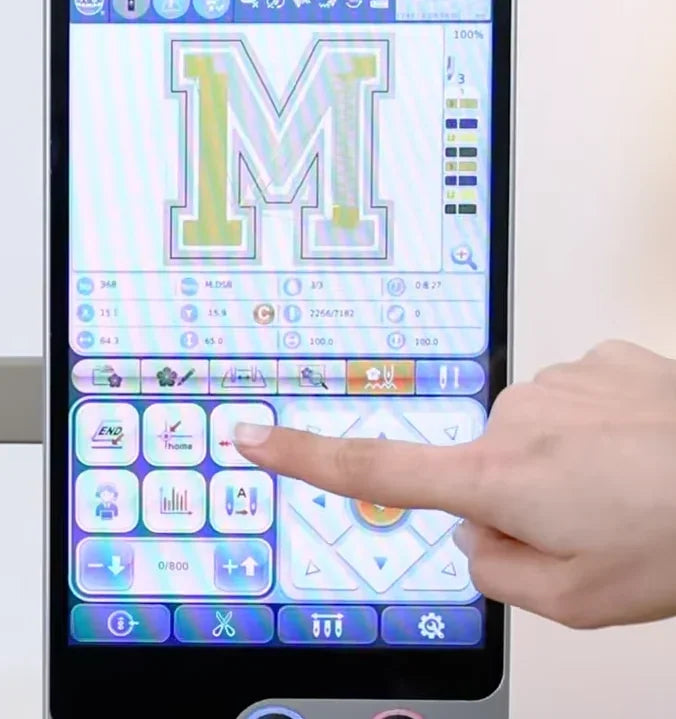
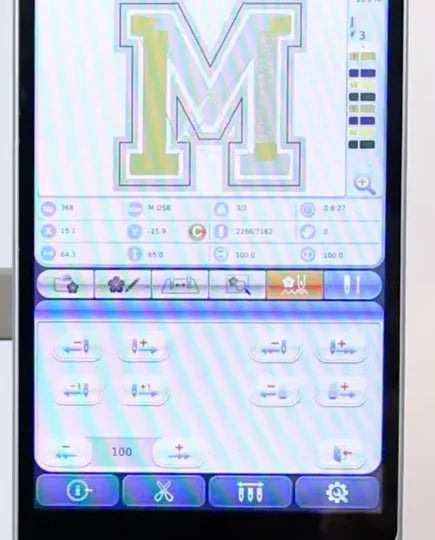
On the main screen, the finger points to the third tile in the upper row of the left control group.
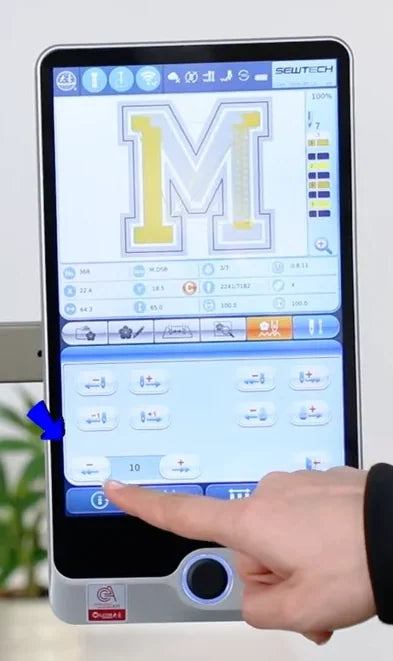
The stitch-movement panel is open. The number near its lower-left corner sits between the fixed-count direction buttons.

3. Set a fixed stitch count

Watch at 00:40

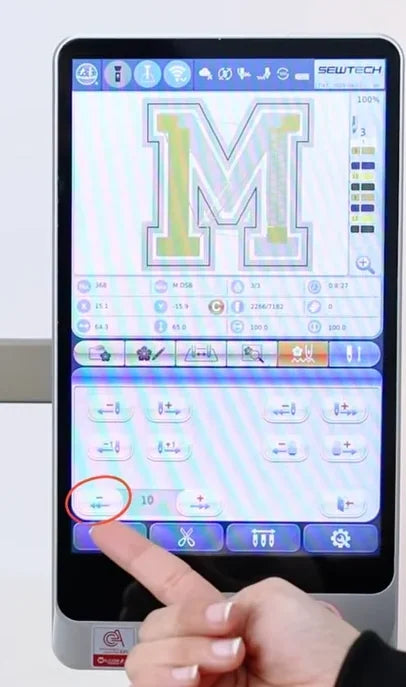
Tap the number between the minus and plus direction buttons in the bottom row. Enter the number of stitches on the keypad, then tap the blue check mark to confirm. Check that the keypad closes and the new number appears between those buttons. The example changes the count from 100 to 10.

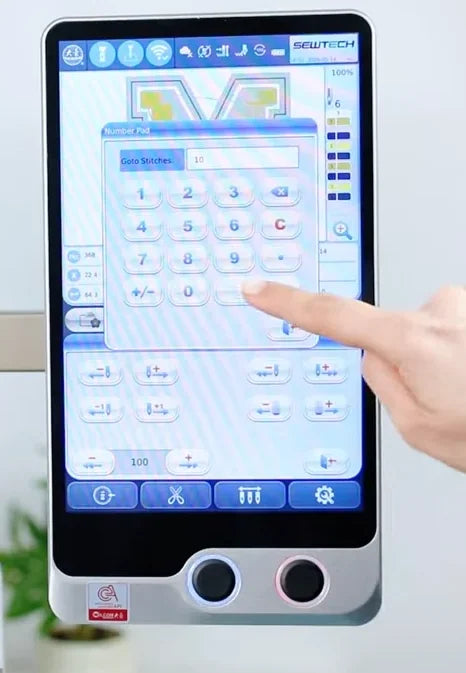
Tap the number between the two bottom-row direction buttons to edit the move amount.
Confirm the entered count with the blue check mark on the keypad.
The keypad is closed and the new value, 10, appears beside the fixed reverse button.

4. Move back by the set count

Watch at 00:58

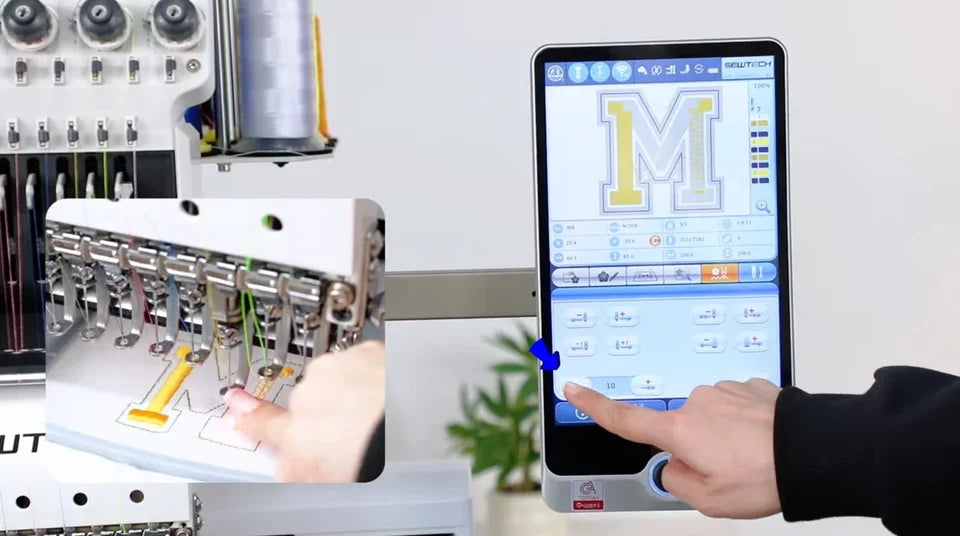
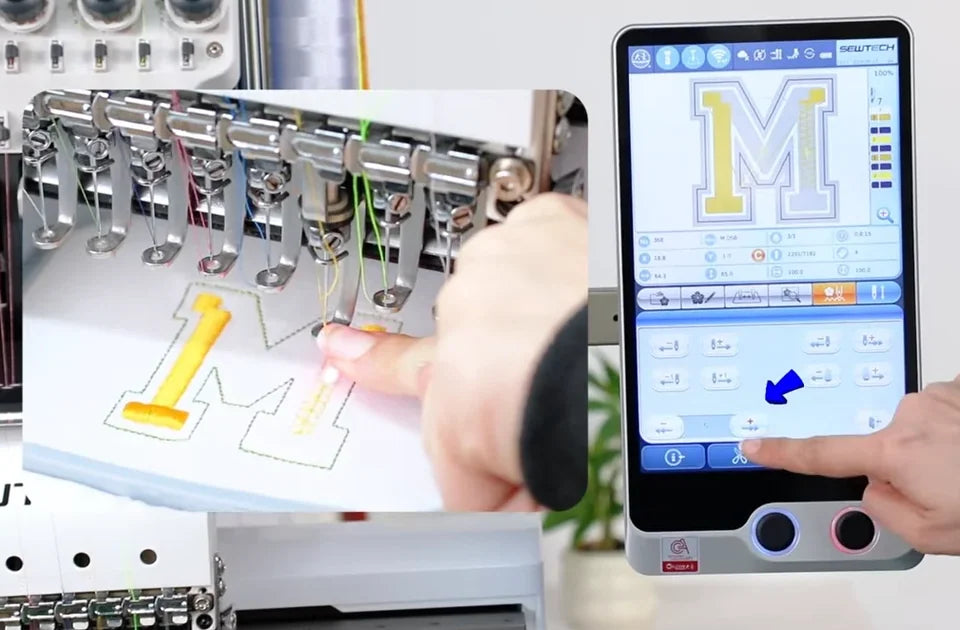
With the machine stopped, lower the presser foot slightly so you can compare the active needle position with the stitches on the fabric. Keep your fingers clear before moving the hoop. Tap the minus button to the left of the set count to move back by that number. Let the hoop stop and check the position before tapping again.
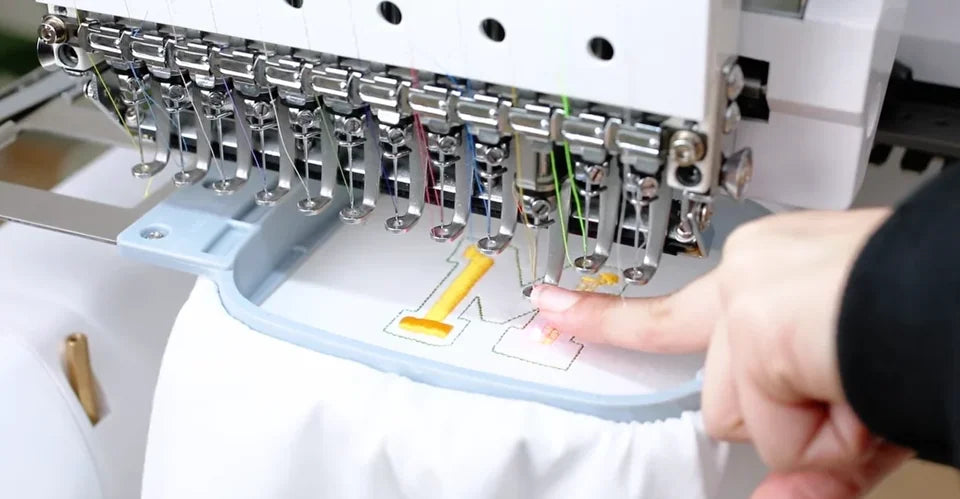
The lowered presser foot makes it easier to see the active needle position against the stitched letter.
The bottom-row minus button, to the left of 10, moves back by the set count.
The inset shows the fabric and needle position as the fixed-count move is repeated.

5. Move forward if you went back too far

Watch at 01:14

Tap the same count field again and enter a smaller number, then confirm with the check mark. Tap the plus button to the right of the number to advance by that count. In the video the correction is 5 stitches. Check the actual needle position again before moving farther.

The demonstrator reopens the same keypad and enters 5 for the forward correction.
The bottom-row plus button advances by 5; the inset shows the needle position on the fabric.

6. Fine-tune one stitch at a time

Watch at 01:27

Use the left-hand pair in the middle row of the stitch-movement panel when you are close to the restart point. The minus button moves back one stitch per tap and the adjacent plus button moves forward one stitch per tap. Check the fabric between taps so you can stop at the end of the intact stitching.
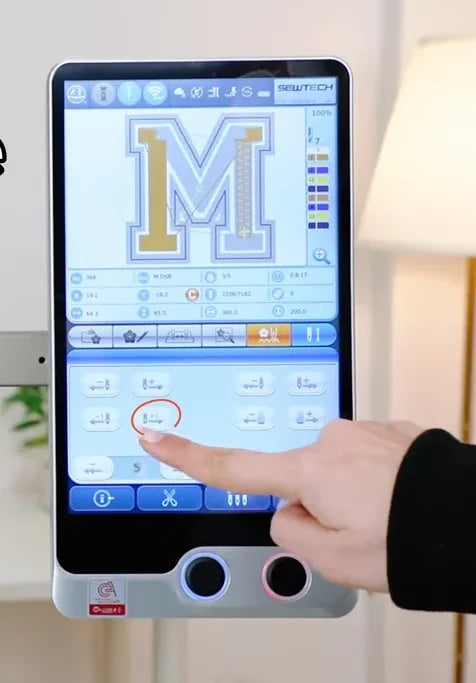
The circled plus button in the middle row advances the design by one stitch.
The circled minus button in the same row moves the design back by one stitch.

7. Start and stop continuous reverse

Watch at 01:34

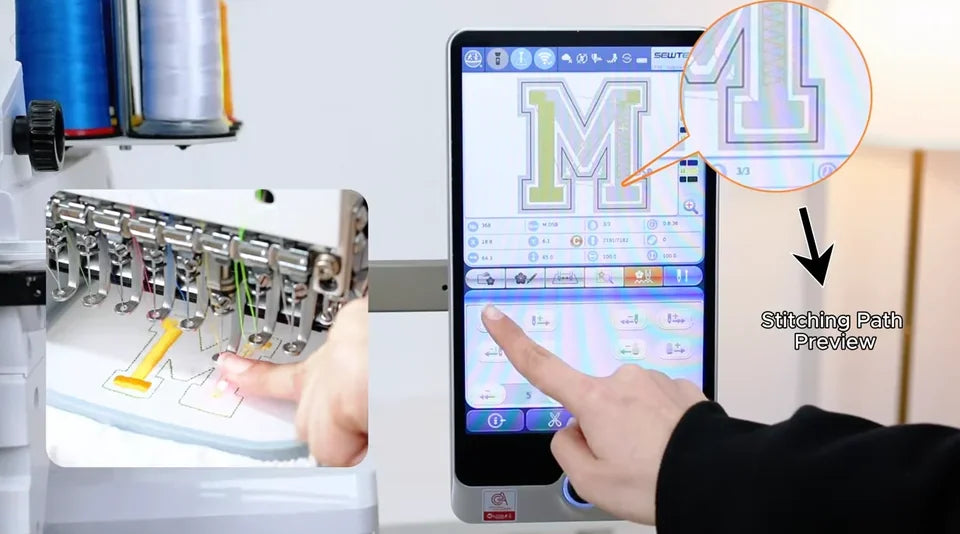
For a longer move, use the left-hand pair in the top row of the stitch-movement panel. After rethreading, lower the presser foot slightly while stationary, then keep your hands clear. Tap the left button once to start continuous reverse. Follow the changing stitch-path preview and the position on the fabric. Tap that same button again to stop at the target.
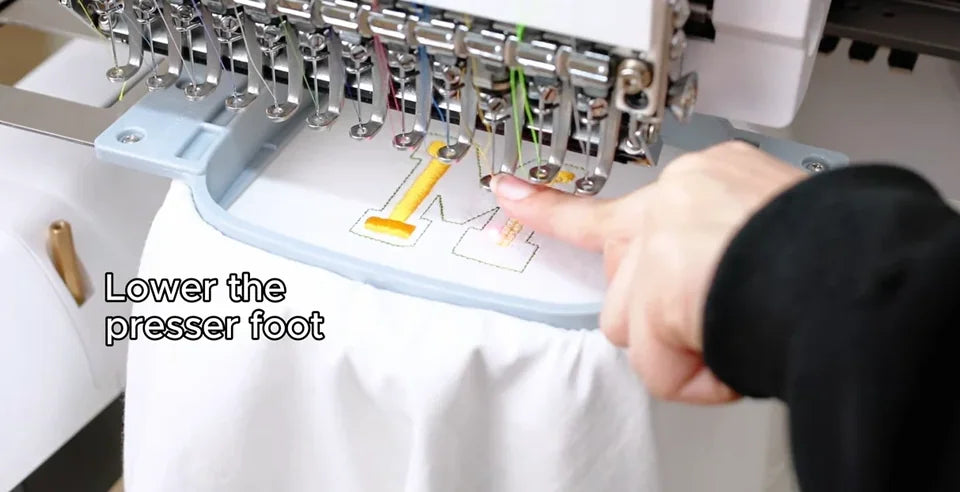
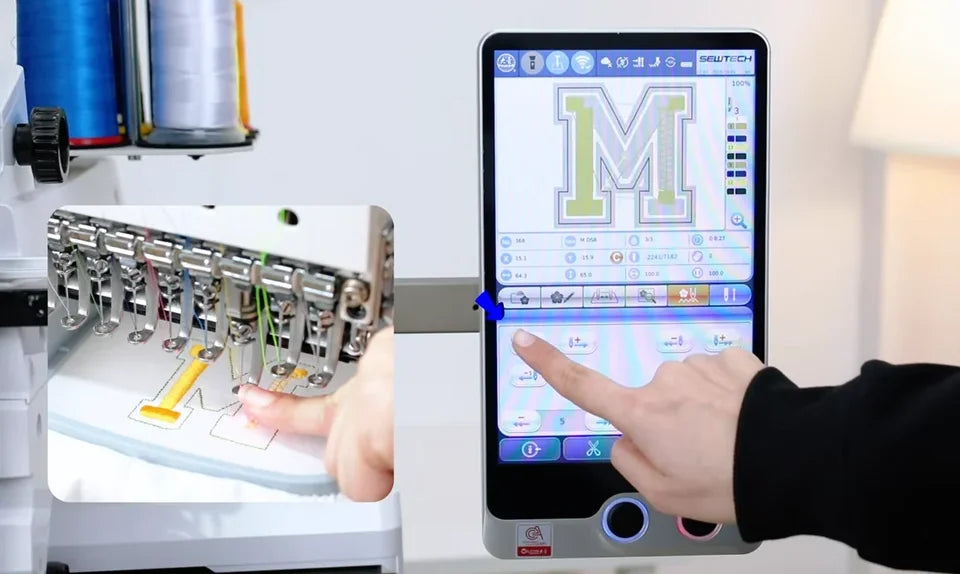
Lower the presser foot slightly before starting the continuous movement.
Tap the left button of the upper-left pair to start continuous reverse.
The screen preview and fabric inset show the position. Tap the same control again to stop.

8. Correct an overshoot with continuous forward

Watch at 01:58

If you have moved too far back, stop reverse first. Tap the right button of the same upper-left pair to start continuous forward. Watch the needle approach the last intact stitches, then tap that button again to stop. Use the single-stitch buttons for any final adjustment.
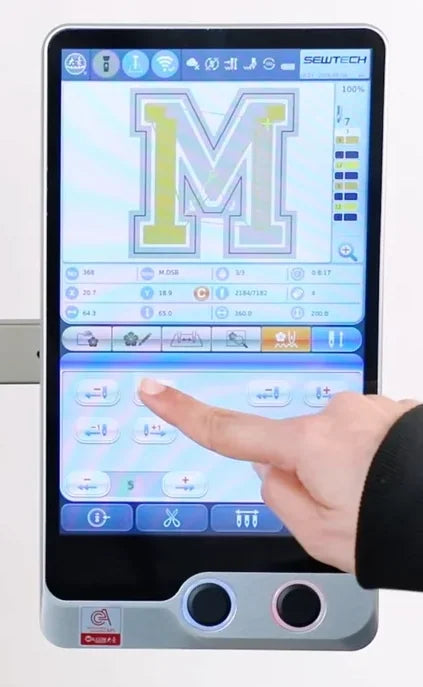
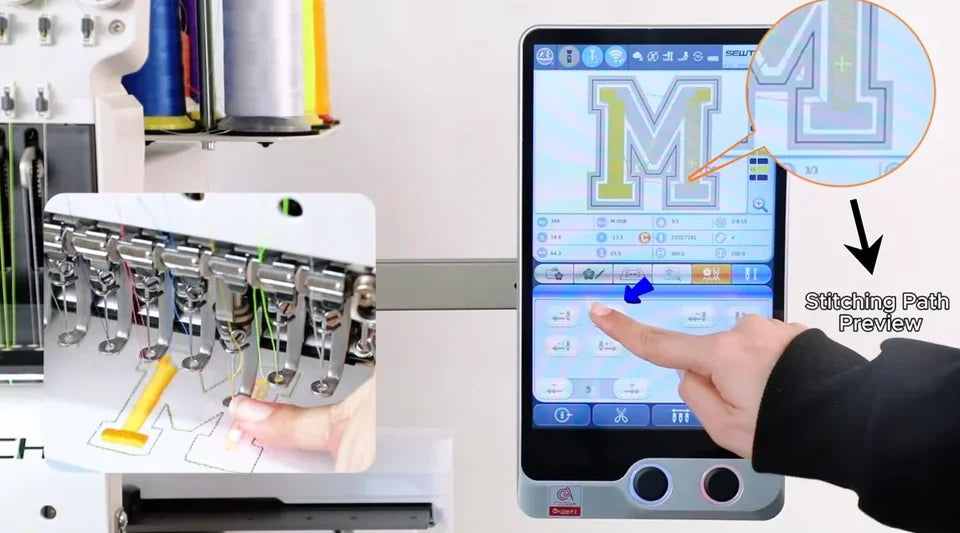
Tap the right button of the upper-left pair to start continuous forward.
Tap the forward button again to stop, checking the path preview against the fabric inset.

9. Resume at the verified stitch position

Watch at 02:10

Confirm that the active needle is lined up with the end of the intact stitches on the fabric and that movement has stopped. Tap the return icon in the lower-right corner of the stitch panel to bring back the main embroidery controls. With your hands clear, press the physical Start button below the left side of the screen. Watch the first new stitches join the existing stitching without a gap.

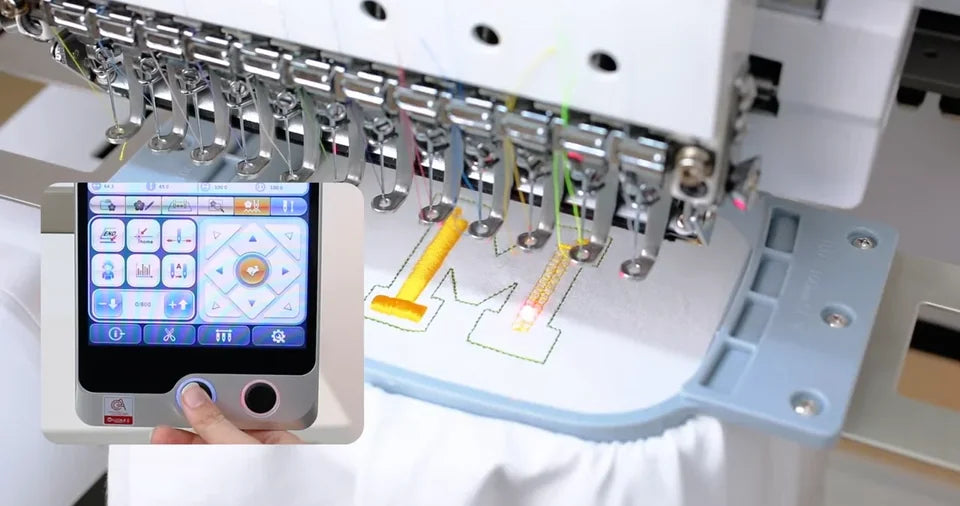
The return icon is at the lower-right corner of the stitch panel, just above the bottom toolbar.
The inset shows the physical Start button with a blue ring below the screen.
The needle is stitching again inside the hooped letter. Check the join as the first new stitches are laid.

10. Zoom and pan the stitch preview

Watch at 02:20

Tap the plus zoom control near the lower-right edge of the design preview to see individual stitches more clearly. Drag inside the preview to bring the area you want into view. Press and hold the same zoom control until it changes from plus to minus, then tap minus to zoom back out to the full design. Check the restart point on the fabric before pressing Start.

The circled zoom control sits at the lower-right edge of the design preview.
Drag within the enlarged letter to inspect a different portion of the stitch path.
After holding the zoom control, look for it to change from plus to minus.
Tap minus to shrink the preview until the whole letter is visible again.