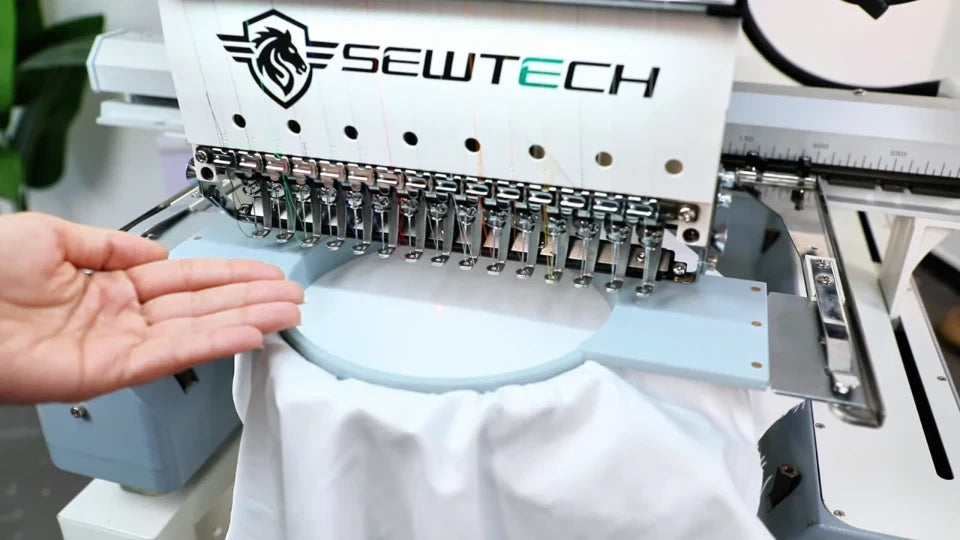
Fix Error 13: Frame Over Border

Overview
Use this guide when the controller shows Error 13 (Frame over border). With the machine stopped, identify the hoop already mounted and keep the intended design open on the control panel. Check the setup on the screen, then confirm clearance on the actual hoop before you start stitching.
Step-by-step guide
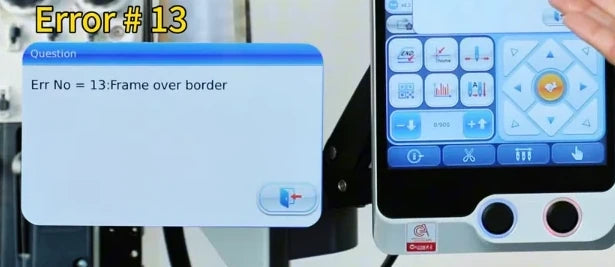
1. Identify the Error 13 message
Watch at 00:08Look for the Frame over border alert. The controller is flagging a hoop selection or design position outside the safe stitching range. After reading the alert, tap the exit icon at the lower right of the pop-up to return to the design controls.

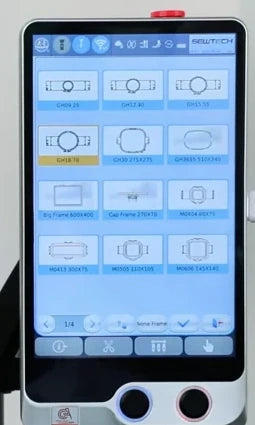
2. Match the mounted hoop and the screen selection
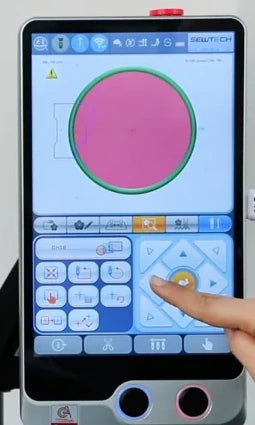
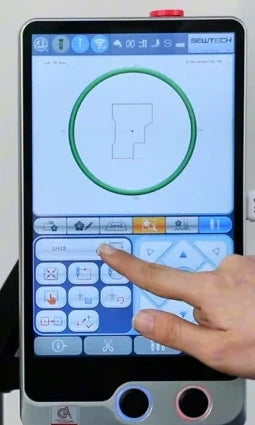
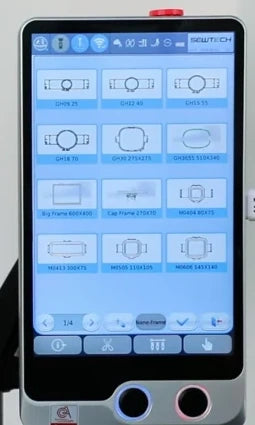
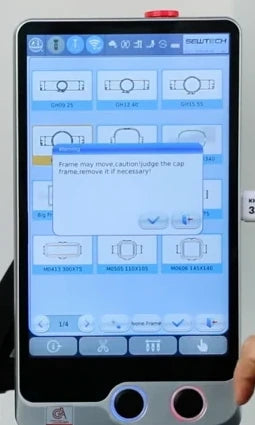
Watch at 00:22Identify the shape and size of the hoop fitted under the needles. Below the design preview, tap the current frame field above the left-hand buttons to open the hoop grid. Check the highlighted entry against the hoop on the machine. If they differ, select the entry for the hoop you actually intend to use and make sure that hoop is mounted. The round hoop in the clip is an example.


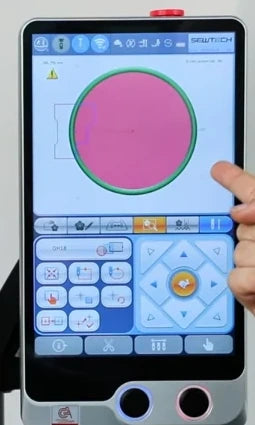
3. Check the design against the hoop boundary
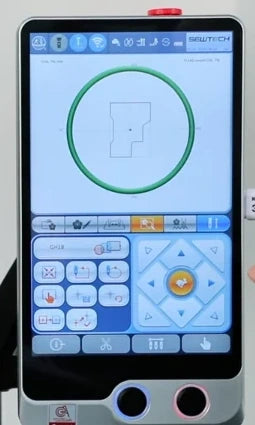
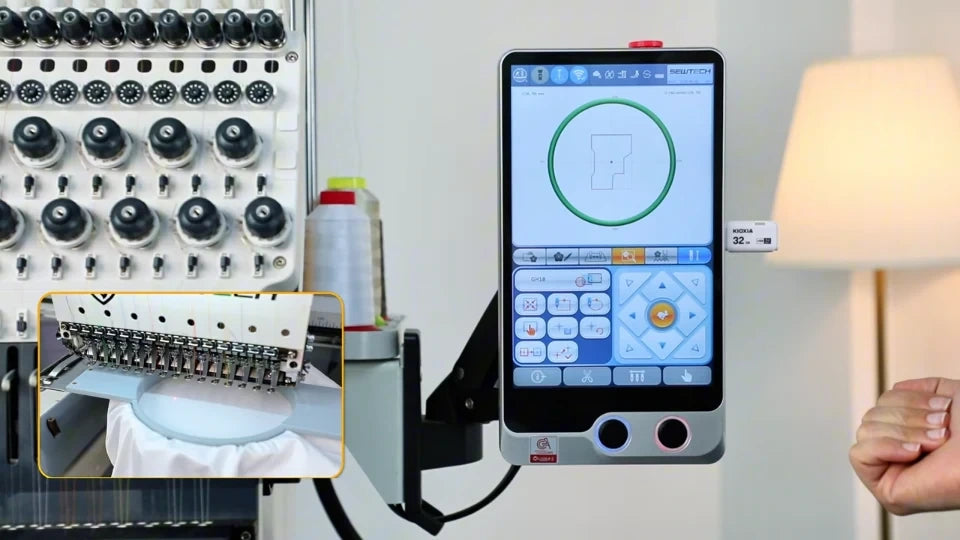
Watch at 00:36Return to the design screen and compare the full design outline with the hoop boundary. In the example, part of the outline sticks out on the left of the green circle. If the design fits but is off center, reposition it. If it is larger than the available embroidery area, choose a design that fits or use and select a suitable larger hoop before tracing.
4. Reposition the design with the arrow keys
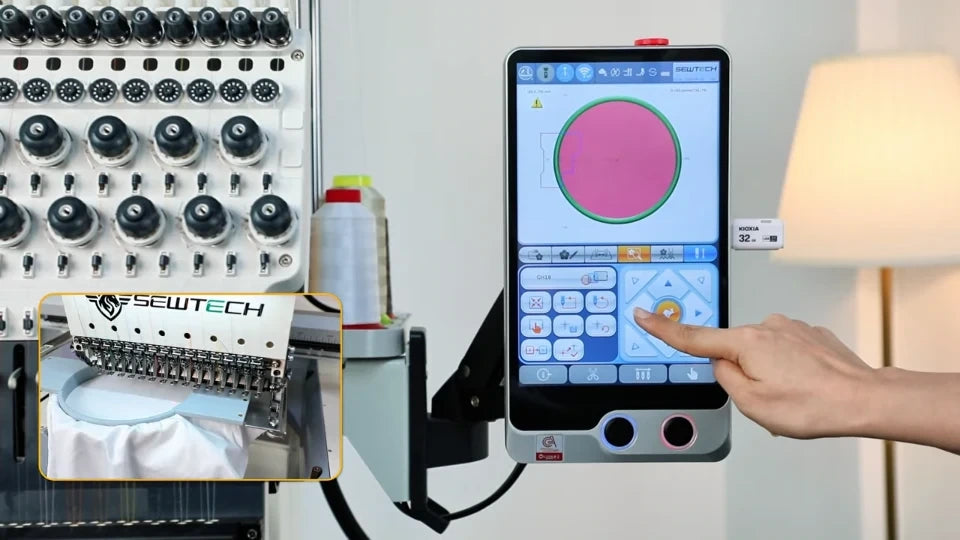
Watch at 00:44Use the direction arrows in the lower-right control pad to move the design. Watch the outline relative to the hoop boundary with each move, and keep your hands clear of the moving hoop. The inset shows the mounted hoop moving when an arrow is used.
5. Switch between turtle and rabbit speed
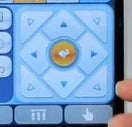
Watch at 00:50Tap the round yellow speed control in the middle of the arrow pad to switch modes. Use the turtle for small, precise corrections and the rabbit for faster repositioning. Check the animal icon before using the arrows.


6. Center the design and confirm frame movement
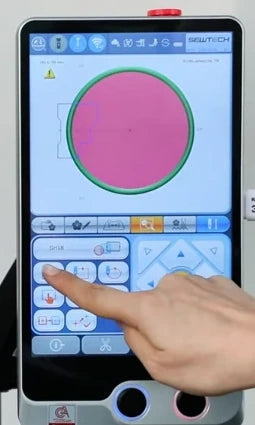
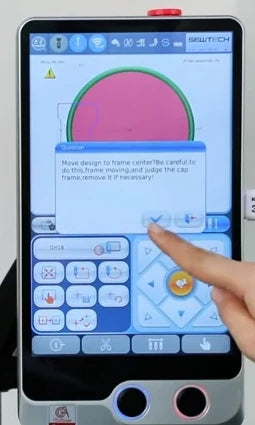
Watch at 00:58To move straight to the center, tap the upper-left button in the left-hand keypad, just below the frame field. The panel asks to move the design to the frame center and warns that the frame will move. Clear the travel path, check whether a cap frame needs to be removed as prompted, then tap the check mark. Wait for the movement to finish and check that the design outline is inside the hoop boundary.
7. Clear the selection with None Frame
Watch at 01:09Open the hoop grid again from the current frame field. Tap None Frame at the bottom, then tap the adjacent check mark. The main screen briefly shows that no frame is selected and the hoop outline disappears. Continue to the next step to restore the correct hoop.
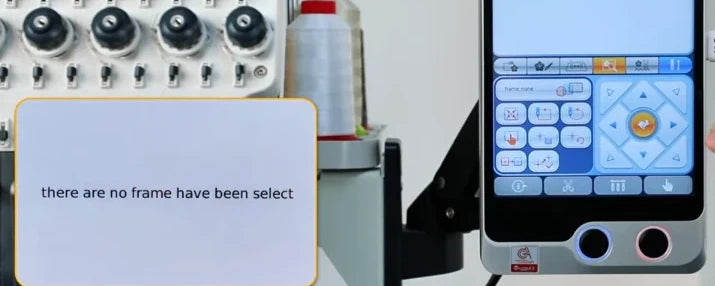
8. Reselect the actual hoop and check the preview
Watch at 01:20Reopen the hoop grid and tap the entry matching the hoop you have mounted. The video highlights the round GH18 entry as an example. When the frame-movement prompt appears, check travel clearance and the cap frame as prompted, then confirm with the check mark. If the grid remains open, use its bottom check mark to apply the selection. Wait for the main screen to show the hoop boundary and design again.

9. Trace the design before stitching
Watch at 01:32Run a design trace after the hoop and design position are set. Watch the mounted hoop under the needles throughout the movement. Start stitching only after the full trace stays inside the usable area and Error 13 does not recur. If the trace reaches outside the usable area, correct the hoop selection or design placement and repeat the trace. The closing shot shows the hoop to watch while the narrator explains this check.