SEWTECHSupport Center 简体中文

Resume Stitching After a Thread Break

Applies to ST-1501 / SC-1501 Demonstrated on ST-1501

Watch on YouTube ↗

Overview

If the hoop has shifted after a thread break, use END on page 5 to return to the saved stop point while the current job is still active. Inspect the stitching under the needle, back up if you find a gap, then restart and watch the first stitches.

Step-by-step guide

1. Prepare to resume after the stop

Watch at 00:19

With the machine stopped, rethread the affected needle and check that the fabric and hoop are still secured. Keep the current design in embroidery mode and leave the X-axis beam in place. The original stop point can be hard to locate by eye if the hoop has shifted.

The hoop remains mounted below the stationary needles while the operator points out where the run stopped.
The red circle marks the area to realign with the needle when the hoop returns.

2. Open page 5 and tap END

Watch at 00:41

Select the fifth tab in the strip directly below the design preview. On that page, tap END in the upper-left corner of the square tool grid, immediately left of Home.

The fifth tab in the strip lights up orange when selected.
The magnified inset identifies END. The operator taps the matching button beside Home.

3. Confirm the return and watch the hoop

Watch at 00:45

When the controller asks “Go To Stop Point?”, tap the check mark. Keep your hands clear while the hoop moves. The prompt closes and the hoop brings the stitched area back beneath the needle. Wait for movement to stop before checking the stitch line.

Tap the check mark in the “Go To Stop Point?” dialog to allow the frame to move.
The dialog has closed. The red circle highlights where the stitched area has returned under the needle.

4. Check the stitches under the needle

Watch at 00:52

Before pressing Start, look closely at the last section of stitching beneath the active needle. Check for a gap between the last complete stitches and the current needle position. If the stitching is continuous, go to the restart step. If you find a gap, back up to just before it.

The operator points to the stitched edge beneath the needle, where you can check for a gap.

5. Open the stitch-back controls

Watch at 01:01

On page 5, tap the needle icon with left and right arrows, two buttons to the right of END. The lower part of the screen changes from the normal tool grid and direction pad to the stitch controls.
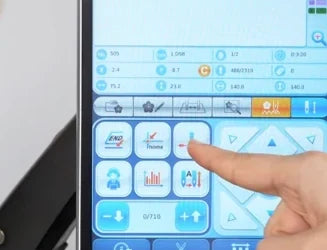
The finger points to the needle-and-arrows button in the top row of the tool grid.
The stitch controls replace the direction pad. The count appears between the bottom-row minus and plus buttons.

6. Set the number of stitches to back up

Watch at 01:06

Tap the number between minus and plus on the bottom row to open the numeric keypad. Enter the number of stitches to back up and confirm it. The instructor suggests about 10–15 stitches as a starting point and sets 10 in the demo. Use the gap on your fabric to decide how far back to go.

The numeric keypad is open above the stitch controls.
The bottom row shows 10 between the minus and plus buttons after entry.

7. Back up to just before the gap

Watch at 01:09

Tap the bottom-row minus button immediately to the left of the count to back up by that number of stitches. Watch the hoop reposition and check that the needle is now just before the gap so the run can cover the missing stitches.
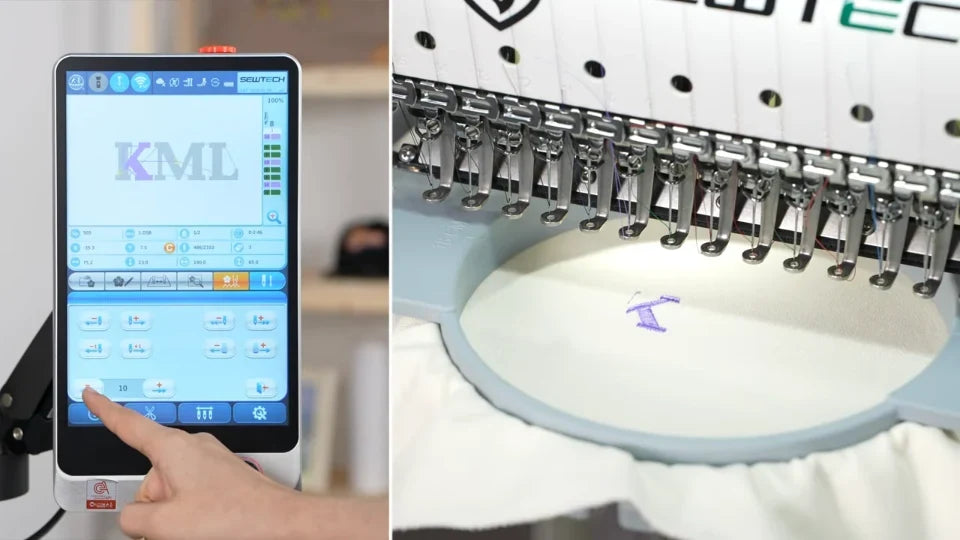
The split screen shows the bottom-row minus button beside 10 and the hoop under the needle.
The machine has moved to the earlier position. Check alignment at the last intact stitches before starting.

8. Restart and watch the first stitches

Watch at 01:12

Return to the normal controller view, clear your hands from the hoop and needles, and press the physical Start button with the blue ring on the left below the screen. Watch the needle resume at the intended spot and check that the new stitches follow the existing design through the gap.

The red box highlights the physical Start button with the blue ring beneath the controller.
The active needle is stitching in the purple design again. Watch this area for alignment as the run resumes.

9. Keep embroidery mode active

Watch at 01:20

If the on-screen embroidery-mode button at the far right of the tab strip is switched from blue to red, the controller clears the saved stop point. In the demo, the KML preview also disappears. Keep the button blue while using END. If you already canceled the job, leave the machine stopped and follow the recovery procedure for your controller before restarting.
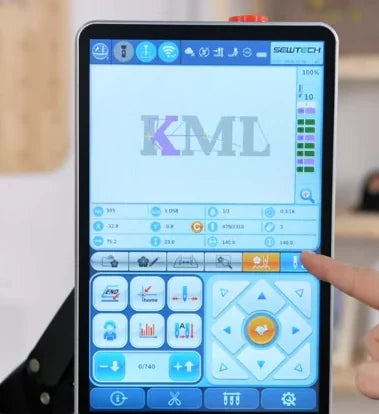
The finger indicates the blue embroidery-mode button at the far right of the strip.
After canceling, the mode button is red and the design preview is blank. END can no longer recover the saved position.

10. Leave the X-axis beam in place

Watch at 01:40

After the machine stops, leave the horizontal X-axis beam behind the needle head where it is. Moving the beam by hand invalidates the saved position. If it has already been moved, stop and re-establish the design alignment using the recovery procedure for your controller before resuming.

The operator indicates the horizontal beam behind the head. This is the part to leave in place after a stop.
The dashed red outline identifies the X-axis beam across the machine.